


Welcome, Ohio Grower!
Welcome to the ultimate guide for growing cannabis at home, made by growers, for growers. We're the 3 Amigos, 3 dumbass friends of over 20+ years, and we created this platform to take the mystery and confusion out of cultivation. Growing your own cannabis is an incredibly rewarding hobby, and our mission is to give you the knowledge to go from your first seed to your first successful harvest with confidence.
This guide is intentionally detailed, but don't let that overwhelm you! We've broken everything down into easy-to-understand sections. Whether you're trying to figure out what light to buy, why your leaves are yellow, or just what's legal, we've got you covered. Use the tabs above to navigate.
Our Philosophy: Keep It Simple, Grow Smart. You don't need a biology degree to grow great cannabis, but the right equipment does help a lot. You just need to understand the basics: a plant needs light, water, food, and fresh air. This guide is built to teach you those basics and then show you the simple upgrades that make a huge difference. We'll help you avoid common mistakes so you can get right to the fun part.
What a Cannabis Plant Really Needs
Before you buy anything, just remember this. Everything you do is to provide these five things:
- Light: This is the plant's food-making engine. Indoors, this is your grow light. Outdoors, it's the sun. More light (to a point) = bigger plants and bigger buds.
- Air: Plants breathe in Carbon Dioxide (CO2) and "exhale" Oxygen. They need fresh air and a gentle breeze to stay healthy and strong.
- Water: Plants drink water through their roots to move nutrients around and stay cool. The trick is learning when to water (and when not to!).
- Nutrients: This is the plant's "food." Just like people, they need a balanced diet, especially Nitrogen (N), Phosphorus (P), and Potassium (K). You can buy this in a bottle or build amazing "living soil" that has it all.
- A Stable Environment: Plants are happiest when their "room" (your tent or garden) isn't too hot, too cold, too wet, or too dry. Keeping things stable is the secret to success.
That's it! Every tool, technique, and tip in this guide is just a way to provide those five things better. You can do this!
Wrong Neighborhood Fool
⚖️ Start Here: Know the Law
Before you buy anything, you MUST understand Ohio's rules on plant count, security, and possession. Protecting yourself is the first step of the grow journey.
💡 Next Up: Your First Indoor Setup
Once you know the rules, it's time to build your grow room. Start with our step-by-step guide on lights, tents, fans, and humidity control.
⚖️ Ohio's Grow Laws: The Simple Version - Know Your Risks
CRITICAL LEGAL DISCLAIMER: We are growers, not lawyers. This is our interpretation of the law for educational purposes ONLY. This is NOT legal advice. NO ONE would take advice from us lol. Laws can change and are interpreted differently. Always read the official Ohio Revised Code (ORC) yourself and consult a qualified lawyer about your specific situation. Do not risk your freedom. Grow responsibly.
🚨 BREAKING NEWS: The Federal "Hemp" Ban
Update: November 19, 2025
The Federal Government is currently moving to amend the Farm Bill to close the "THCa Loophole." This is known as the Mary Miller Amendment.
What This Means For You:
- The "Total THC" Rule: The proposal changes the definition of "Hemp" to include Total THC (THCa + Delta-9). This would effectively ban the sale of THCa flower and Delta-8 products online and in smoke shops.
- Are Seeds Safe? WHO KNOWS?. Seeds contain 0% THC and 0% THCa. Even under the strictest proposed ban, seeds "should" remain legally defined as "hemp" because they contain no psychoactive cannabinoids but we all know how the government can be.
- The Risk: While seeds "should" remain legal, this legislation could cause payment processors (Visa/Mastercard) to drop cannabis seed banks out of fear.
3 Amigos Advice: If you rely on specific genetics, buy your seeds now. The seeds themselves aren't going anywhere, but buying them online might get much harder. Get to know some breeders personally if possible.
Who, Where, and How Many Plants?
These limits are the maximum allowed and are often the easiest way to accidentally commit a violation. Stay well within these boundaries.
- Who Can Grow? Any adult aged 21 or older.
- Where Can You Grow? You can ONLY grow at your primary residence. You cannot grow at a second property, a friend's house, or a business.
- Plant Count (The Hard Limit):
- Per Adult: Up to six (6) plants per qualifying adult.
- Per Household: A maximum limit of twelve (12) plants per household, regardless of the number of adults living there.
- What Counts as a "Plant"? The law is intentionally vague, but the
safest rule is: If it has its own root structure, it counts. This means you
should:
- Only start the exact number of seeds/clones you intend to grow.
- Do NOT keep extra seedlings or unrooted cuttings ("clones") once the plant is established and is clearly intended for cultivation.
- The Safest Strategy: Never keep more than 10 plants total at any one time (including seedlings) to create a buffer against the 12-plant limit.
The "Secret and Secure" Rules (The Path to Felony Avoidance)
Compliance with these rules is essential. A failure to keep your grow secure can turn an otherwise legal operation into a criminal offense, even if you are under the plant limit.
- Not Visible to the Public: Plants cannot be visible "using
normal unaided vision" from any public place (street, sidewalk, neighbor's unprotected property,
etc.).
- Indoors: Keep your grow in a locked tent or room, and never near a window where a curious person could see them. Use blackout curtains on any room containing your grow.
- Outdoors: They must be in a secure, enclosed area (like a greenhouse or backyard space) surrounded by a tall, solid fence (a minimum 6-foot, solid wood or vinyl privacy fence is the safest bet). Chain-link fences or hedges are not sufficient, as they allow visual access.
- Secure from Minors: The grow area MUST be locked or otherwise secured to prevent access by anyone under 21. For a tent, this means a lock on the zippers. For a room, a lock on the door. This protects you from felony charges related to "contributing to the delinquency of a minor" if an underage person gains access.
Penalties: Know the Consequences
The penalty you face depends entirely on how you violate the law. There is a huge difference between a civil fine for a technical error and a serious felony for trafficking.
Category 1: Civil Offenses (First-time Technical Violations)
These are the best-case scenarios and typically apply when the police know you are growing for personal use but made a simple error (like poor visibility or being slightly over the plant count).
- Plant Count Violation (1st Offense): If you are caught with more than
12 plants, the entire grow is considered illegal cultivation. However, the law
provides for a non-criminal offense for minor overages.
- Penalty: Typically a civil fine of up to $250 to $500.
- Outcome: The illegal excess plants are seized. Crucially, this violation is not a criminal conviction.
- Unsecured/Visible Grow (1st Offense): Failure to meet the security or
visibility requirements.
- Penalty: Typically a civil fine of up to $250.
- Outcome: You are usually given a chance to immediately secure the grow. Repeated, intentional violations, however, can escalate the charge.
Category 2: Criminal Offenses (The Real Danger)
These charges are triggered by behaviors that go beyond personal use, are highly visible, or involve large quantities of cannabis. These are felonies that carry serious prison time and permanent criminal records.
- Selling or Trafficking: This is the biggest risk. Any exchange of
homegrown cannabis for money or anything of value is trafficking. Even if it's just
one transaction, it's a felony.
- Felony Charge: Illegal Cultivation or Trafficking.
- Penalty: Prison time and high fines are possible, depending on the amount sold or grown.
- Possession Over Home Limit (2.5 oz in Public): Being caught transporting more
than the legal limit (2.5 ounces) in public.
- Felony Charge: Depending on the amount, possession can range from a misdemeanor (under 2.5 oz) to a felony (over 100 grams / 3.5 oz).
- Mass Cultivation: Growing large quantities far exceeding the 12-plant limit (e.g., 50+ plants). This is almost always interpreted as intent to sell/trafficking.
Possession and Transport
These limits change the moment you step outside your home's boundaries.
- IN PUBLIC (Transporting): You are limited to the standard possession limit: 2.5 ounces of flower (or 15 grams of concentrate). When driving, it must be in a sealed container, out of reach (the trunk or locked glove box is best).
- AT HOME (From Your Grow): The 2.5 oz limit does not apply to the cannabis you grow and keep at your own home. You can legally possess all the flower you harvest from your 6-12 plants, as long as it stays at your primary residence and is stored securely away from minors.
The Big "Don'ts" (Seriously, Don't Do This)
- DON'T Sell It: You cannot sell, trade, or barter your homegrown cannabis. Not even to a friend. It is for your personal use ONLY. Selling it is a serious crime.
- DON'T Give It Away (for money): Gifting is a legal gray area, but any "gift" that involves an exchange of money (e.g., "buy this $50 sticker and get a 'free' gift") is considered selling and is illegal.
- DON'T Grow on Property You Don't Own (without permission): Landlords can (and likely will) prohibit growing in your lease. HOAs (Homeowners Associations) can also ban it. The state law does not override a private lease or HOA contract.
Know The Risks
A reminder to always follow the law, grow securely, and protect yourself. Don't be this guy.
💡 The Complete Indoor Grow Guide for Beginners
Welcome to the most rewarding way to grow! Indoor cultivation gives you 100% control. You become Mother Nature, providing everything the plant needs. This means you can grow amazing cannabis year-round, safe from Ohio weather and pests. Here's the ultimate beginner's shopping list and guide.
Chapter 1: Your Shopping List (The "Core Four" + Control)
You can get fancy later. To start, you only *need* four key things to create a perfect environment. We recommend a "grow tent kit" which bundles all of this together and saves you money.
1. The Tent (Your "Grow Room")
- Why you need it: It contains your entire environment. It has reflective walls to bounce light back onto your plants, it's light-proof to ensure a perfect "night time" for flowering, and it has ports to run your fans.
- What to buy: A 2x4 foot or 3x3 foot tent is a perfect start. It fits 2-4 plants comfortably and won't overwhelm your space or electric bill. A 4x4 is also very popular if you have the room. (e.g., brands like Vivosun, Mars Hydro, AC Infinity).
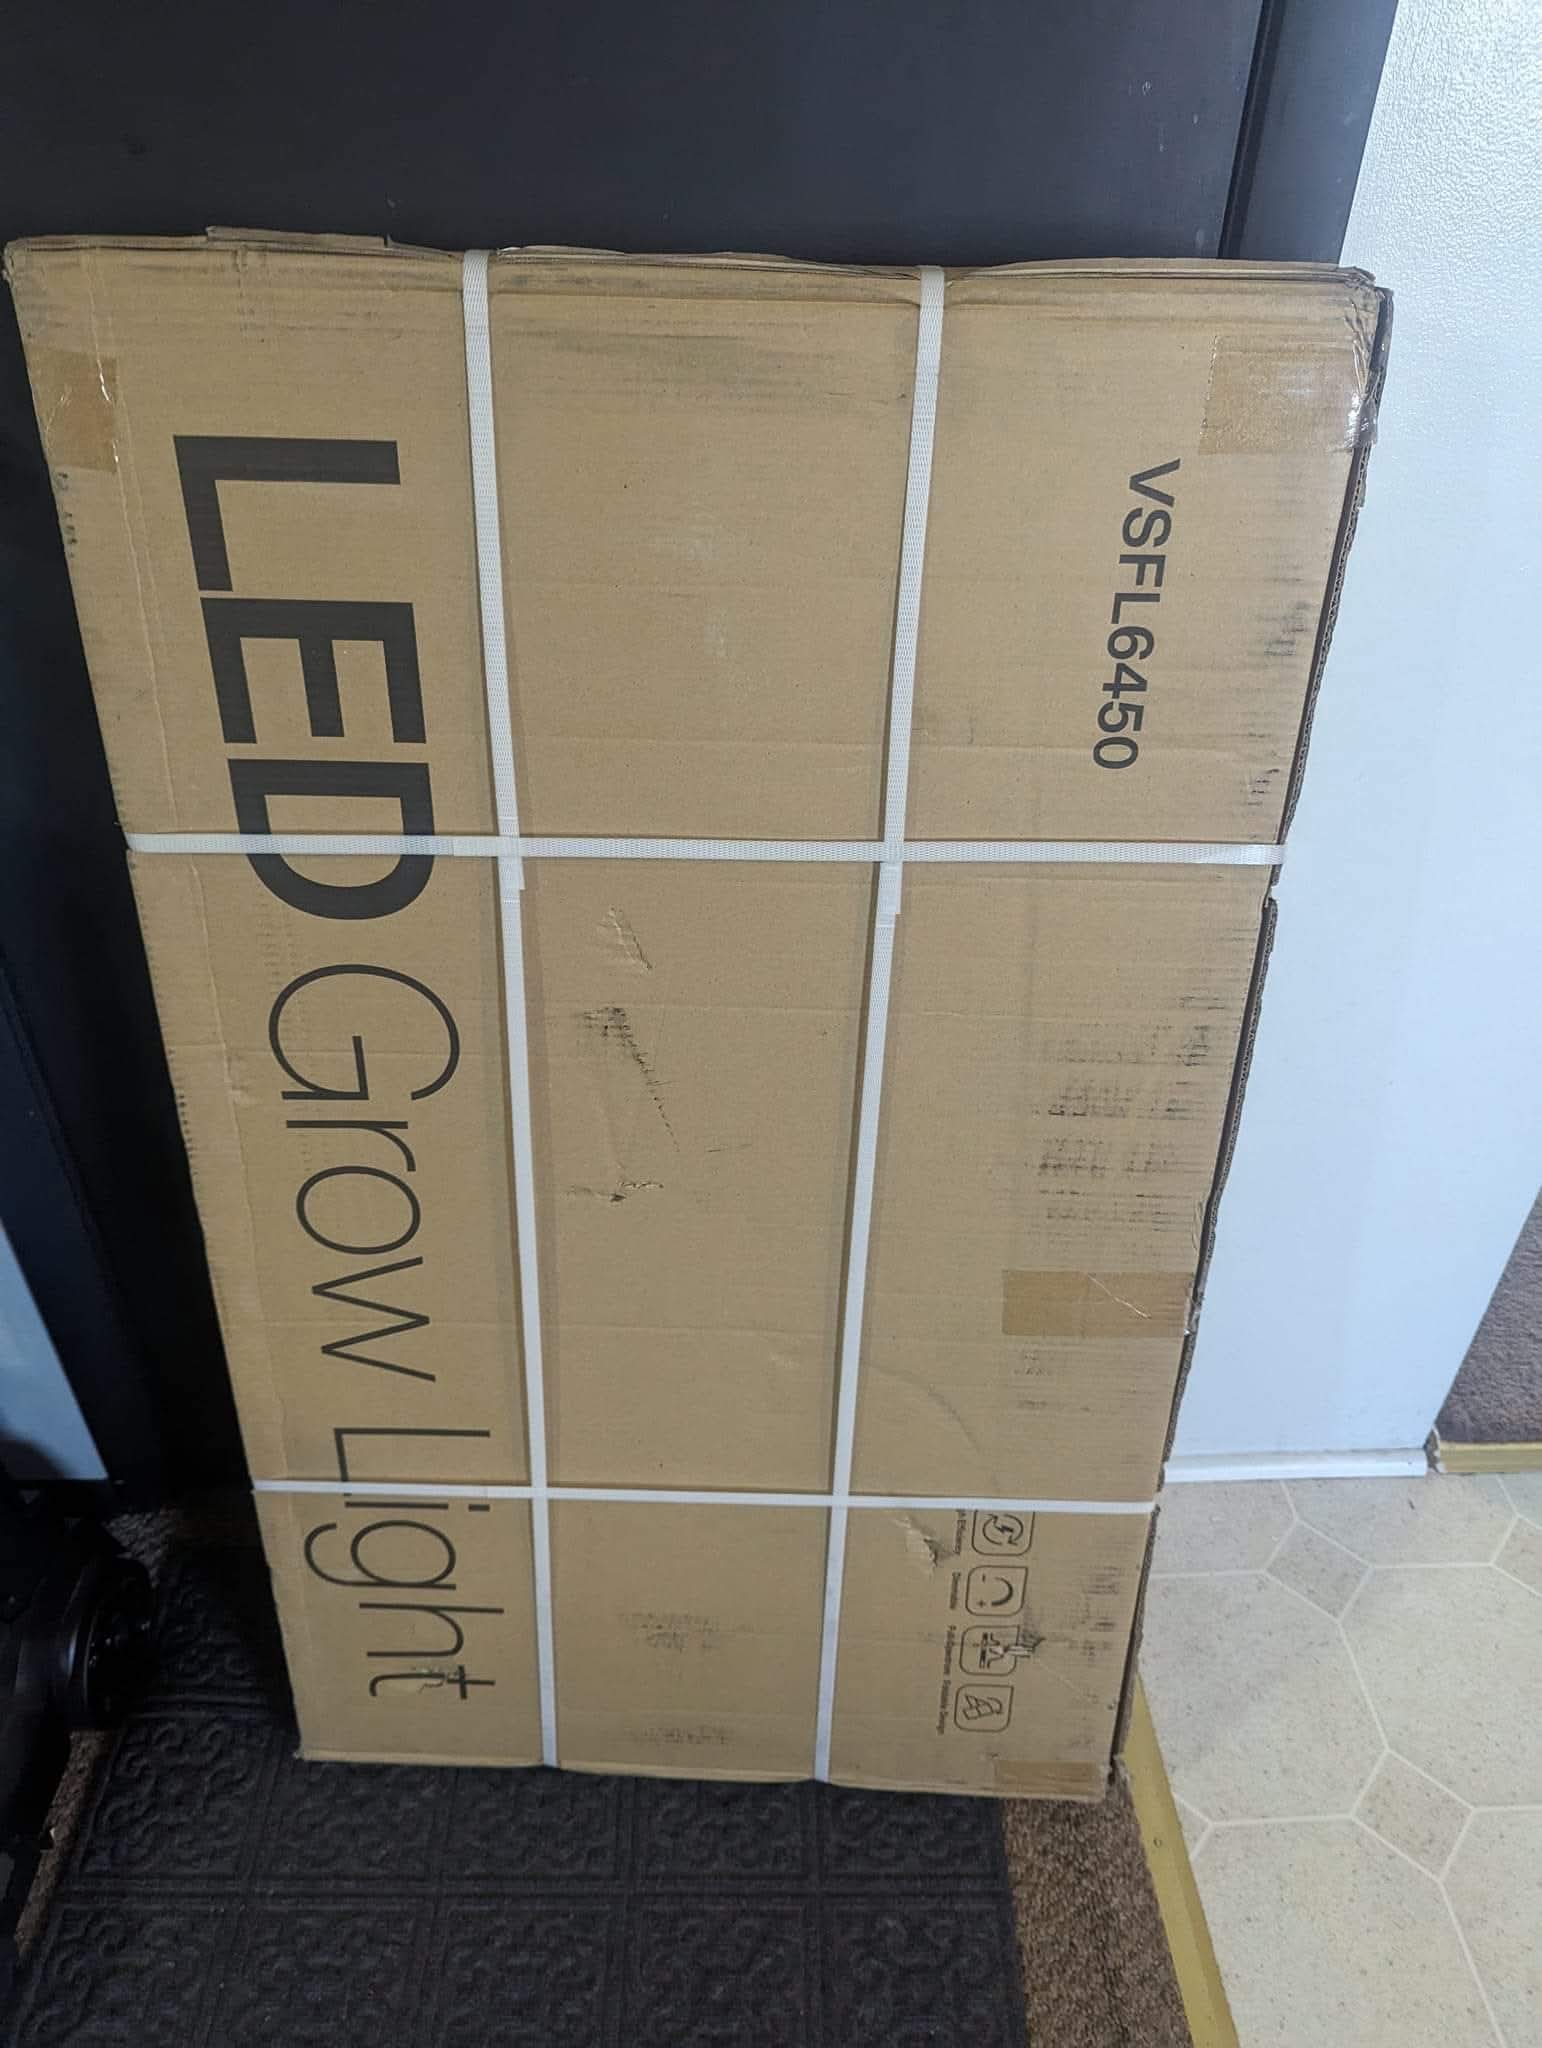
2. The Light (The "Sun")
- Why you need it: This is the most important piece of equipment. Your light is the engine for plant growth. A weak light = weak, fluffy buds. A strong light means dense, heavy buds.
- What to buy: Get a Full-Spectrum LED light. Don't buy the
cheap purple ("blurple") lights; they are old technology. Look for modern "quantum board" or
"bar style" LEDs.
- For a 2x4 tent: Aim for a light that draws 200-300 watts from the wall (e.g., Mars Hydro TSL2000, Spider Farmer SF2000).
- For a 3x3 tent: Aim for a light that draws 300 watts (e.g., Mars Hydro FC3000, Spider Farmer SE3000).
- Key Feature: Make sure it has a dimmer knob! This is crucial for turning the power down for seedlings, saving electricity, and preventing light burn.
3. The Ventilation System 🌀 (The "Lungs & Deodorizer")
This is a two-part system that pulls fresh air in and pushes hot, stinky air out.
- Inline Fan: This is the engine that pulls air. For a 2x4 or 3x3 tent, a 4-inch inline fan is usually enough. A 6-inch fan is more powerful and can often run *quieter* at a lower speed.
- Carbon Filter: This attaches to the fan and is essential. Cannabis smells *a lot*. This filter scrubs the air clean before it leaves your tent, so your house doesn't smell.
- Ducting: The silver tube that connects the fan and filter.
4. A Small Clip-On Fan (The "Breeze")
- Why you need it: You need a fan inside the tent to blow a gentle breeze over your plants. This strengthens their stems and prevents stale, humid air from sitting around the leaves, which can cause mold.
- What to buy: Any 6-inch clip-on fan will do.
5. Humidity Control (The "Unsung Hero")
Ohio's climate makes humidity control non-negotiable, especially indoors. Proper humidity management (Relative Humidity or RH) is as important as light and nutrients, as it directly impacts your plant's ability to "drink" and fight off mold. See the Automation tab for details on controlling these with smart devices.
- Dehumidifier (Crucial for Flower): In the flowering stage (12/12), high humidity is the primary cause of bud rot (Botrytis). You absolutely need a dehumidifier (ideally connected to a controller) to keep RH low (40%-55%). A small bedroom unit is often enough for a small tent, but check its capacity.
- Humidifier (Crucial for Seedling/Veg): Seedlings and young plants need high humidity (60%-80%) to promote rapid, healthy leaf growth. A simple cool-mist humidifier can run inside the tent during the vegetative stage to keep the RH high.
Chapter 2: Pot, Soil, and Food
Soil vs. Coco: What's Easier?
- Soil (Easiest): We 100% recommend starting with soil. Buy a high-quality bagged potting soil (like FoxFarm Ocean Forest or Build-A-Soil). This soil is packed with nutrients and will feed your plant for the first 3-4 weeks with just plain water!
- Coco Coir (Advanced): This is shredded coconut husk. It's a great medium, but it contains zero food. You have to add nutrients (food) to every single watering from day one. It's less forgiving. Save this for your second grow.
Pots: Fabric vs. Plastic
- Winner: Fabric Pots. (e.g., "Smart Pots" or "Vivosun fabric pots").
- Why:** They allow roots to "air-prune." When a root hits the fabric side, it stops and sends out *new* roots, creating a dense, healthy root ball. In a plastic pot, the roots just circle the bottom (called "root bound").
- What size?** Start seedlings in a Solo cup, then move to a 5-gallon or 7-gallon fabric pot for its final home.
Nutrients (The "Food")
This is the most confusing part for new growers. You *can* start simple, but quality nutrients make a *huge* difference. See our "Our Gear" tab for what we use, but here's the rundown:
- Beginner Pick: A simple two-part system like FoxFarm "Grow Big" (for veg) and "Tiger Bloom" (for flower) is a perfect, time-tested beginner's choice.
- Our Secret Weapon: We swear by the Heavy 16 nutrient line (Veg A/B, Bloom A/B, Prime, Fire). It's a professional-grade line that is incredibly pH stable and clean, which is perfect for our automated watering systems. It costs more, but the results are unmatched.
- The "Rocket Fuel" Additive: We add Recharge by Real Growers once a week. This isn't a nutrient; it's a microbial pack (think super-yogurt for your soil). It builds a powerful root system that makes your plants explode with growth and helps them absorb the expensive nutes you're feeding them.
- The Golden Rule: Always start with 1/4 to 1/2 the dose recommended on the bottle! It's way easier to fix an underfed plant than a burnt, overfed one.
Chapter 3: Your First Grow (Step-by-Step)
Phase 1: Germination (Day 1-5)
Your goal is to get the seed's taproot to pop out.
- Fold a seed in a damp (not soaking wet) paper towel.
- Place it in a Ziploc bag or between two plates.
- Put it somewhere warm and dark (like on top of your fridge).
- Check it daily. Once the little white taproot is 1/4 inch long, it's ready.
- Gently plant it (root down!) about 1/2 inch deep in a Solo cup filled with soil.
Phase 2: Seedling (Week 1-3)
Your plant is a baby. Be gentle!
- Light:** Turn your new LED light on, but dim it to 25%-40% and hang it 24-30 inches away.
- Water:** Do NOT soak the pot. Just give a few tablespoons of water in a small ring around the seedling every 2-3 days. Overwatering is the #1 killer of seedlings.
- Environment:** Keep a clear plastic dome (like half a water bottle) over the seedling to keep humidity high.
Phase 3: Vegetative ("Veg") Stage (Week 3-8+)
Your plant is now a teenager, focused on growing big and strong (leaves and branches). Your goal is to build a good "bush."
- Light Cycle:** Set your light timer to 18 hours ON, 6 hours OFF.
- Light Intensity:** Gradually increase the dimmer to 50%-75% and lower the light to 18-24 inches. Watch the plant for any stress (curling leaves).
- Transplanting:** When the leaves reach the edges of your Solo cup, it's time to move it to its final 5-gallon pot.
- Watering:** Now you can water fully. Water until the pot is heavy and a little bit runs out the bottom. Then wait until the pot feels light again (this could be 3-5 days!). This "wet-dry" cycle is key.
- Training:** This is when you can *gently* bend the main stalk over (called "Low-Stress Training" or LST) to encourage the lower branches to grow up, creating a flat, even canopy.
Phase 4: Flowering ("Flower") Stage (Week 8-18+)
This is the magic time when your plant starts making buds. You "tell" the plant to start flowering by changing the light schedule.
- THE FLIP:** Change your light timer to 12 hours ON, 12 hours OFF. This change in "daylight" tricks the plant into thinking winter is coming, so it starts to flower.
- CRITICAL: The 12-hour dark period must be uninterrupted. Even a little light leaking in can stress the plant and ruin your harvest. This is why a tent is so great.
- Light Intensity:** Now you can crank your light to 100%!
- Nutrients:** Switch from "Veg" food to "Bloom" food (less Nitrogen, more Phosphorus and Potassium).
- The Stretch (Weeks 1-3 of Flower): Your plant will double or even triple in size! This is normal.
- Bud Building (Weeks 4-10+ of Flower): Be patient. The plant will grow white "hairs" (pistils) that will slowly swell into dense, frosty buds. This takes 8-12 weeks depending on the strain.
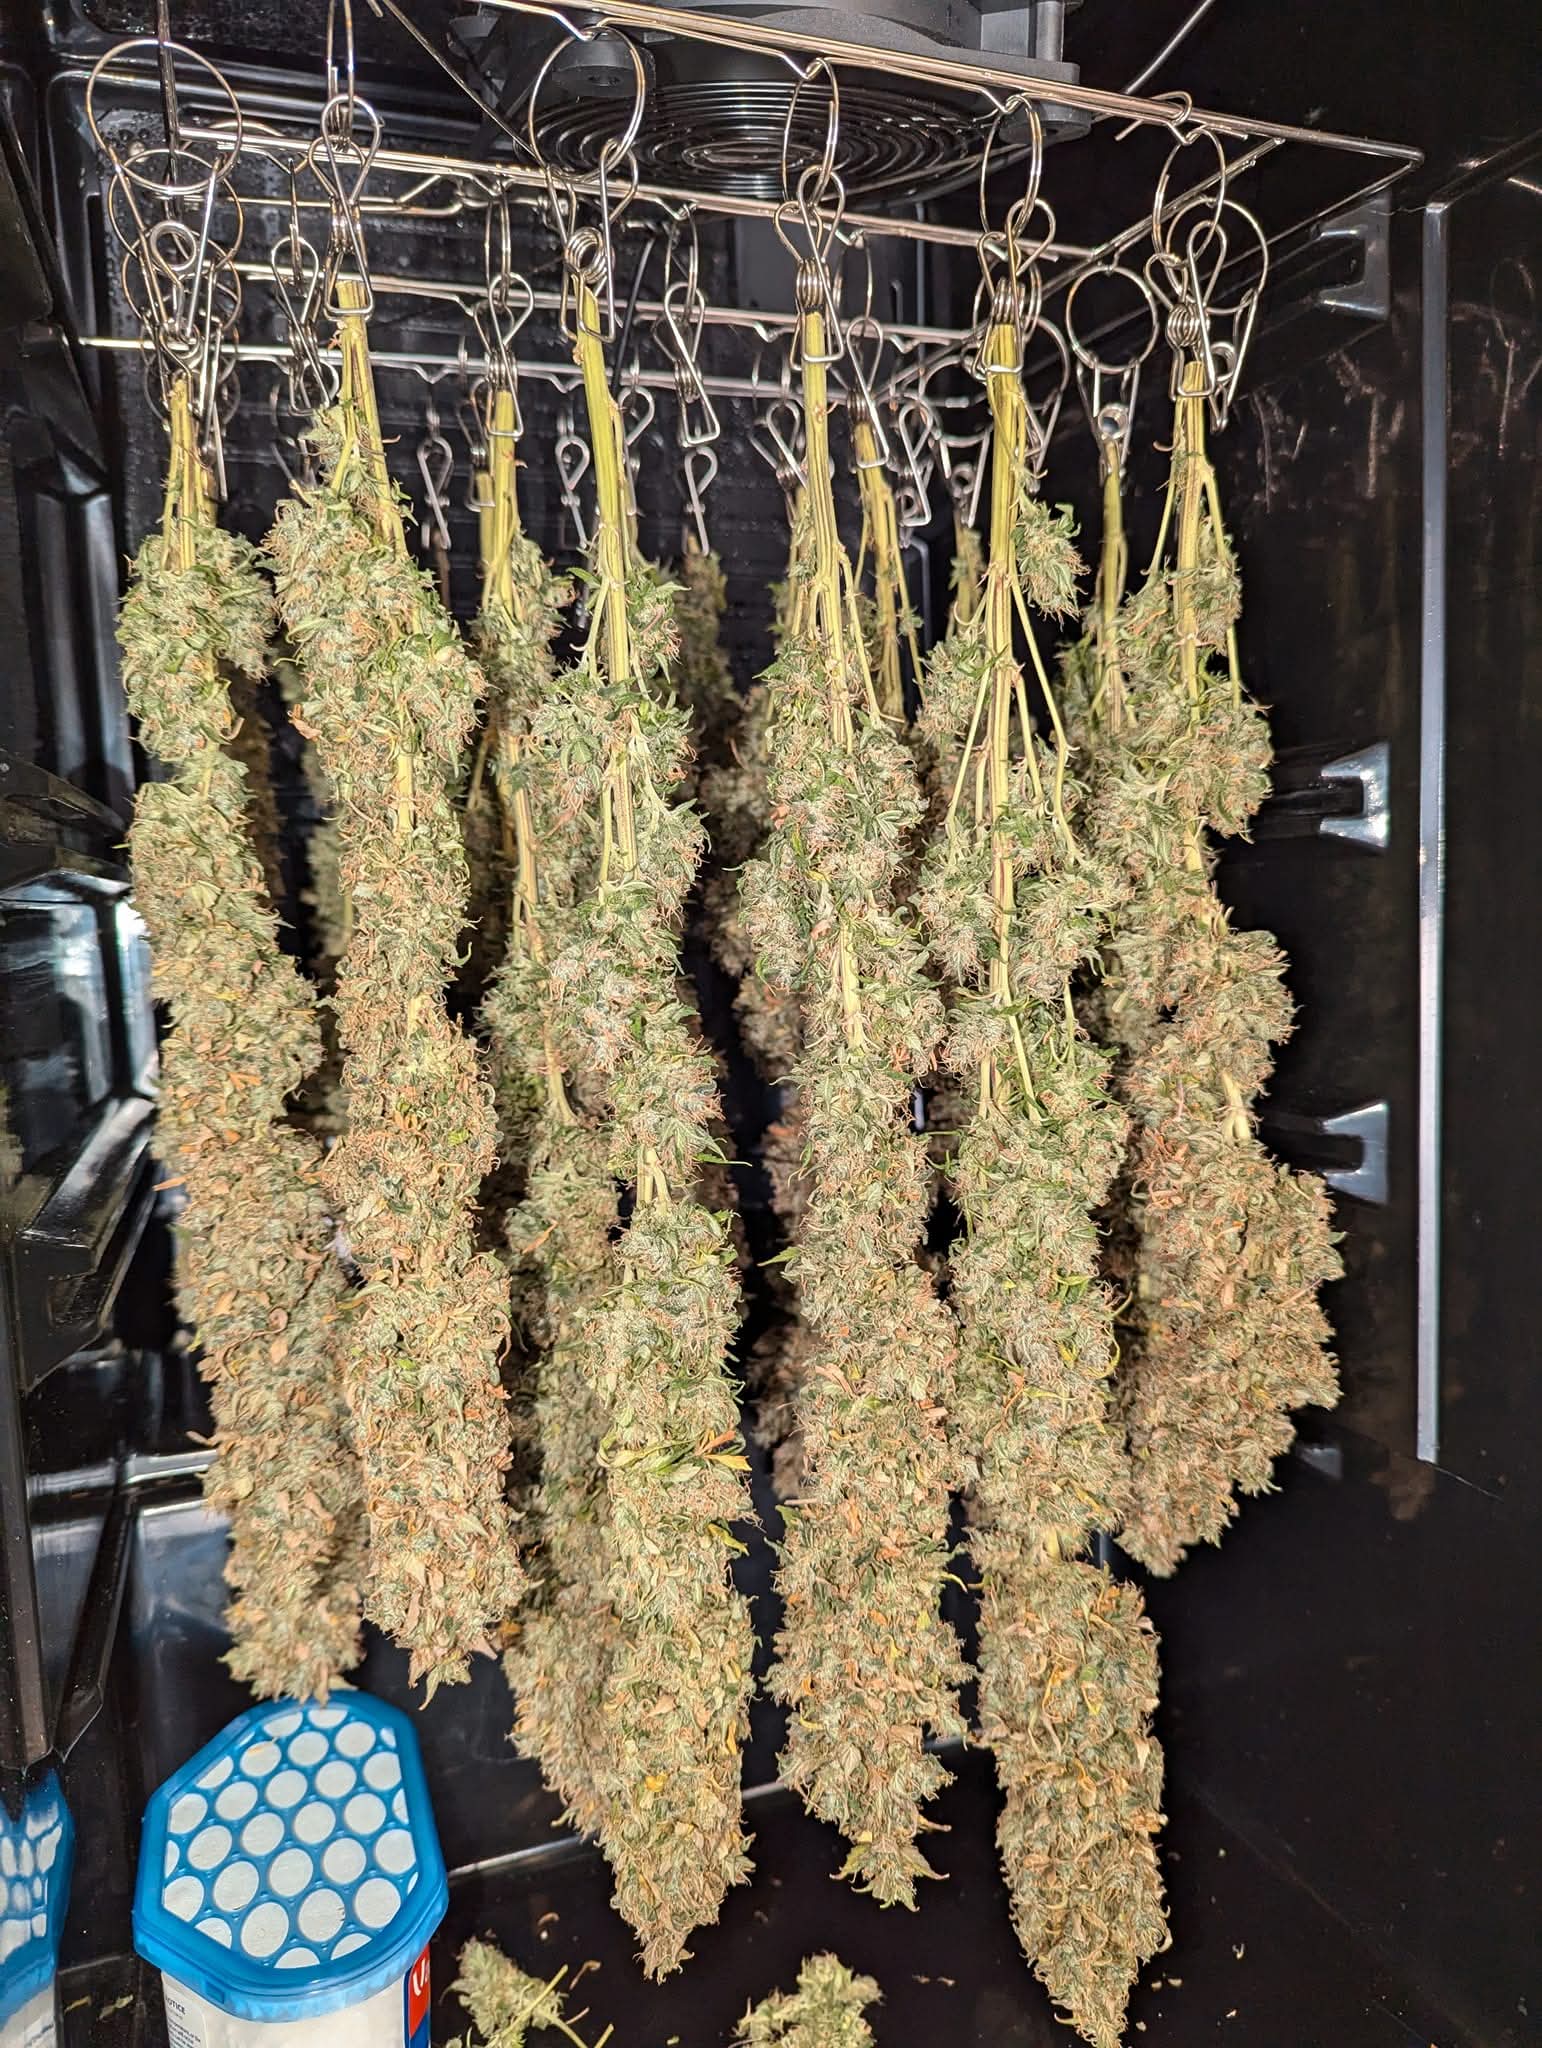
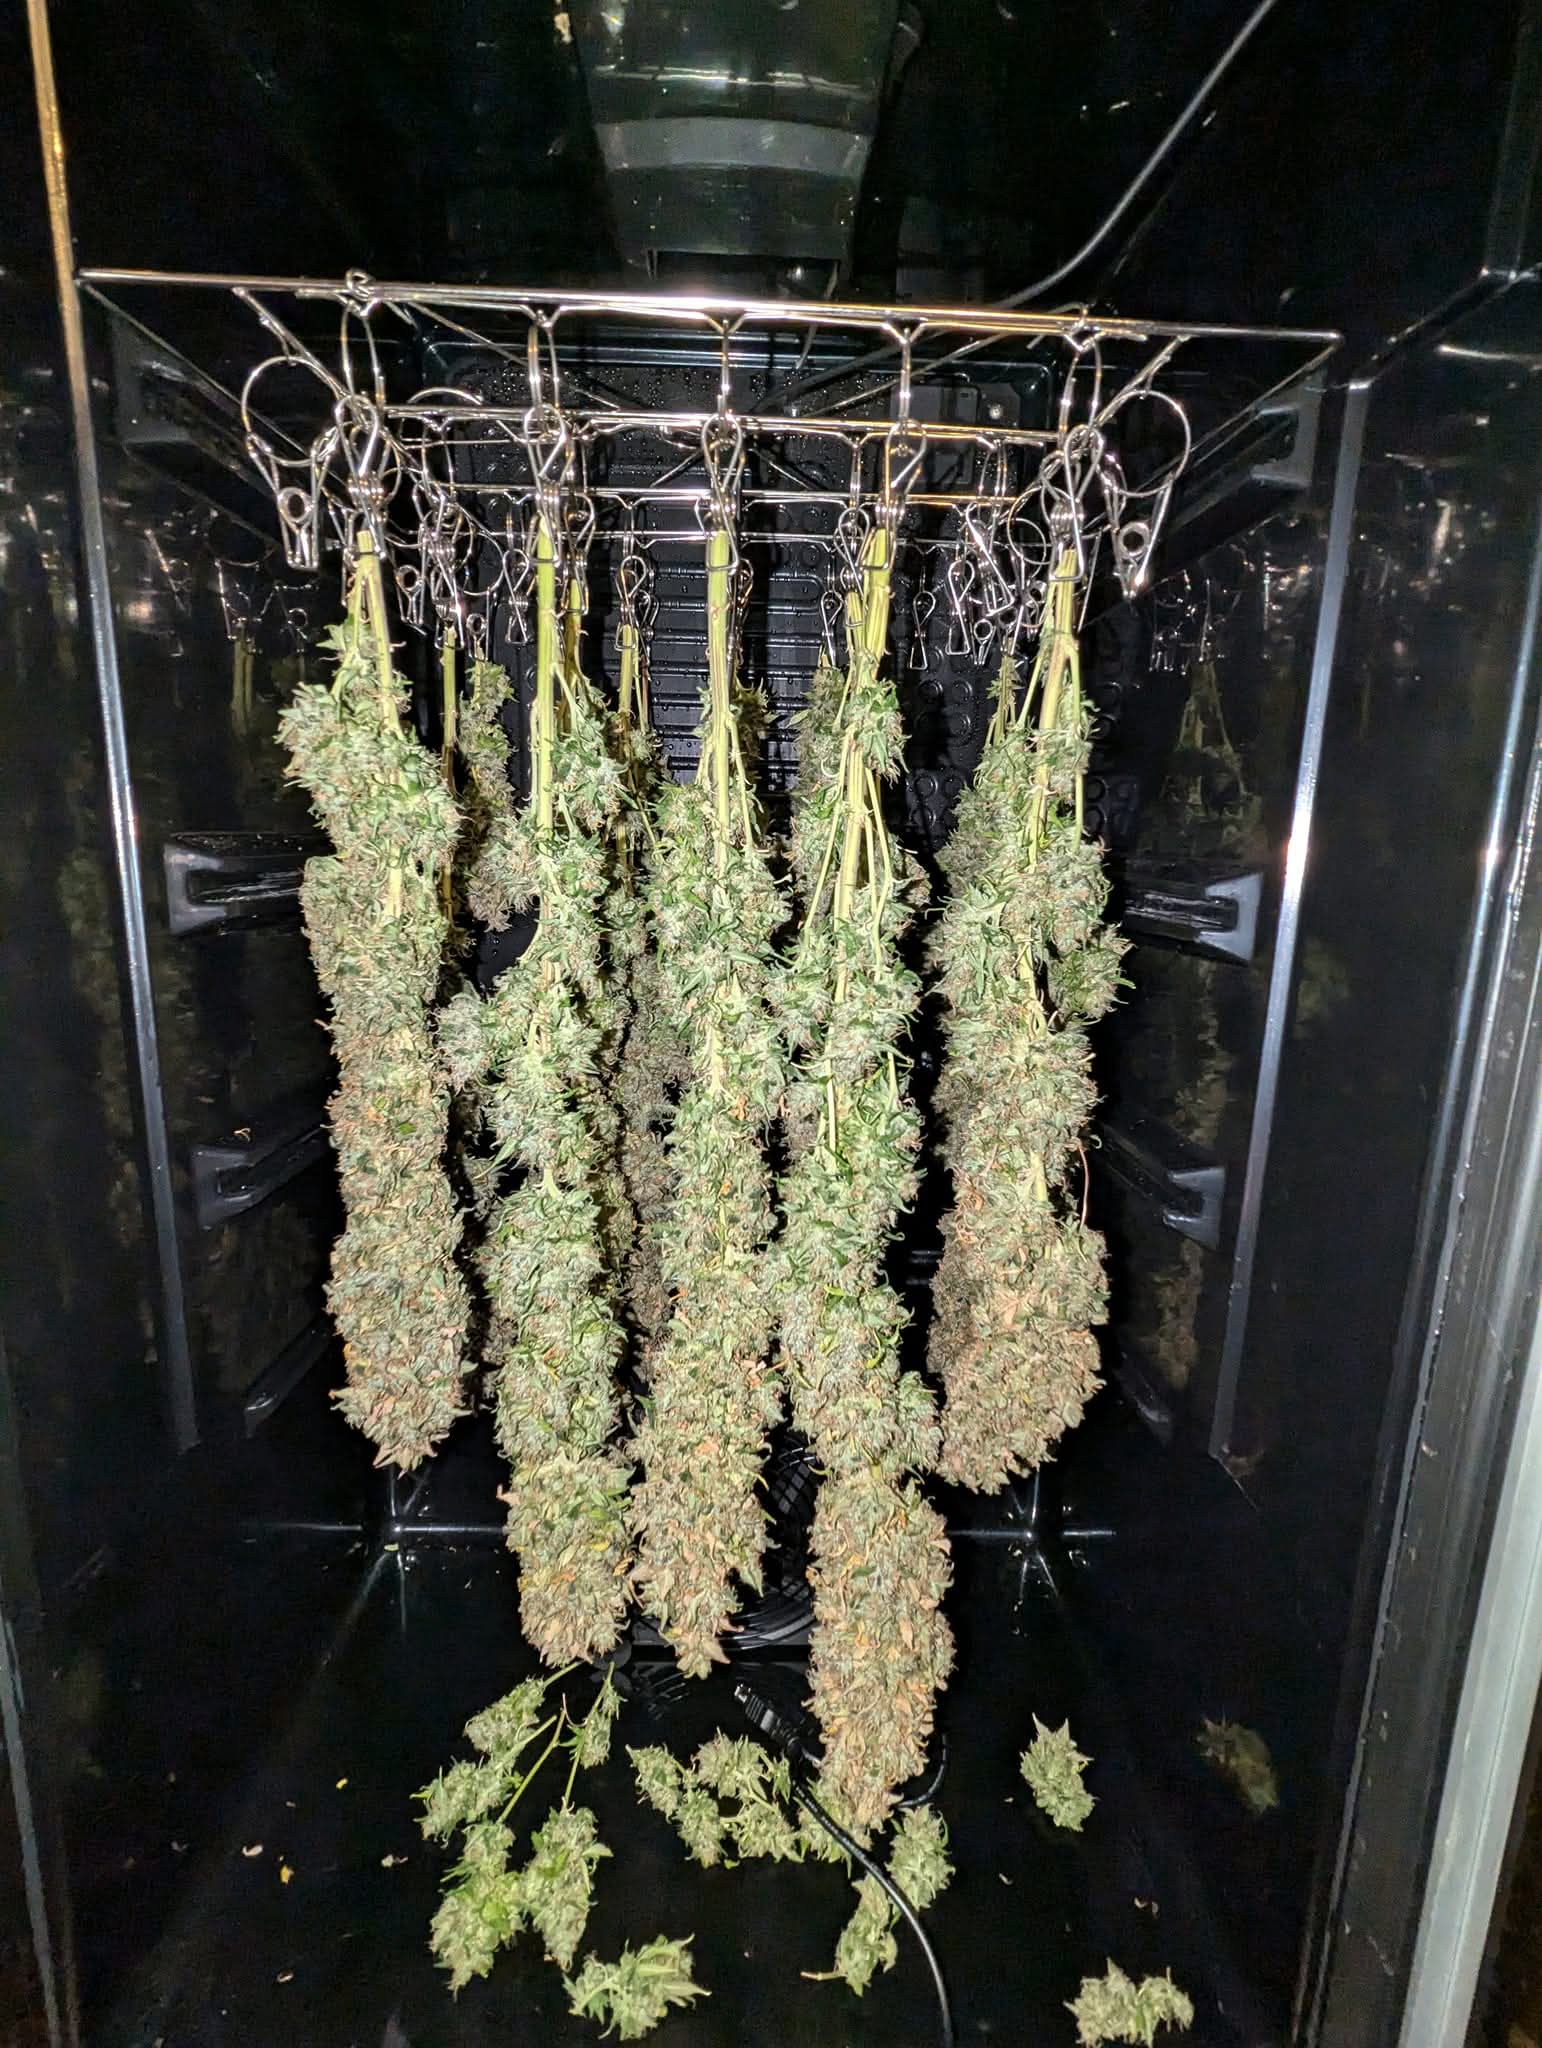
Phase 5: Harvest, Dry, and Cure
You're almost there! Don't ruin it by being impatient.
- Harvest:** You'll know it's ready by looking at the "trichomes" (the frosty crystals) with a cheap jeweler's loupe. You want them to be all "milky" or "cloudy," with just a few turning amber.
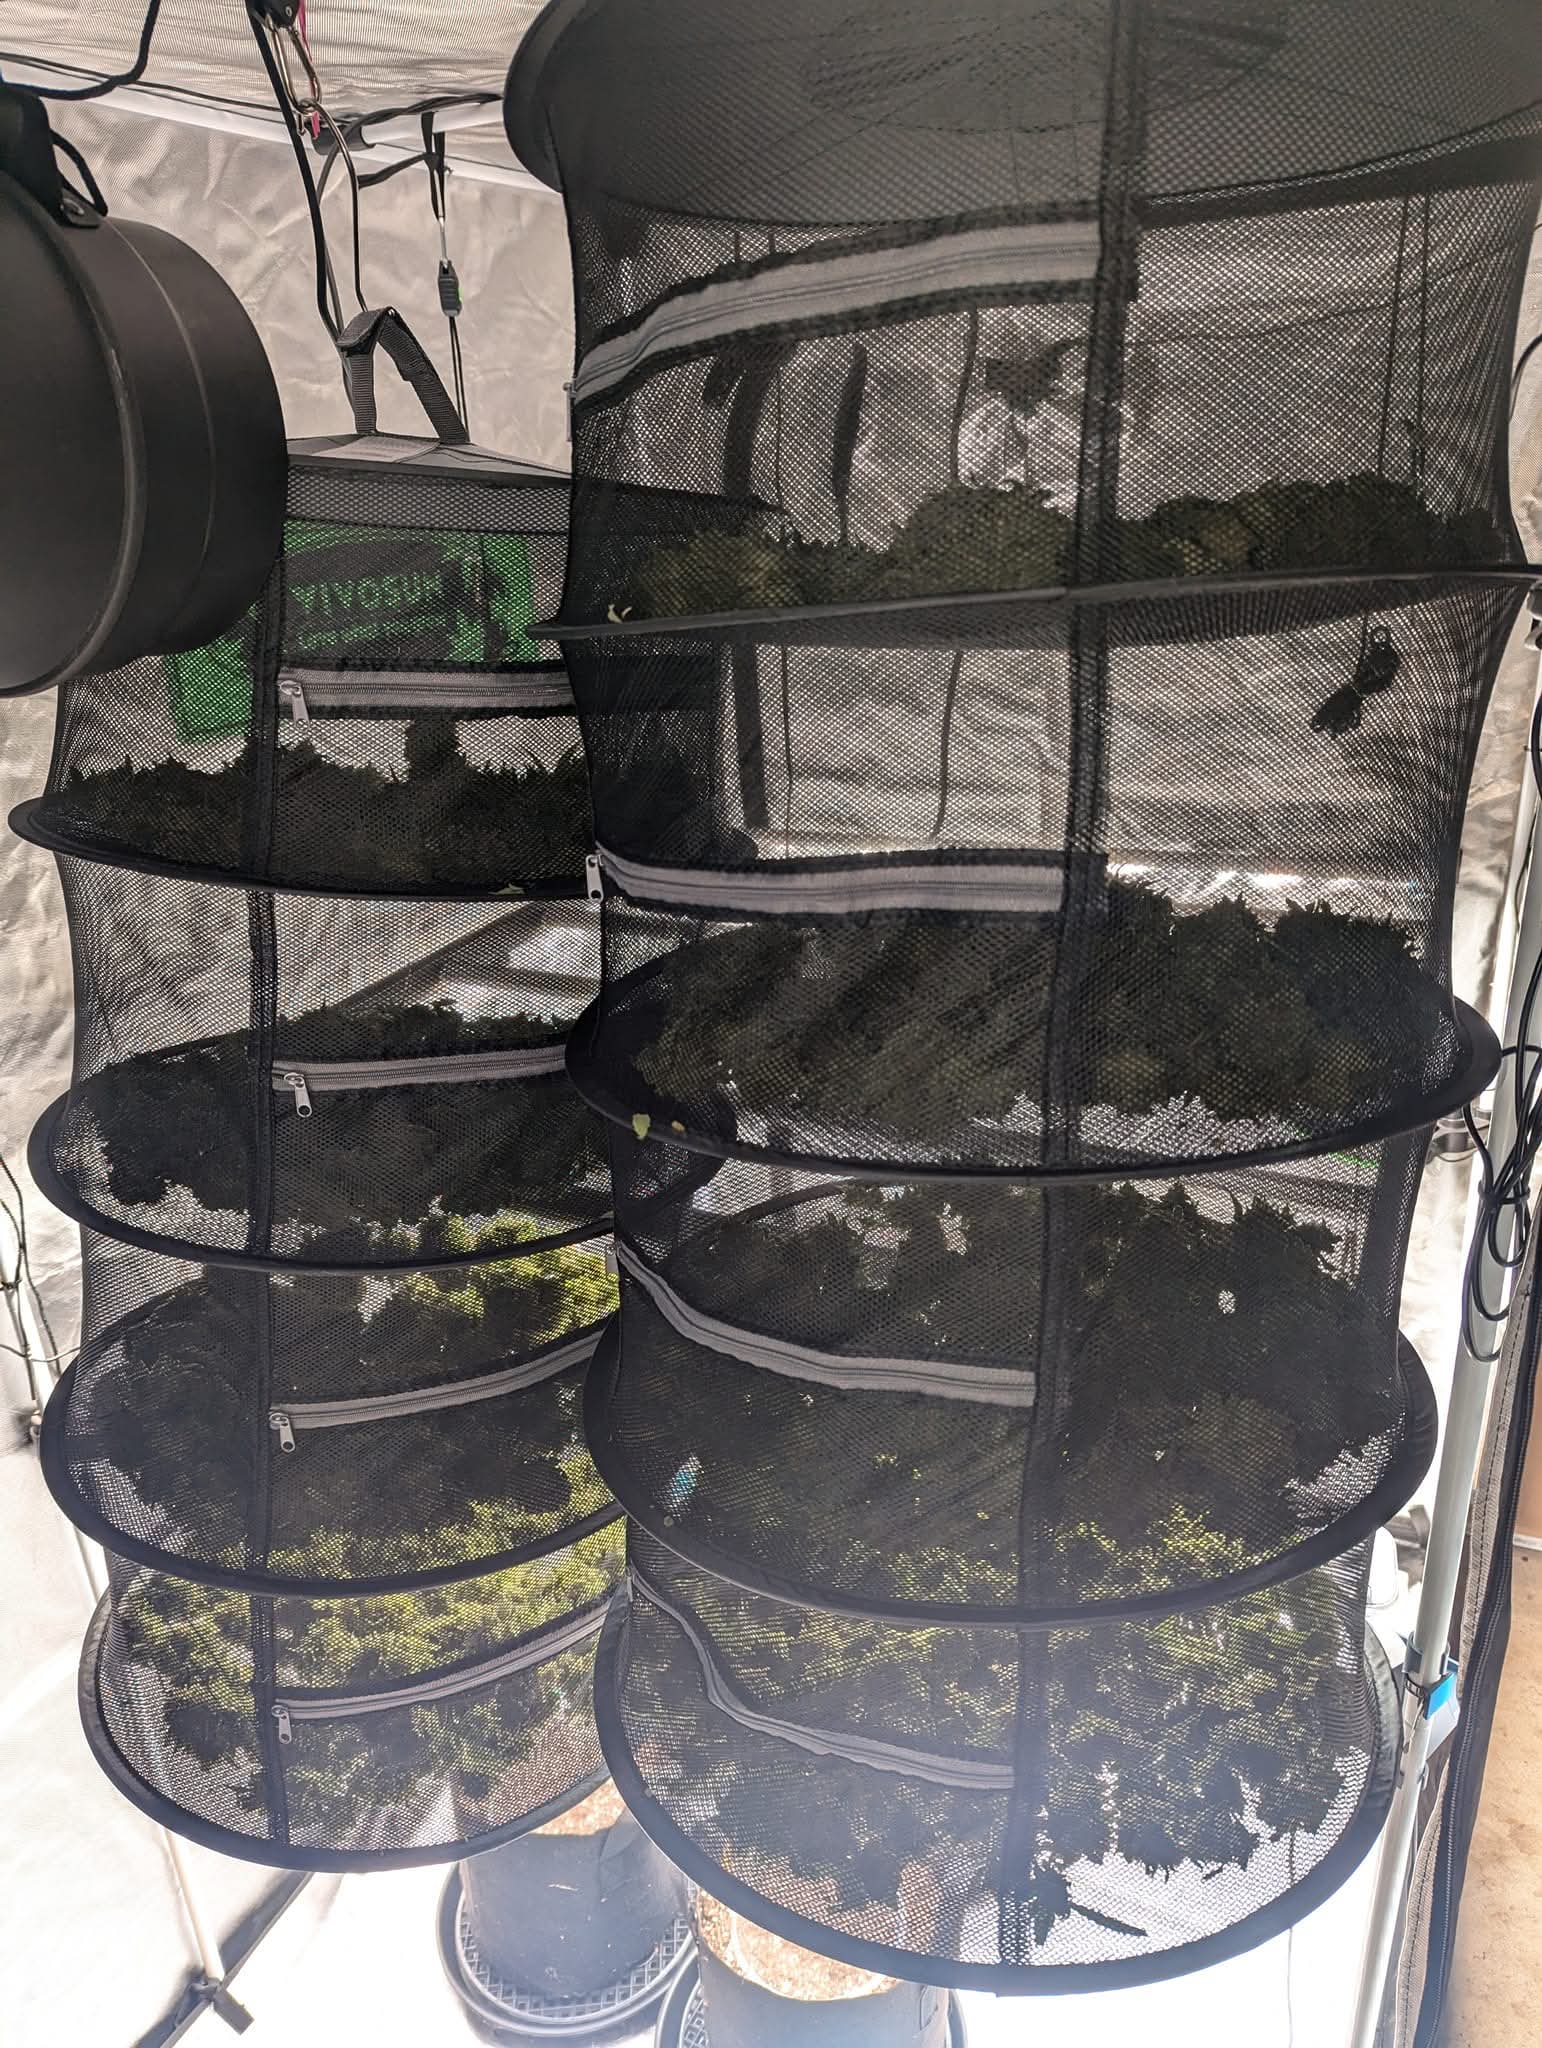
- Dry (The Most Important Step):** Hang the branches in your tent (with the light off and fan on low) for 7-14 days. You want a slow, gentle dry. It's ready when small stems snap instead of bend.
- Cure:** Cut the buds off the stems and put them in glass mason jars (don't pack them in!). For the next 2-3 weeks, "burp" the jars by opening them for 10-15 minutes once a day. This process dramatically improves the smell, taste, and smoothness of your final product.
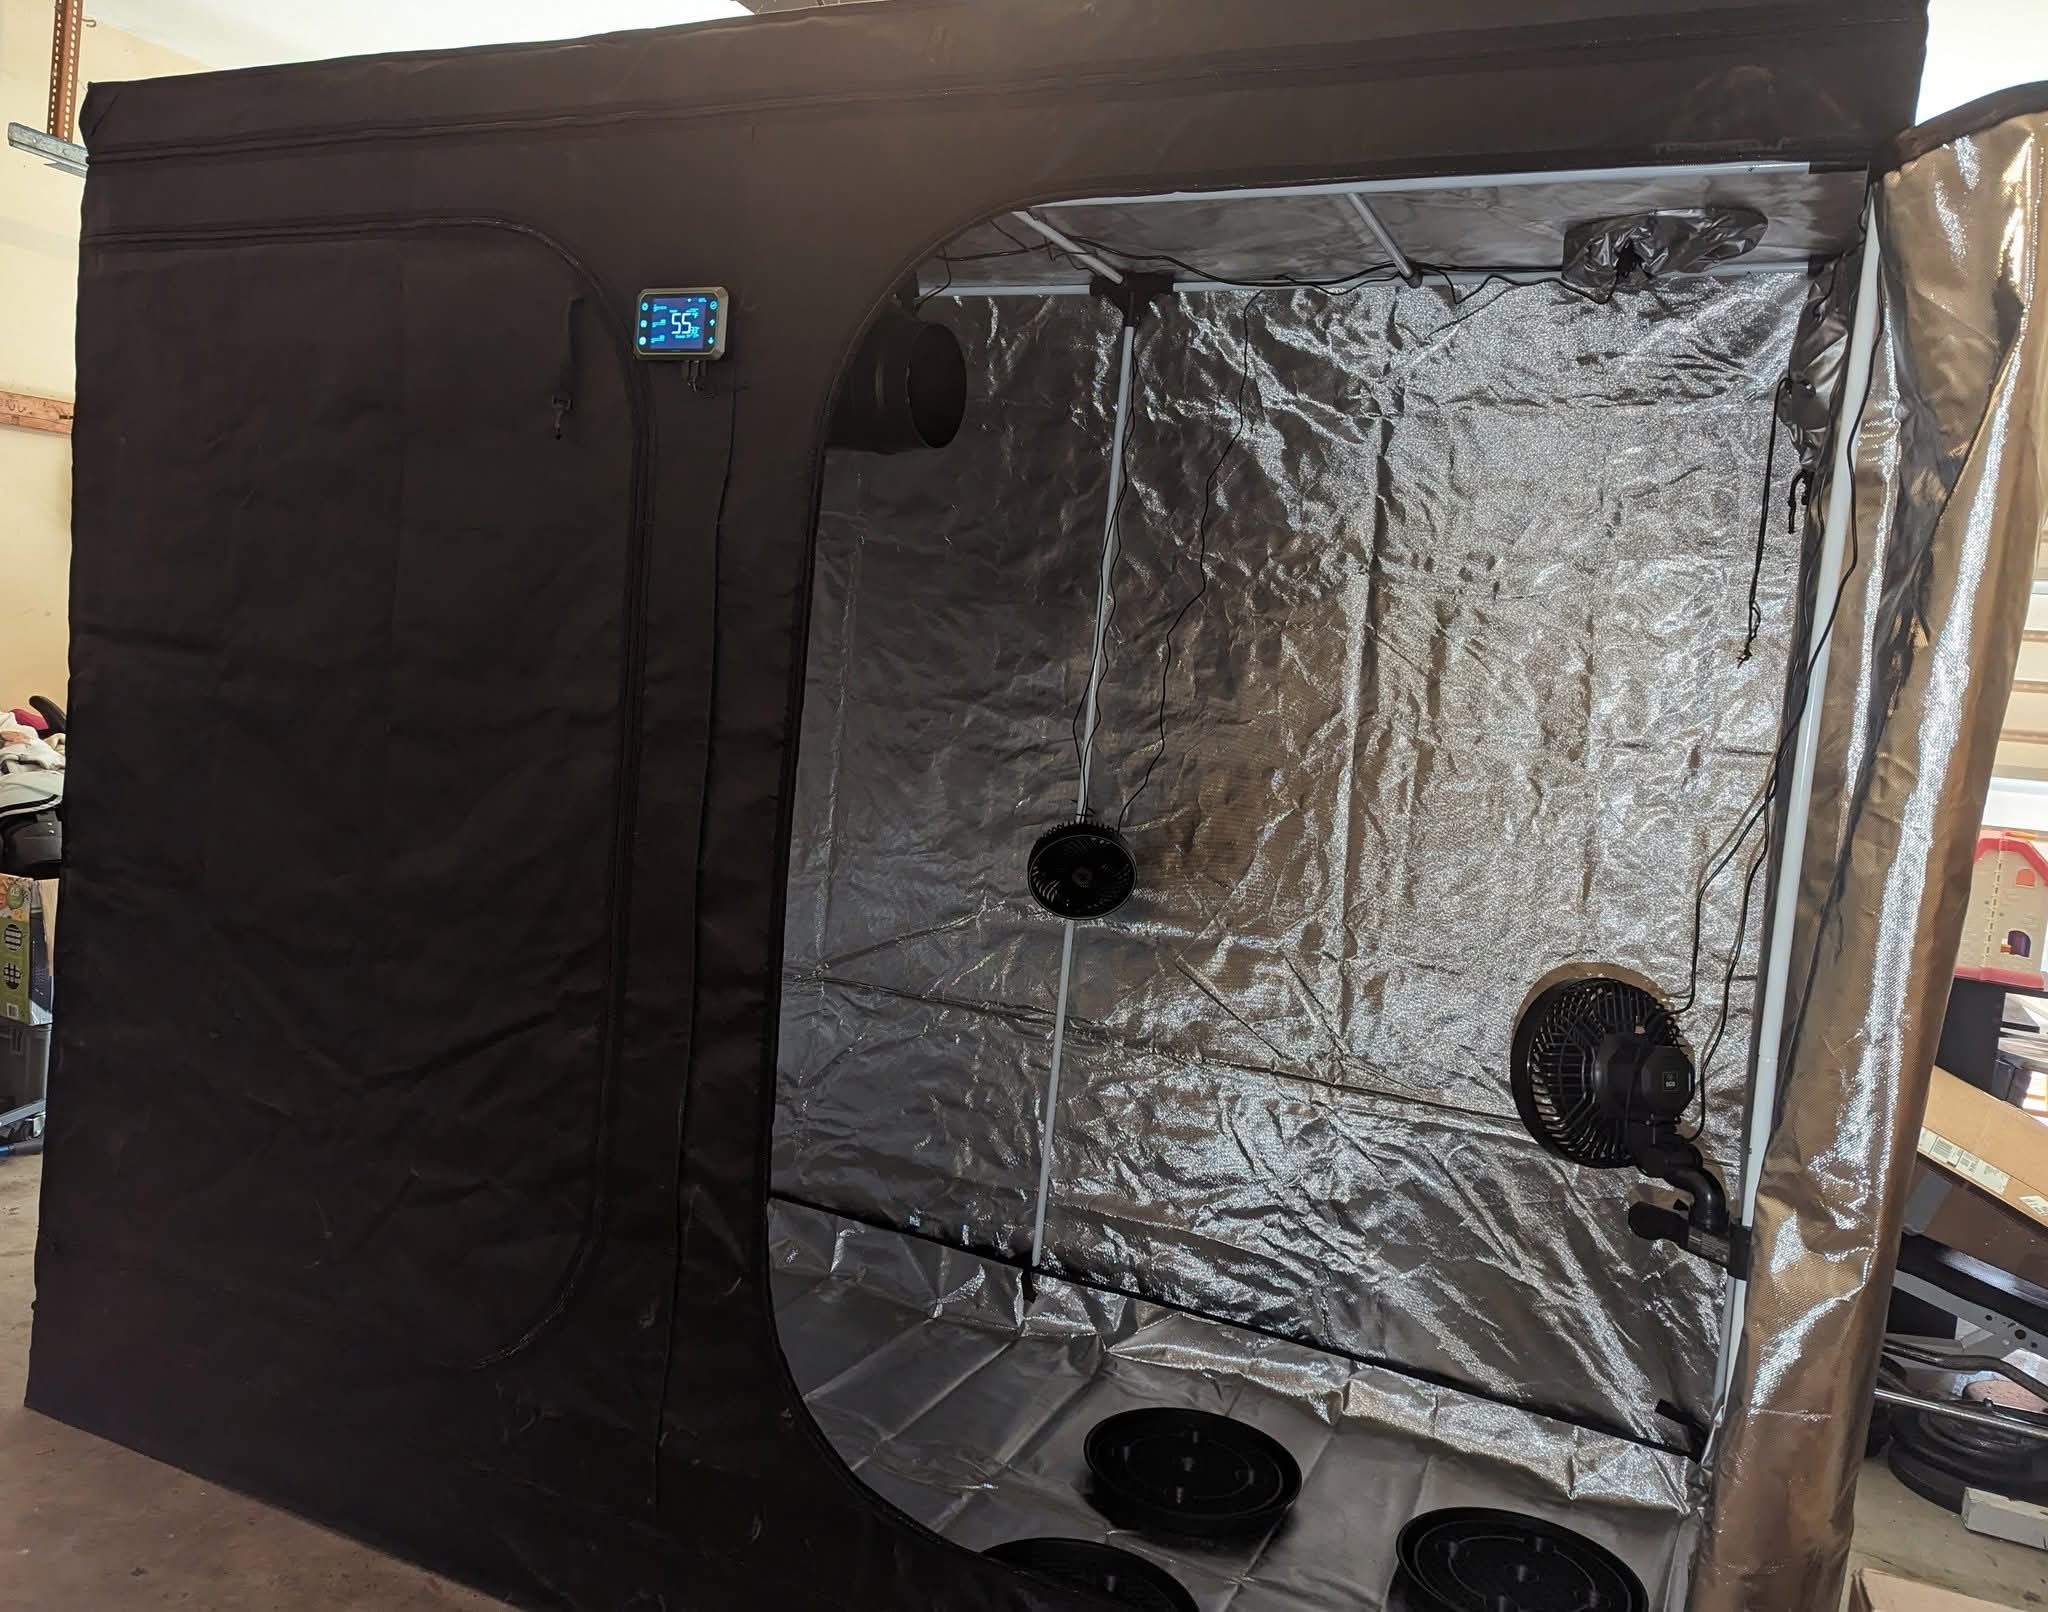
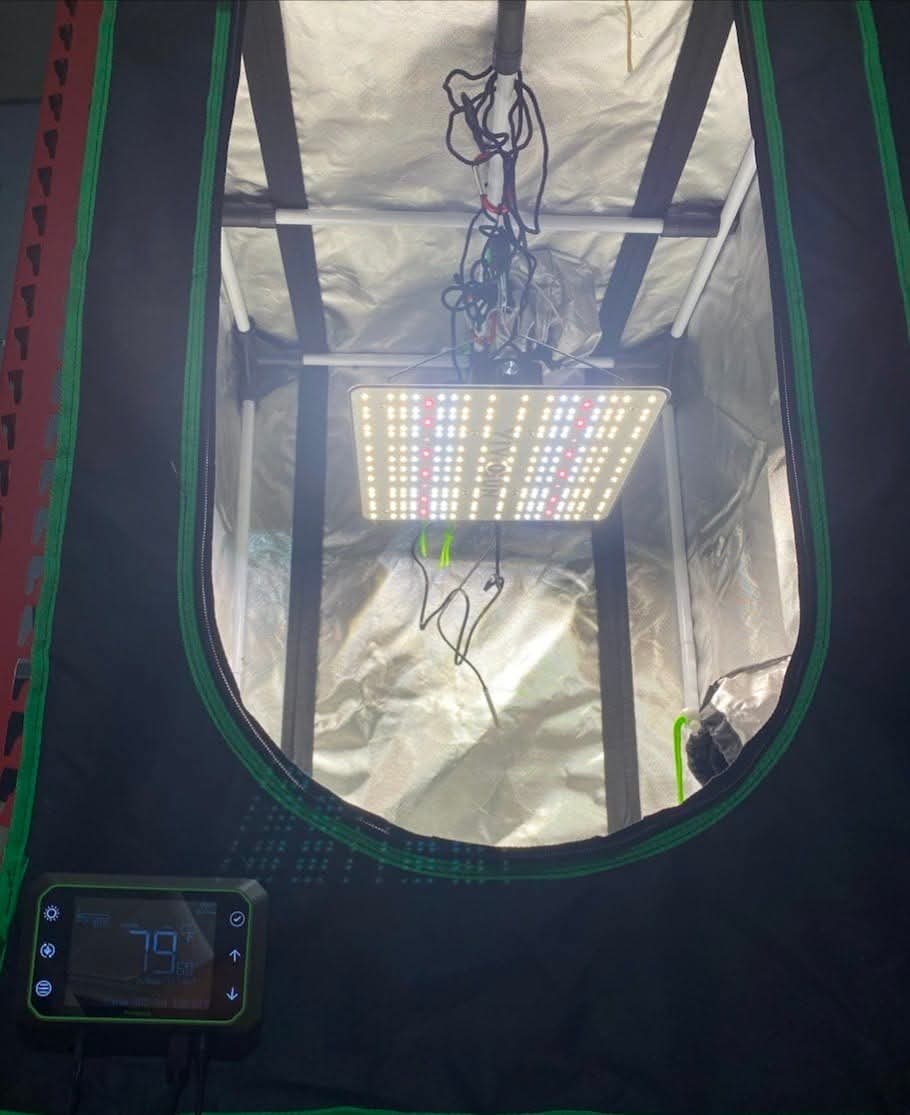
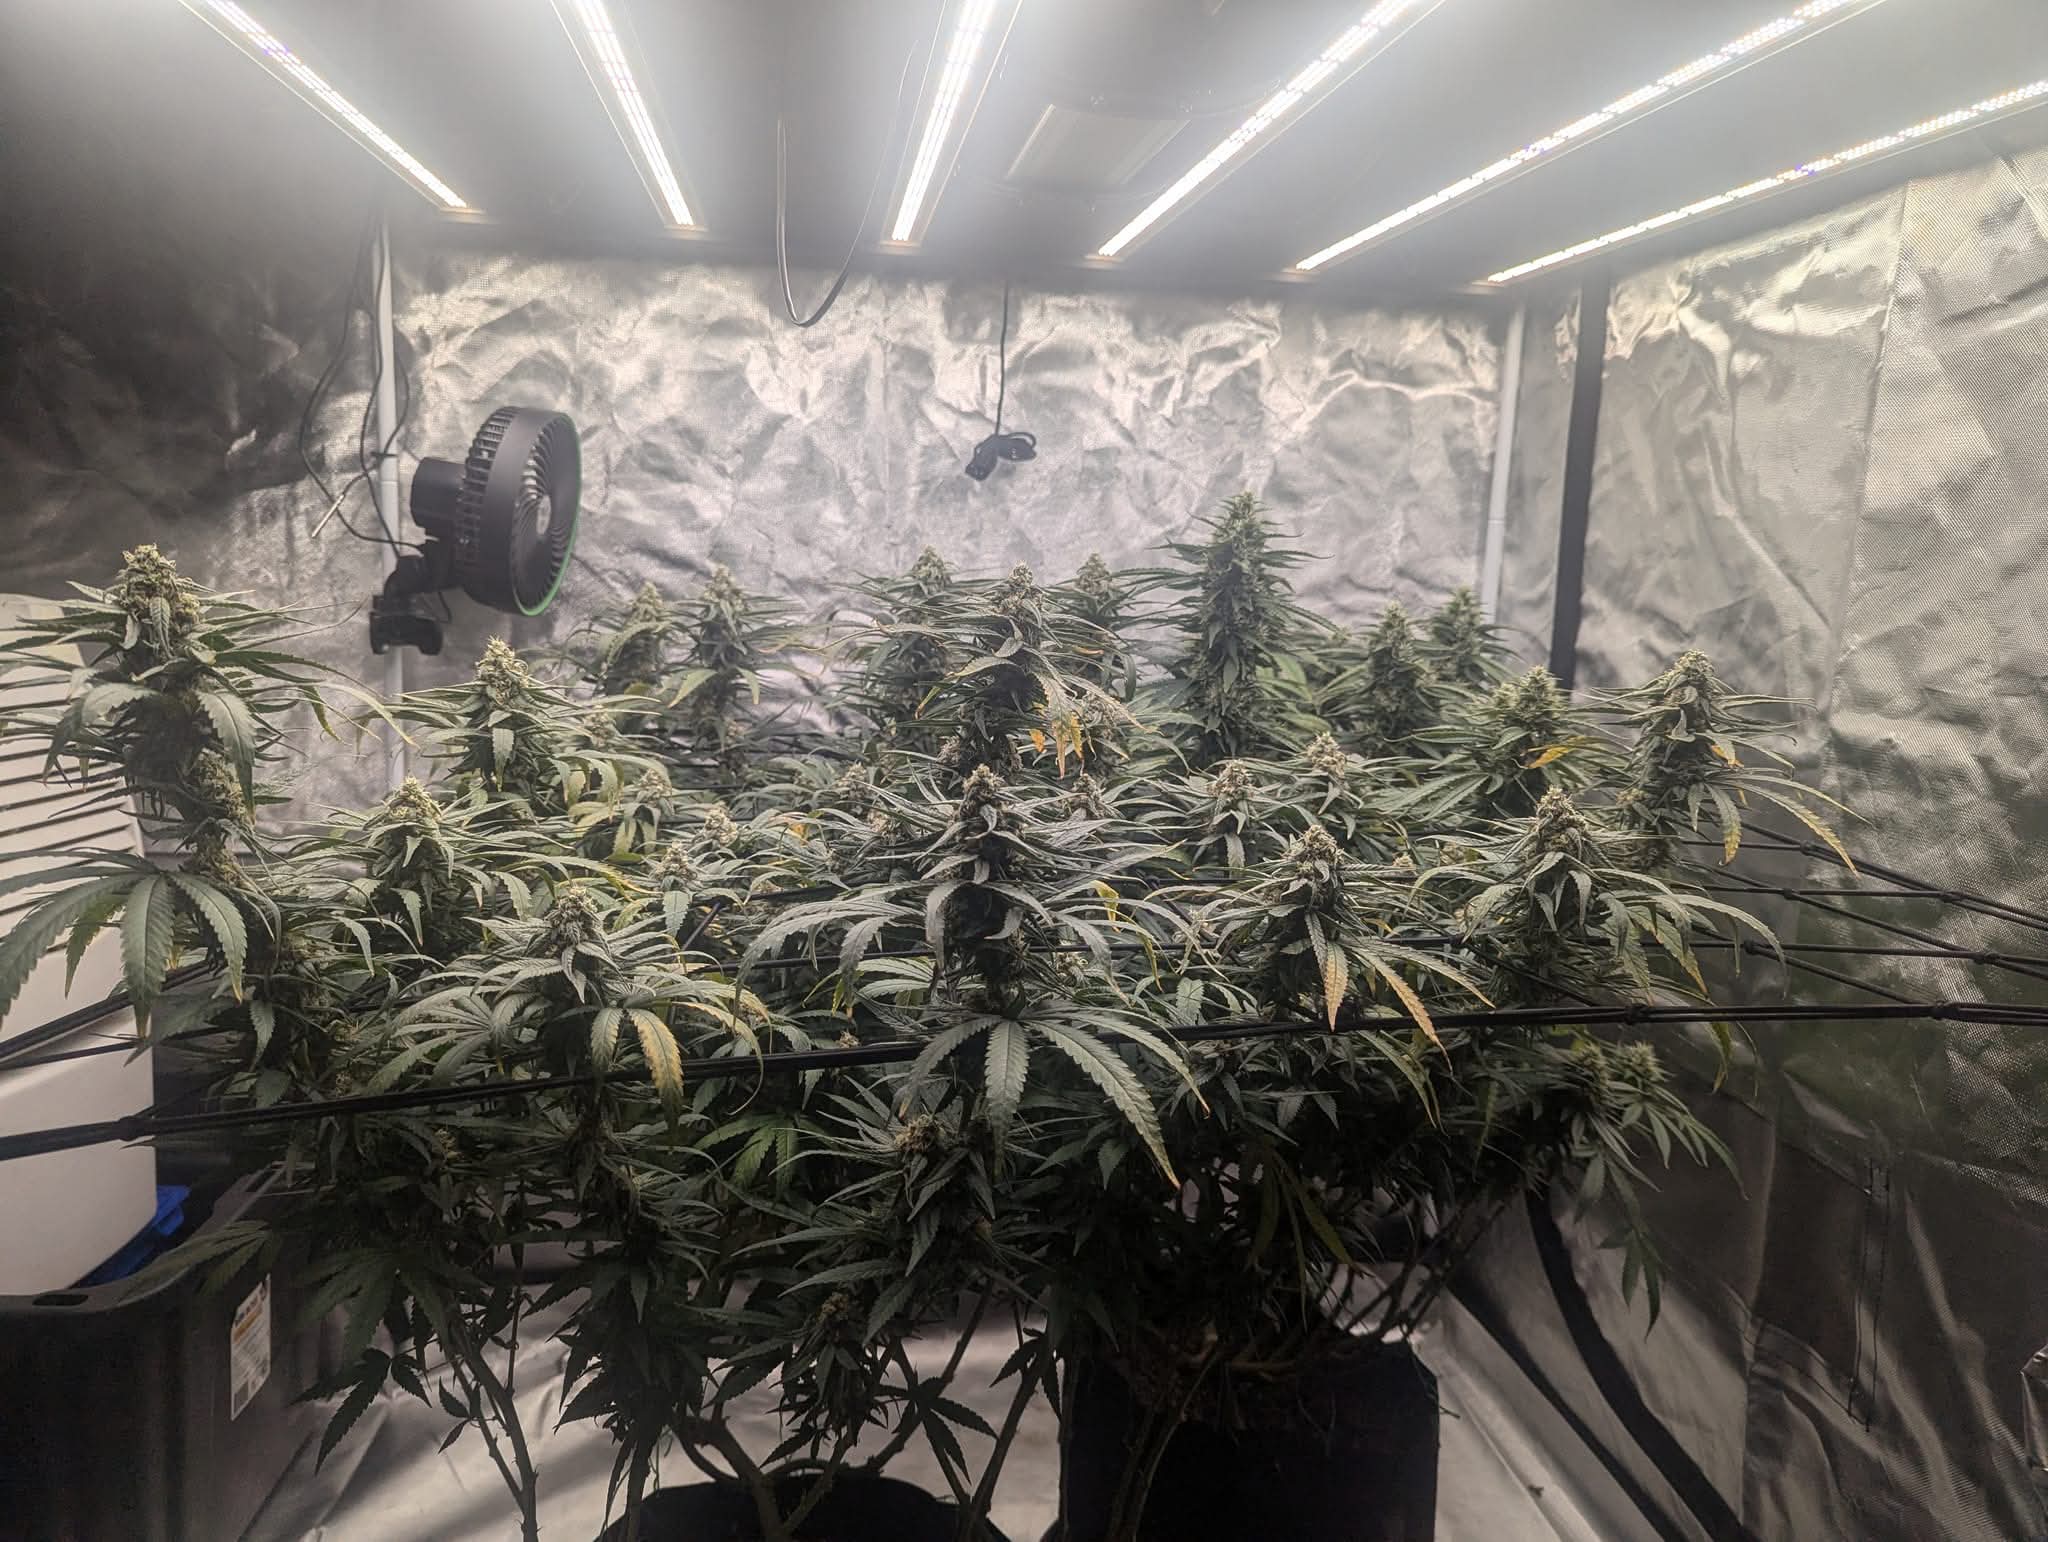
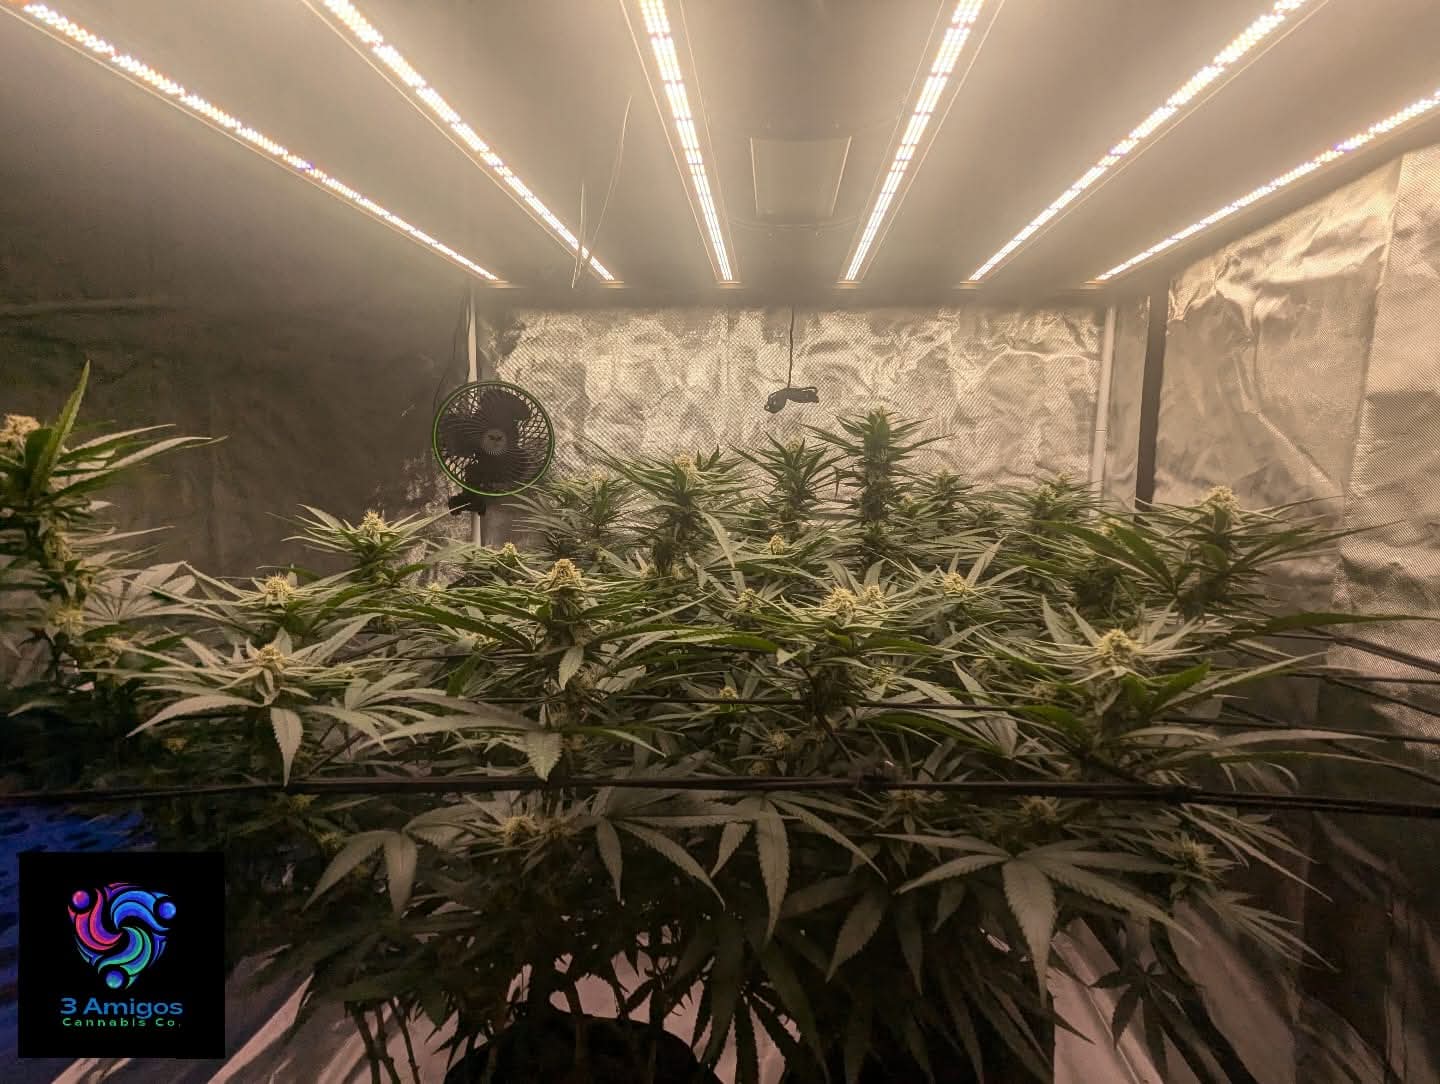
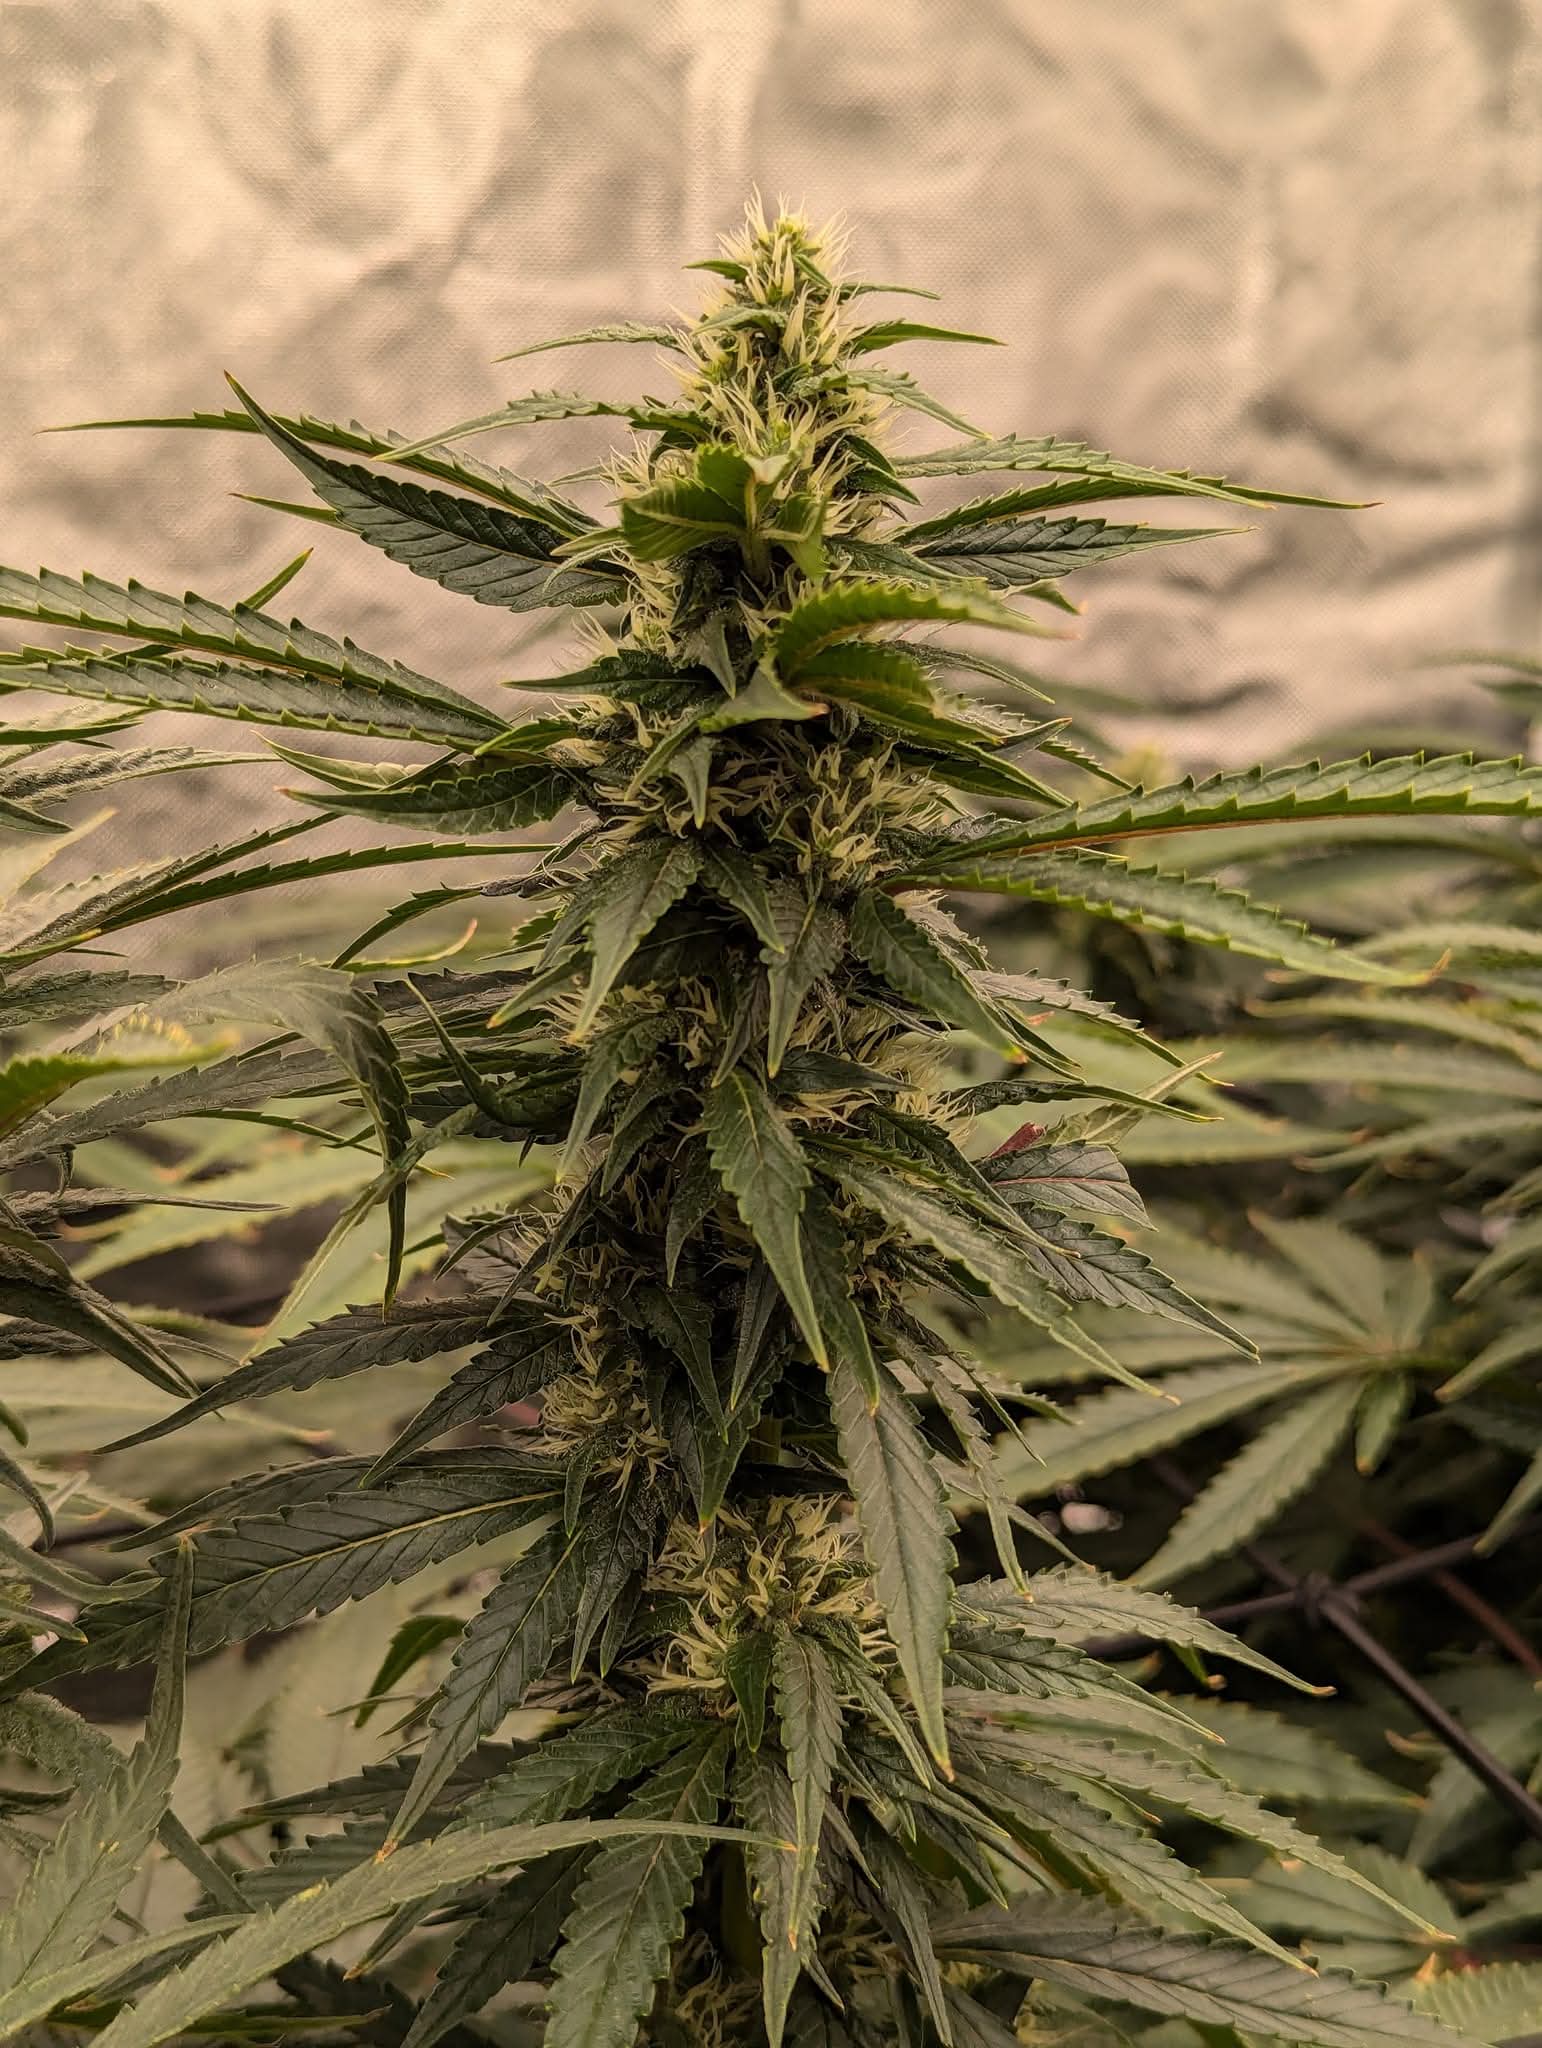
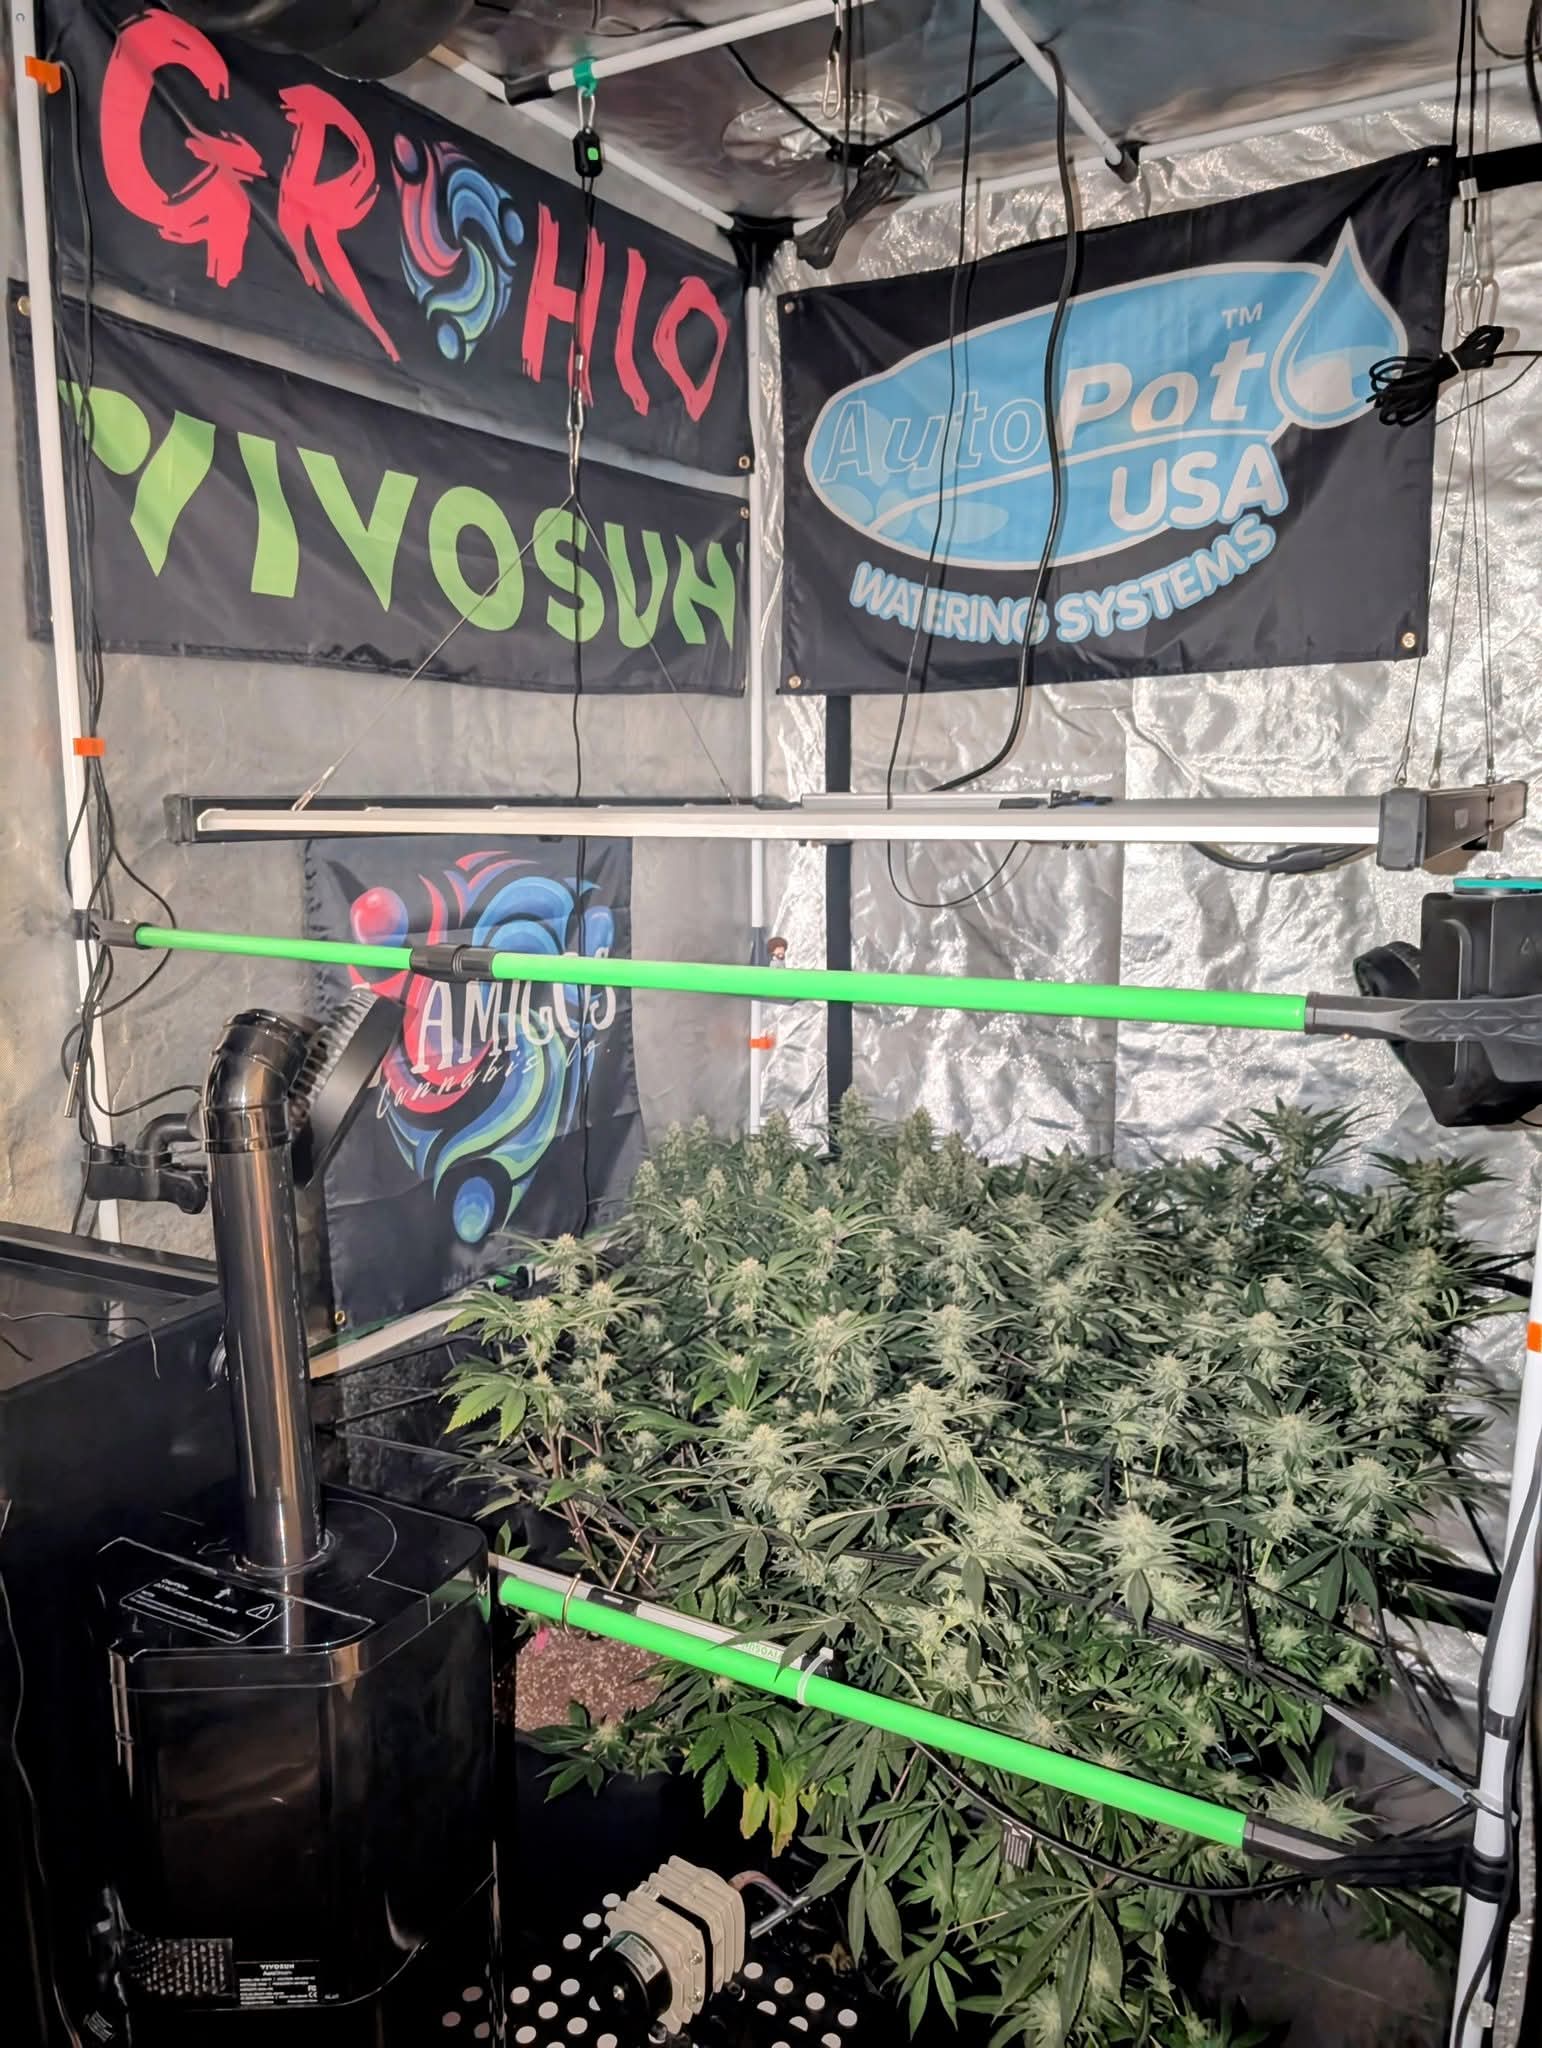
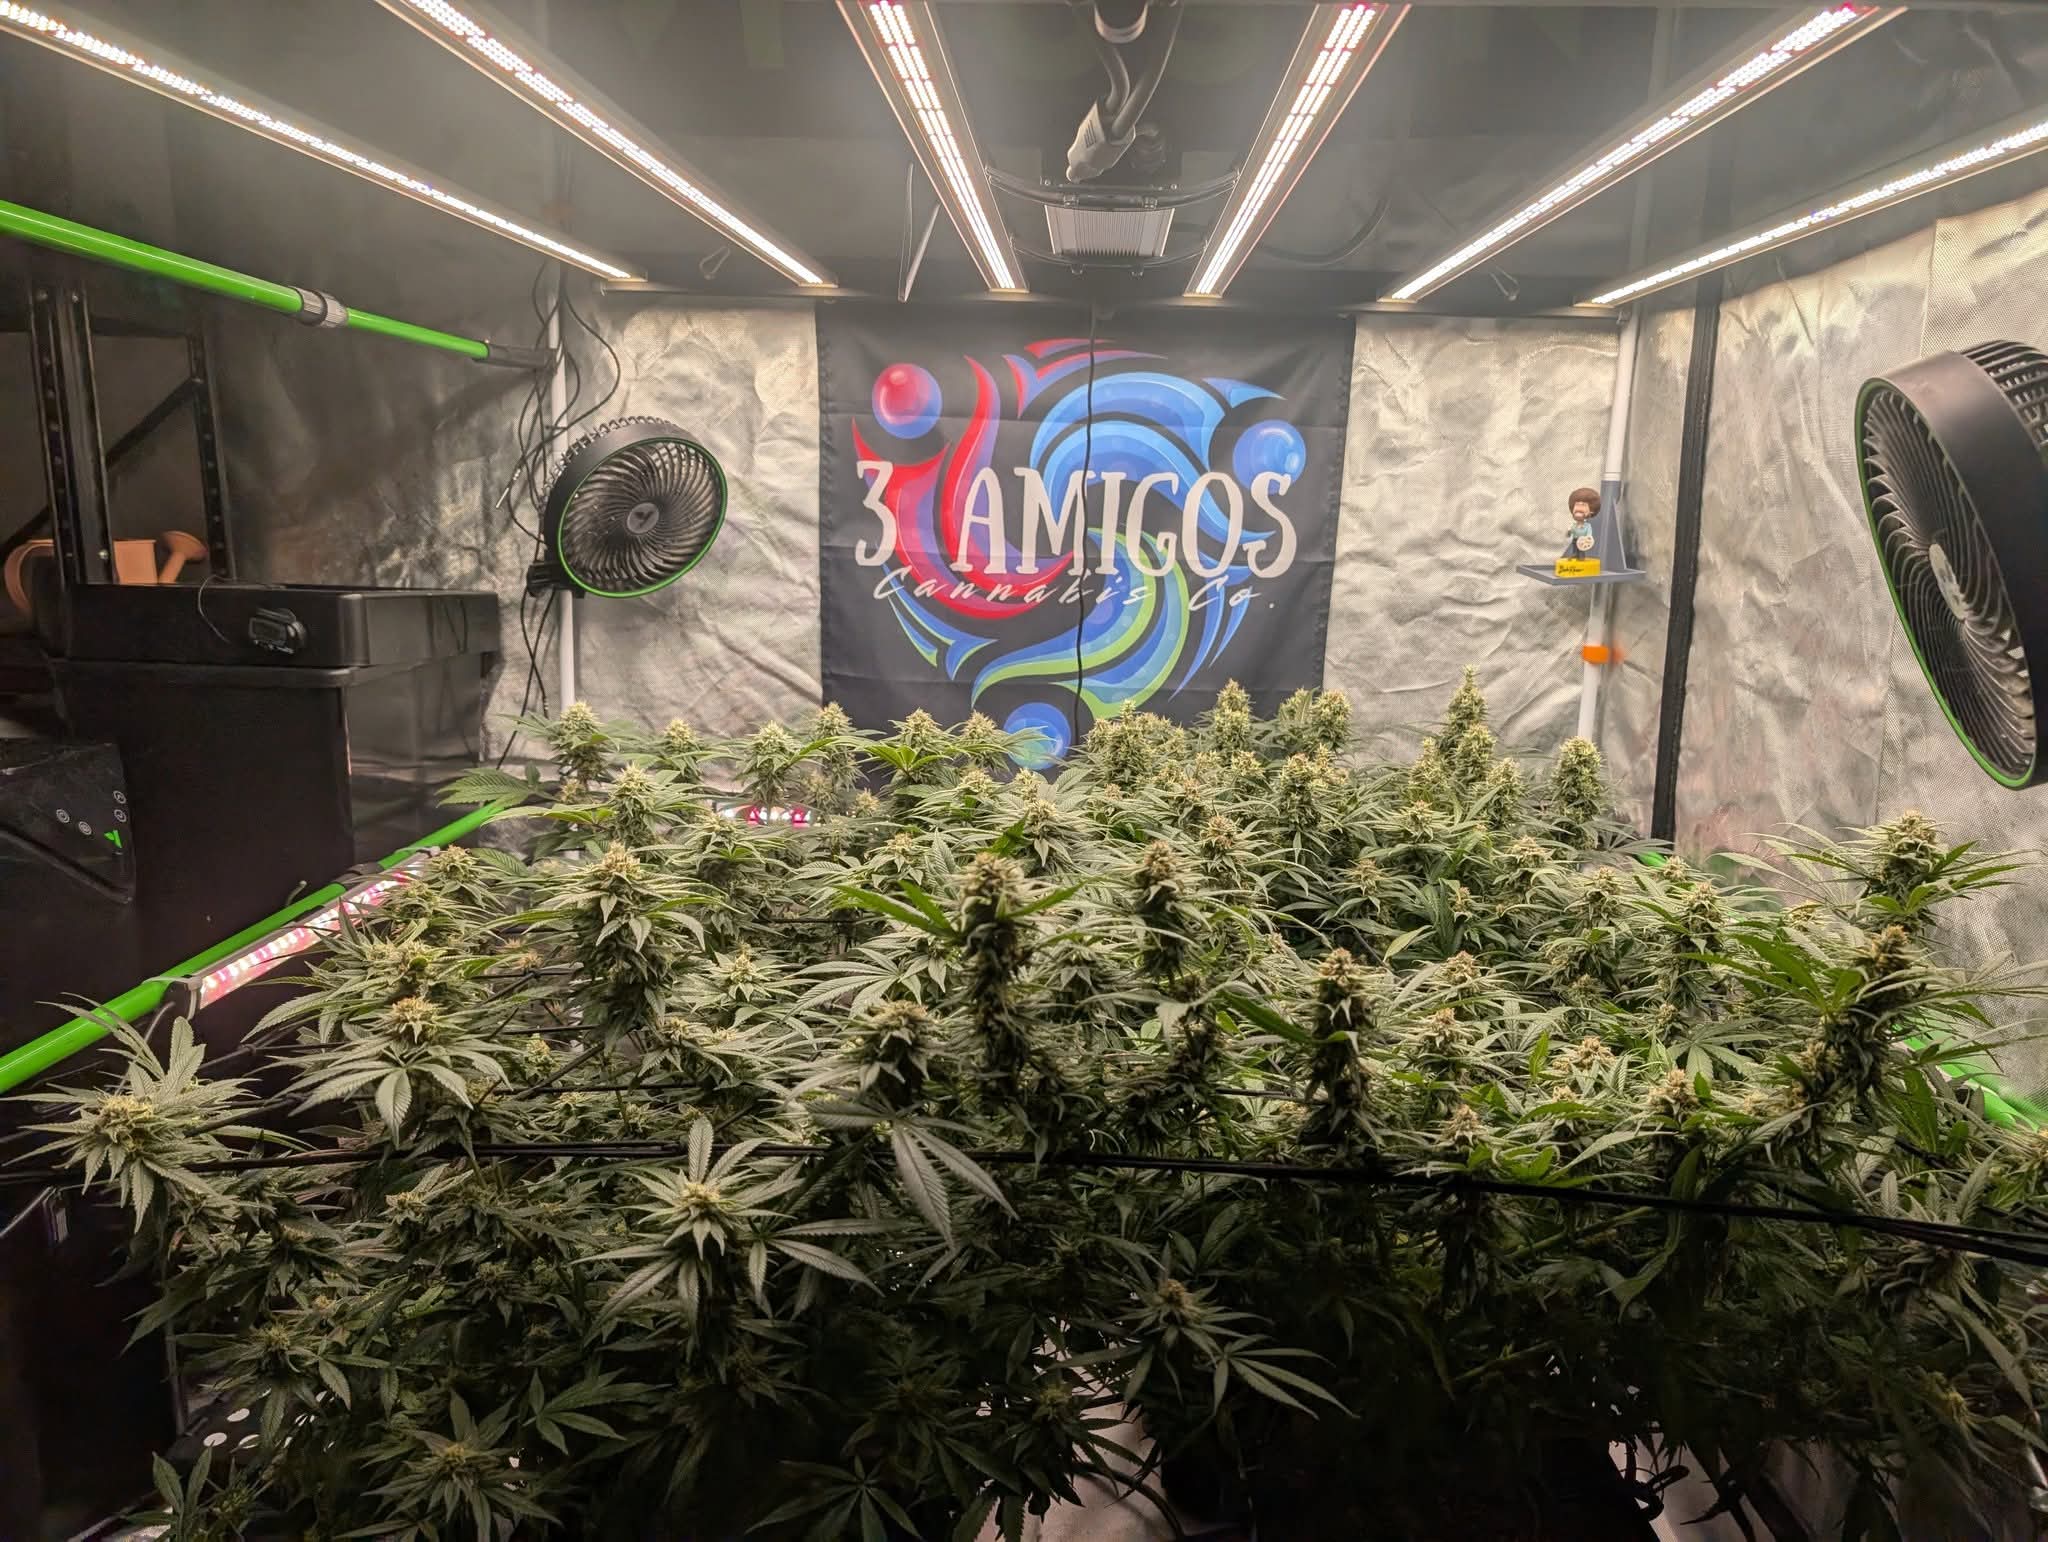
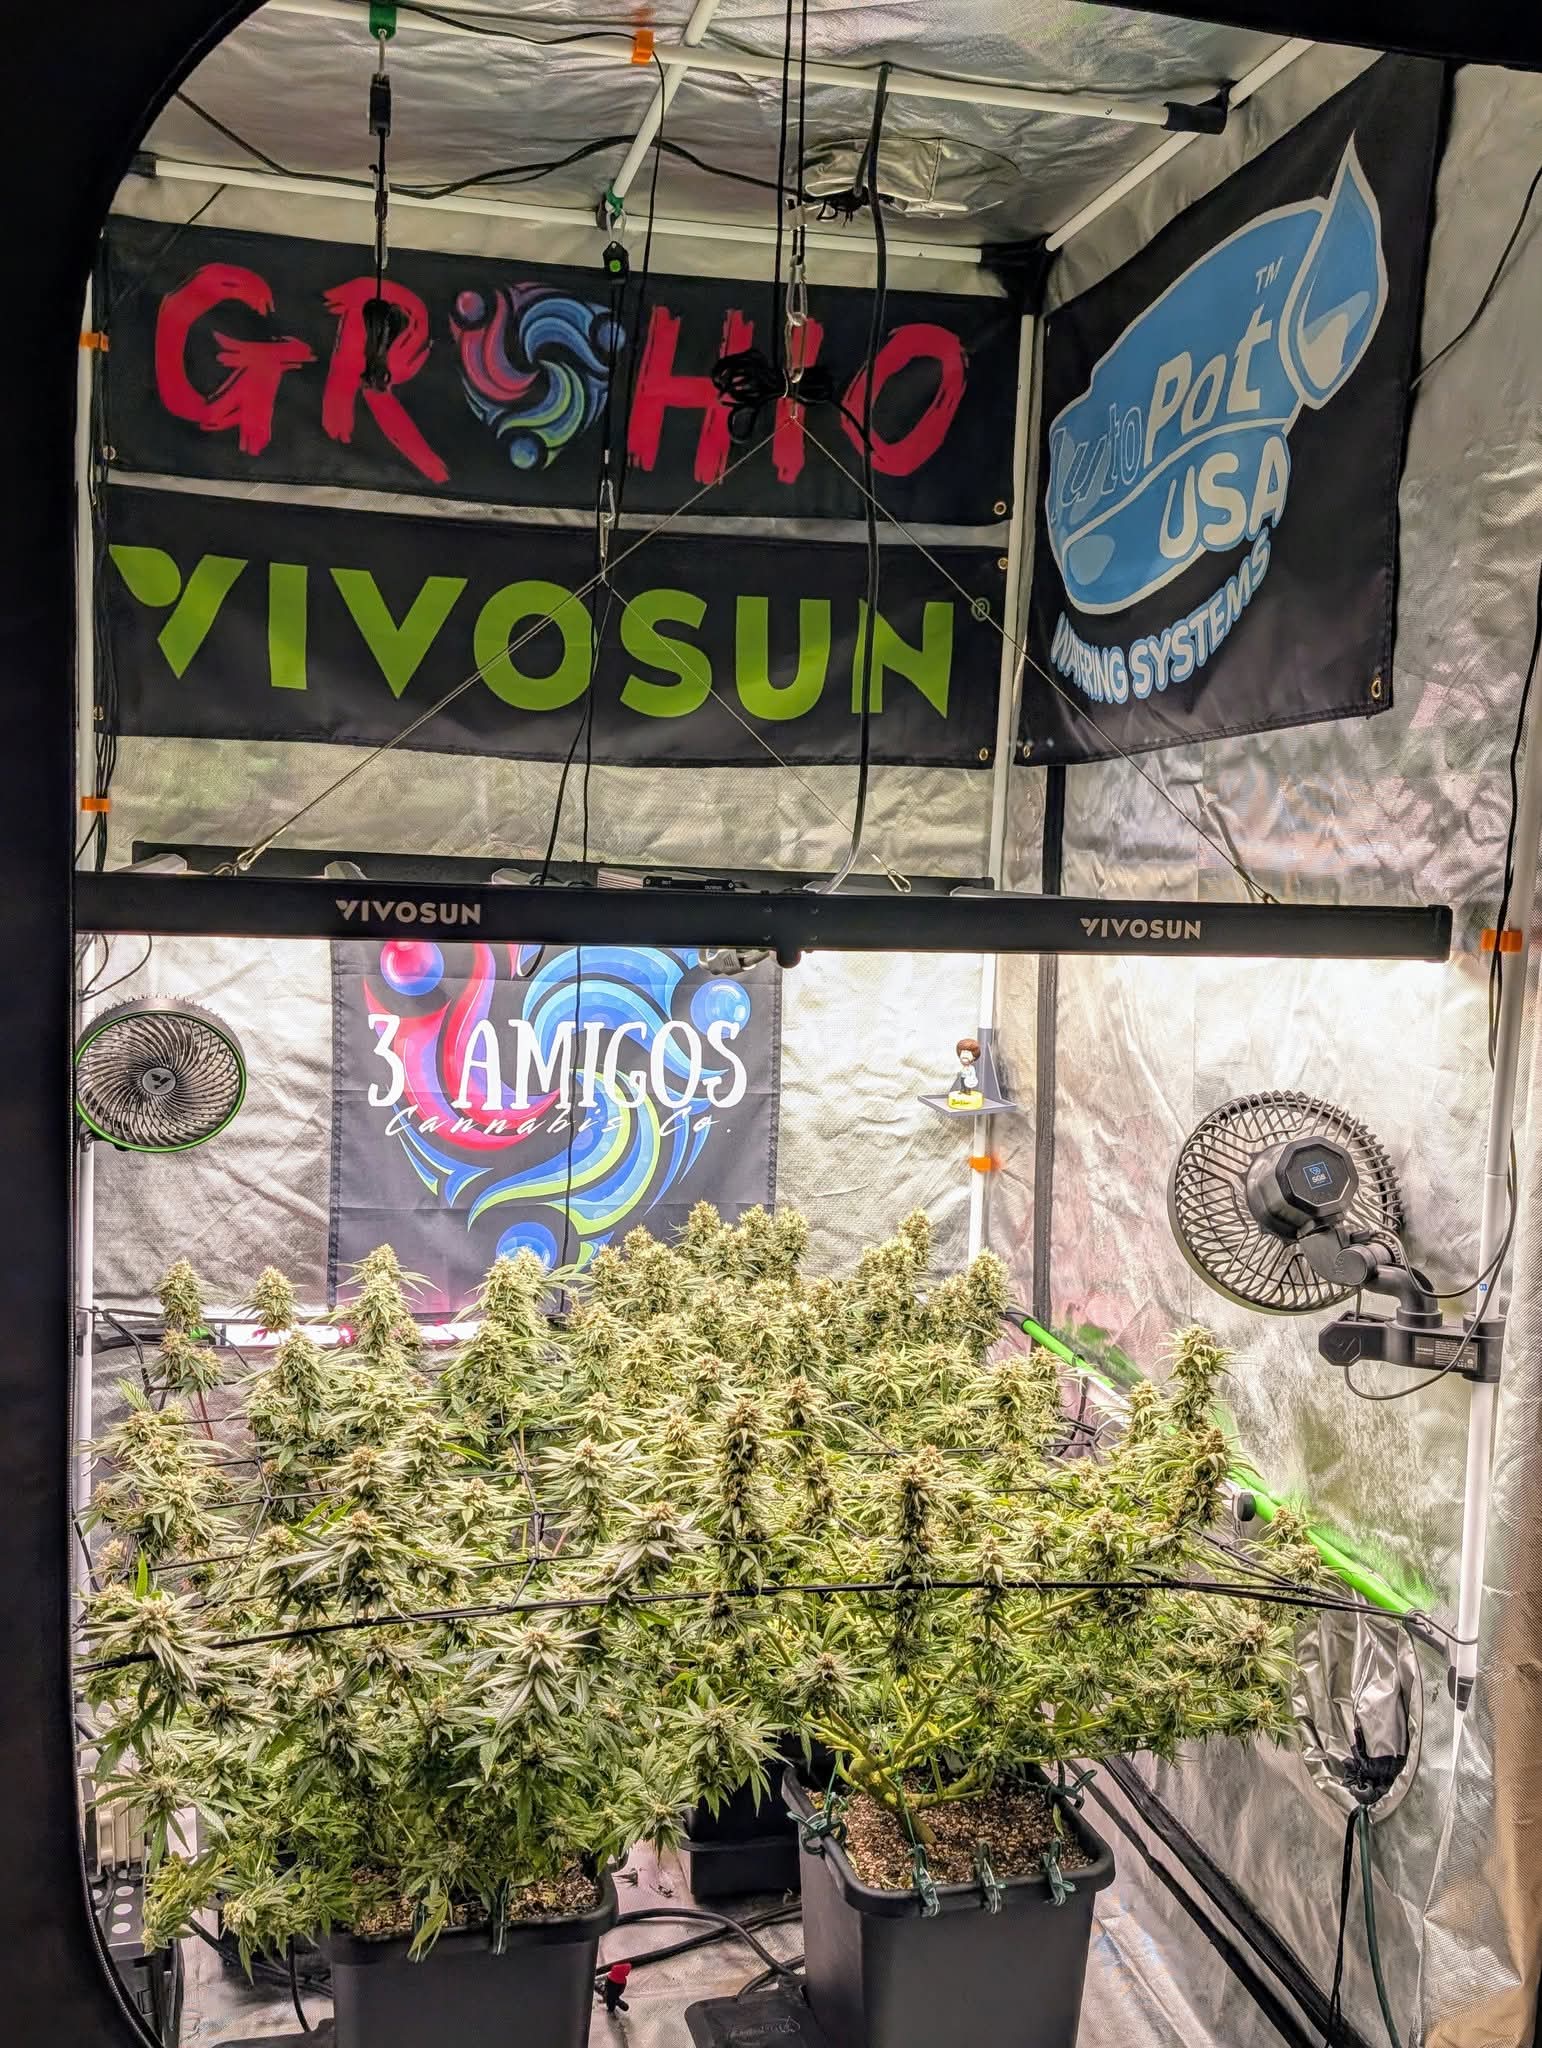
Indoor Showcase
A look inside a simple, effective indoor tent setup.
☀️ The Ohio Outdoor Grower's Guide
Ready to use the power of the sun? Outdoor growing is fantastic. It's cheap, the yields can be massive, and the sun provides a light spectrum that even the best LEDs can't fully replicate. However, growing in Ohio means you are battling our specific climate: high humidity, summer storms, and fall rain.
Chapter 1: Planning Your Outdoor Grow
Site Selection: Sun and Security
- Security First (See Legal Tab):** Your grow MUST be hidden from the public (solid fence) and secure from kids. This is the #1 rule. A visible grow *will* get stolen or reported.
- Find the Sun: This is the most important factor. Your plants need at least 6-8 hours of direct, non-stop sunlight per day. The more, the better. Scout your yard for a whole day. Watch where the sun hits and for how long. Morning sun is especially good, as it helps dry the dew off the leaves and prevent mold.
- Water Access: A 7-foot plant drinks gallons of water every hot day. Make sure you have a hose nearby or are prepared to haul a *lot* of water.
- Breeze: Good airflow is your best friend. A spot with a gentle, consistent breeze will help fight humidity and keep mold away. Avoid corners of your yard where air gets trapped.
When to Start: The Ohio Calendar
- Germinate Indoors (April 15th - May 1st): Start your seeds inside under a simple, cheap light. This gives them a 4-6 week head start, making them strong before they go outside.
- Plant Outside (May 20th - June 1st): Do NOT plant outside until after Ohio's last frost date. A good rule of thumb is "after Memorial Day weekend." A late frost *will* kill your seedlings.
- Veg Stage (June - Early August): Your plants will grow like crazy with the long summer days.
- Flower Stage (Mid-August - October): As the days get shorter, your plants will naturally start to flower.
- Harvest (Late Sept - Mid-October): This is the race! You need to harvest before the first hard frost (which kills plants) or the cold, rainy weather of late October (which causes bud rot).
Chapter 2: Soil & Feeding
Soil Prep: Beating the Clay
Ohio's native soil is notoriously heavy clay, which drains poorly and can suffocate roots. You cannot just dig a hole and drop a plant in. Drainage is life.
- In-Ground Preparation: Dig a hole much larger than you think you need (at least 3-4 feet wide and 2 feet deep). Remove all the clay and replace it with a 50/50 mix of high-quality compost (or peat moss) and a drainage amendment like perlite, rice hulls, or coarse sand. This creates a "perfect pocket" for your roots.
- Raised Beds: This is the best solution. Building a simple 3x3 or 4x4 raised bed and filling it entirely with premium, well-draining soil is a game-changer. It bypasses the clay problem entirely and heats up faster in the spring.
Pots: Best Option for Mobility
- Why: Growing in fabric pots (10-gallon minimum, 20-50 gallons for monsters) gives you two massive advantages: control over your soil and the ability to move the plant.
- Moving Strategy: If a major thunderstorm, hail, or a long period of heavy, cold rain is forecast in September/October, you can move your pots under a patio or into a garage for protection. This prevents bud rot, which is often triggered by excessive late-season moisture.
- Watering: Downside is you must water constantly, maybe even twice a day in the hottest parts of the summer, as pots dry out fast.
Our Outdoor Nutrient & Soil Strategy
Outdoors, we feed the soil, not just the plant. We build a rich, living "super soil" and supplement with natural, organic inputs.
- Base Nutrients: We're big fans of the Humboldt's Secret line here as well, especially their base nutes. For an all-natural, local (Ohio) alternative, Meigs Fertilizer (like their "All-Purpose") is a fantastic granular feed you can mix into your soil.
- Bloom Boosters: During flower, we add Humboldt's Secret Sweet & Sticky to feed the microbes and boost terpene production.
- The Old-School Secret: We add a tablespoon of unsulphured blackstrap molasses per gallon of water about once every 1-2 weeks. It's cheap, natural, and loaded with sugars and micronutrients that soil microbes love. This is one of the oldest tricks in the book for better tasting, stickier buds.
Chapter 3: The Ohio Climate Battle
The Number One Threat: Humidity & Bud Rot
Ohio's summers bring high nighttime humidity and heavy dew, creating a perfect storm for Bud Rot (Botrytis). Prevention is the only cure.
- Defoliation: Strategically remove large, inner fan leaves, especially in August. This opens up the plant's canopy, allowing air and sunlight to penetrate the dense inner buds where rot starts.
- Morning Shake: After any rain or heavy dew, go out and gently shake the branches. This knocks off standing water that provides a breeding ground for spores.
- Airflow: Position plants where they get constant air movement. If they are in a sheltered space, consider placing a simple fan to move air around them during the day.
Heat and Drought Stress
Outdoor plants are exposed to intense afternoon sun and high temperatures, which can lead to stress and nutrient lockout.
- Mulch: Cover the top of the soil (in pots or in-ground) with a thick layer of straw, wood chips, or cover crop. This acts like insulation, keeping the roots cool and dramatically reducing the amount of water lost to evaporation.
- Mid-Day Shade: If temperatures spike above 90°F (32°C), even 2-3 hours of afternoon shade can save your plant from heat stress. Shade cloth or a temporary structure is recommended.
Chapter 4: Outdoor Pest Defense (The War)
Outdoors, you are fighting every pest in the neighborhood. Your strategy must be preventative. See "Our Gear" for our full arsenal.
- Japanese Beetles: These are devastating in Ohio. They chew holes through leaves and can quickly defoliate a small plant. Do NOT use pheromone traps—they attract more beetles than they catch. The best defense is to hand-pick them in the morning when they are sluggish and drop them into soapy water.
- Caterpillars (Budworms): These are the worst because they burrow inside the buds. Start a preventative spray schedule using BT (Bacillus thuringiensis), an organic, caterpillar-specific bacteria, once flowering starts in August. This is completely safe to spray directly on the buds.
- General Pests (Mites, Aphids): We use a rotation of Lost Coast Plant Therapy and Neem Oil as a preventative spray every 7-10 days *during the vegetative stage* to keep populations low. (Avoid spraying any oils on buds in the flower stage).
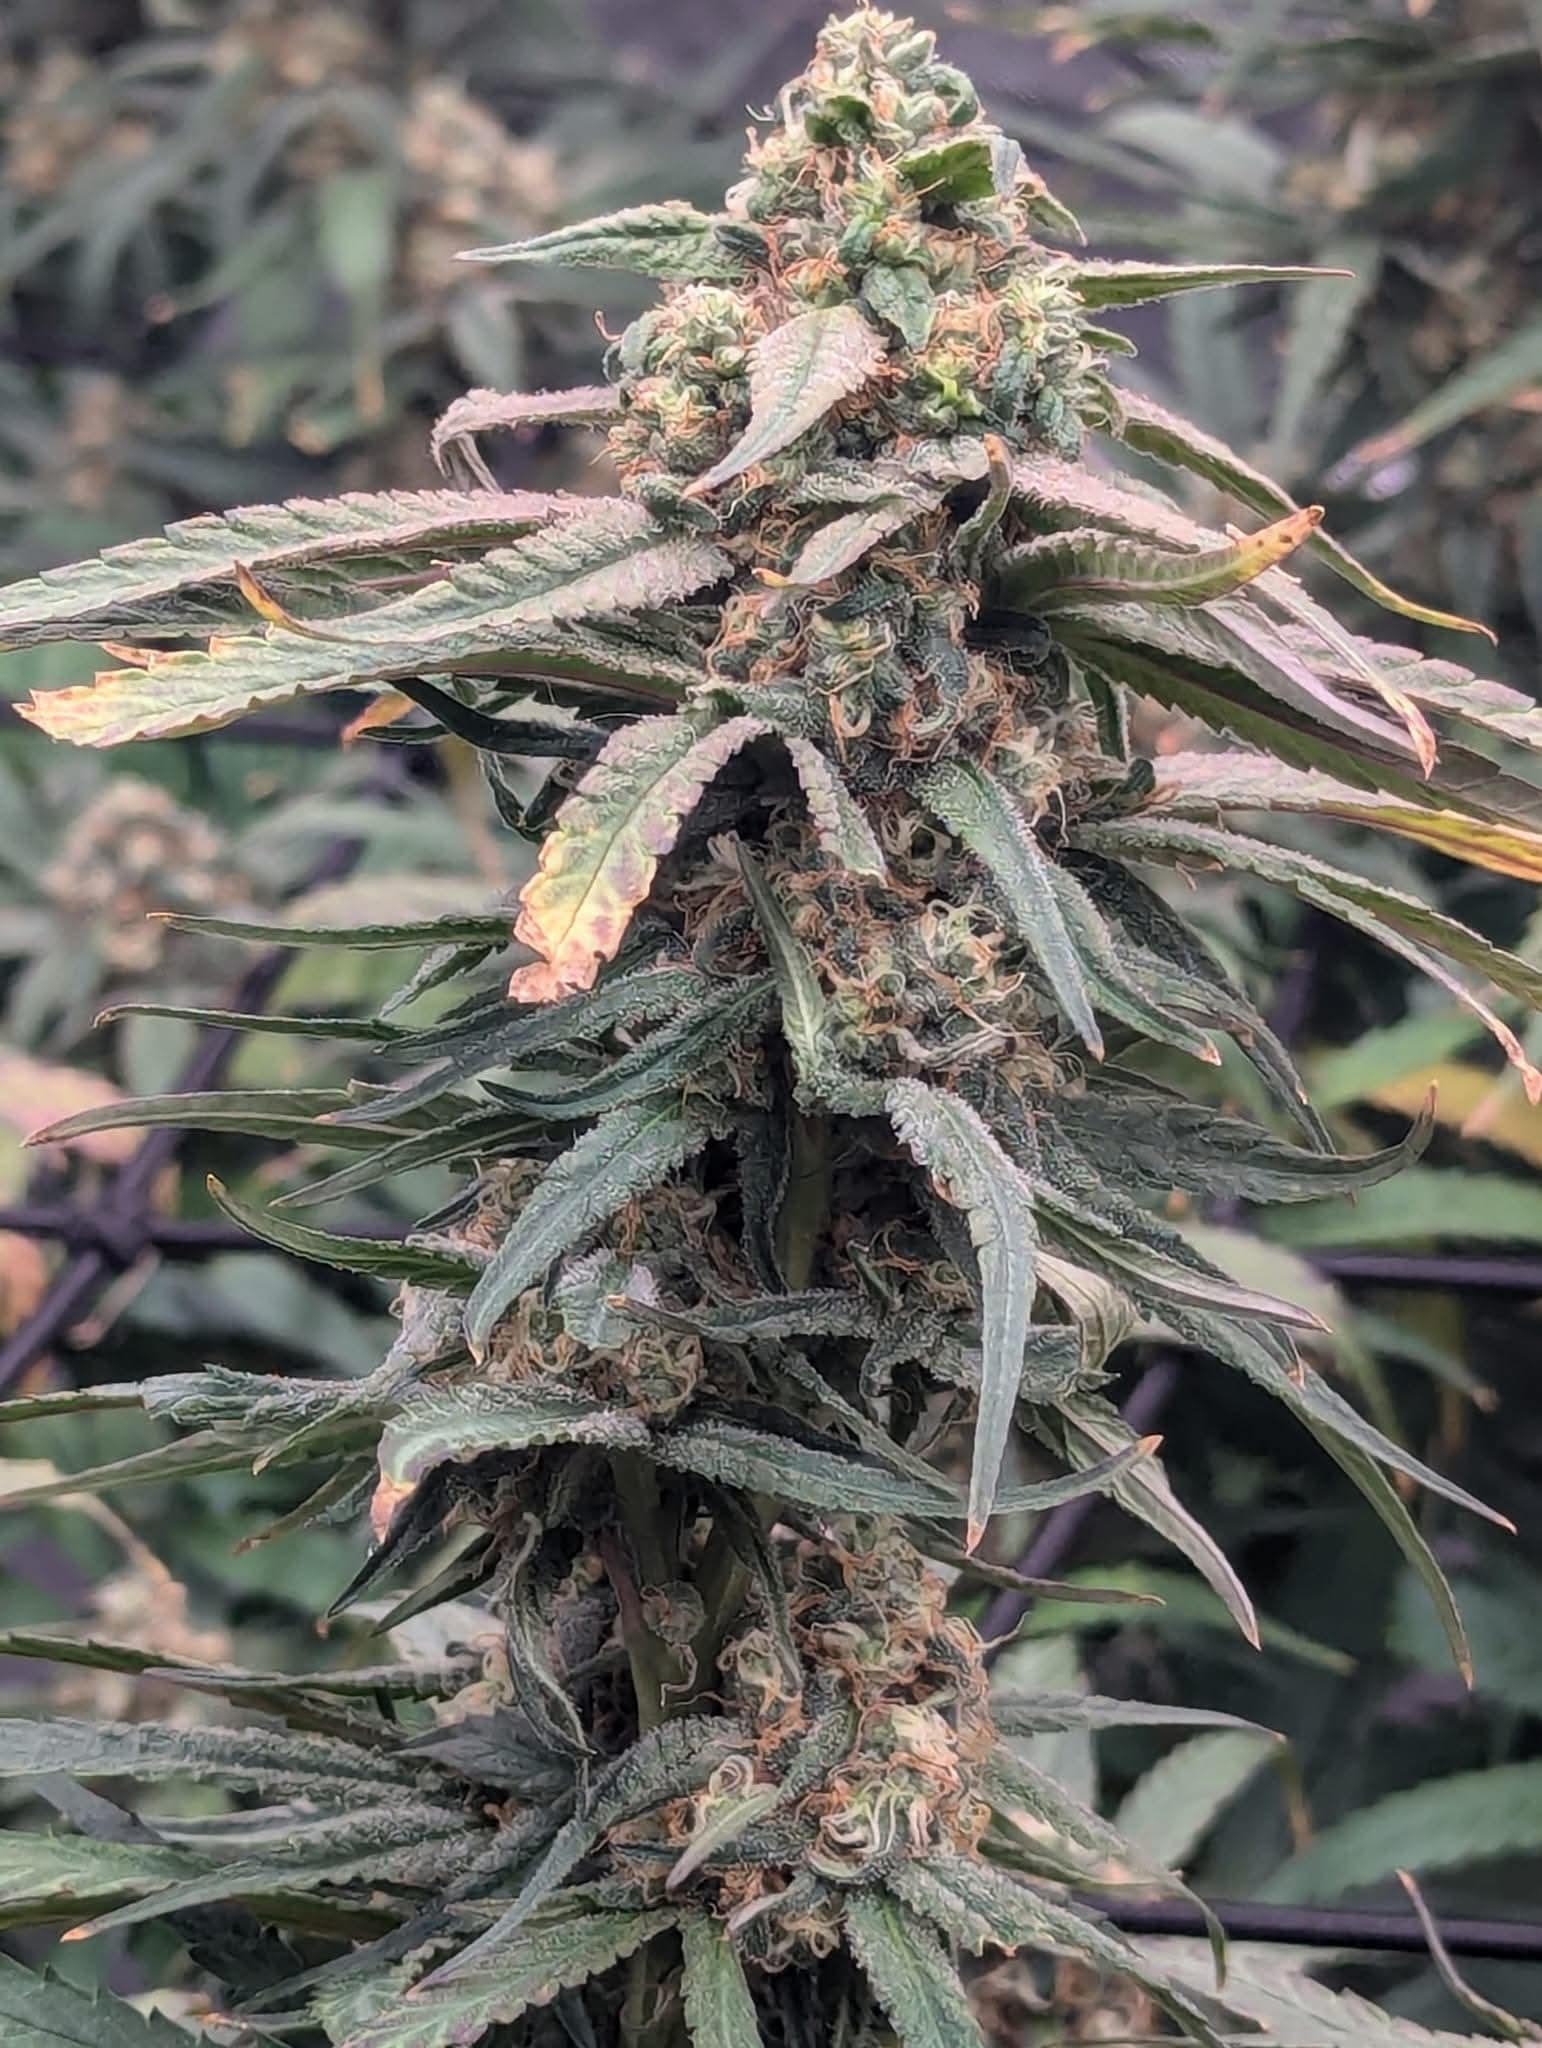
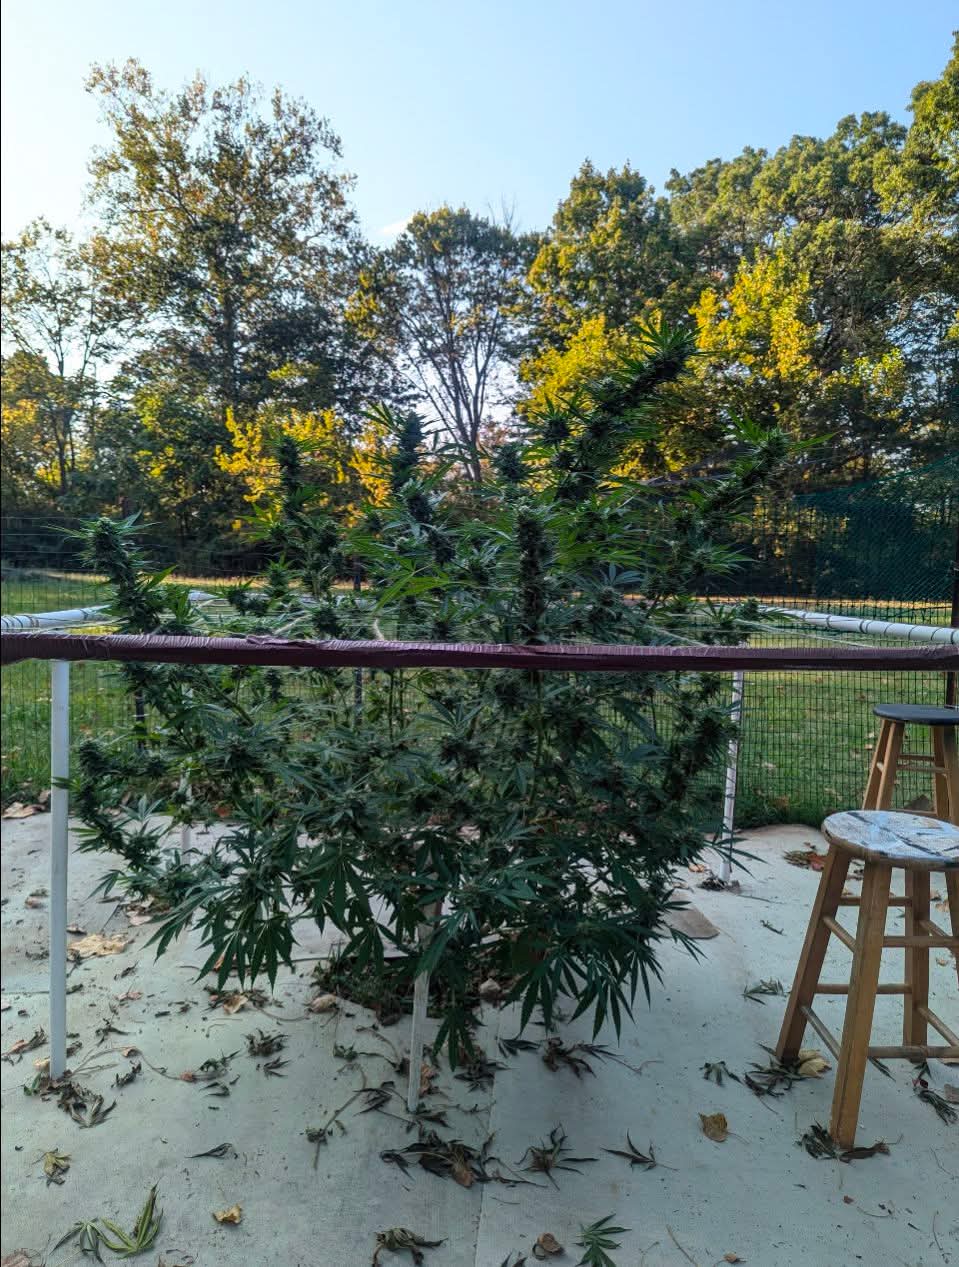
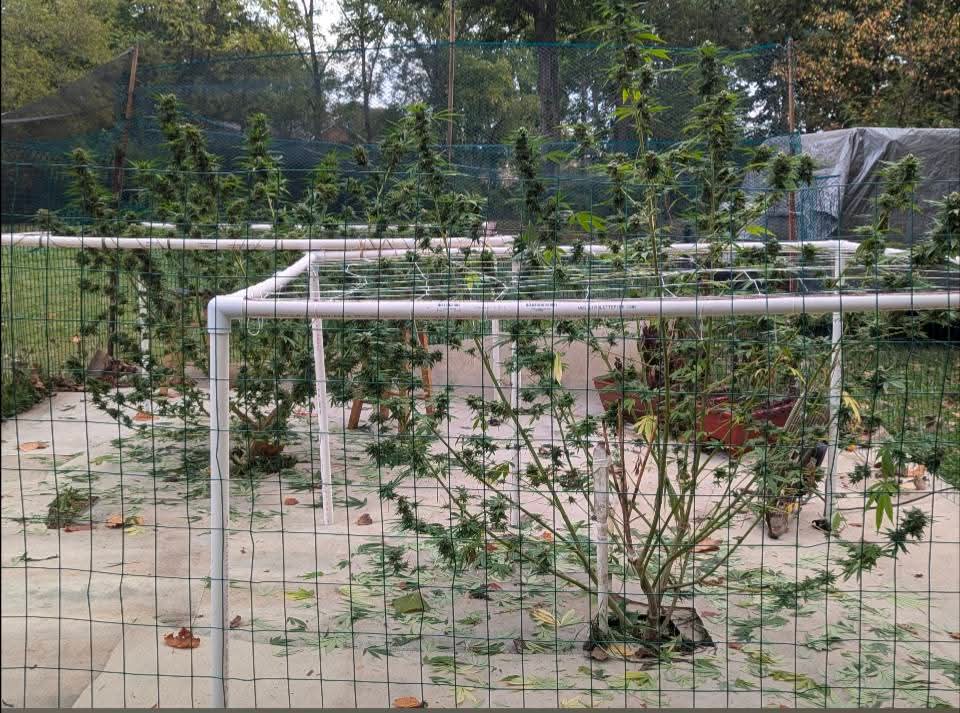
Outdoor Success!
See what's possible when you use the sun and battle the elements correctly. The 3 Amigos celebrating a successful harvest.
🧬 Strains & Genetics: Picking Your Perfect Plant
Walking into a seed store (or website) is overwhelming. You'll see hundreds of strains with crazy names. What's the difference? This section will help you understand what to look for, so you pick a plant that's right for you and right for your grow room.
Autoflower vs. Photoperiod: The Most Important Choice
This is the first and most important decision you'll make. It determines how your plant knows when to flower (make buds).
Photoperiod Strains (The "Traditional" Way)
- How they work: These plants (the "normal" kind) will keep growing leaves and branches ("Veg") for as long as you give them 18+ hours of light per day.
- The "Flip": You force them to flower by changing your light timer to 12 hours on, 12 hours off. This "flip" to a shorter day tricks them into thinking winter is coming.
- Pros: You have total control. You can keep it in "Veg" for 3 weeks or 3 months to make it as big as you want. You can also take "clones" (cuttings) from it.
- Cons: You must have a light-proof tent. Light leaks during the 12-hour dark period can stress them out and ruin your harvest.
Autoflower Strains (The "Beginner-Friendly" Way)
- How they work: These plants are special. They have a built-in genetic timer. They don't care about the light schedule. They will automatically start flowering on their own after about 3-5 weeks, no matter what.
- Light Cycle: You just set your timer to 18/6 or 20/4 for the entire grow, from seed to harvest. No "flip" needed!
- Pros: Super simple for beginners. No need to worry about light leaks. They usually finish very fast (often 10-12 weeks from seed). Great for outdoor growers who want a quick summer harvest.
- Cons: You can't control when they flower, so you can't make them bigger. They are very sensitive to stress in the first few weeks (like overwatering or transplanting). You can't take clones.
Indica vs. Sativa vs. Hybrid: The Terminology
You'll see these labels everywhere. Traditionally, this is what they meant:
- Indica: Short, bushy plants with wide leaves. Supposedly give a relaxing, sleepy, "body high" (think "In-da-couch").
- Sativa: Tall, lanky plants with thin leaves. Supposedly give an energetic, creative, "head high."
- Hybrid: A mix of both.
The Modern Truth: These terms are mostly just for marketing now. Almost *every* strain you buy is a complex "Hybrid." The terms are still useful for describing the plant's *shape* (Indicas are bushy, Sativas are tall), but they are not a reliable way to predict the *effect*. So, what does predict the effect?
Chapter 2: Quality Genetics and Avoiding Bad Breeders
Genetics are the blueprints for your plant. Starting with bad genetics is like building a house on quicksand. Your motto should be: Research the Breeder, not the Strain.
1. Understanding the F-Generation (Stability)
- F1 Hybrid: The result of crossing two true strains (Parent A x Parent B)🌱 F1s are genetically vigorous and uniform. This is the most desirable seed to buy.
- F2 (or higher): The result of breeding F1s together. This creates massive genetic diversity (or "pheno-hunting"). Unless you are an experienced grower looking for a unique trait, avoid F2s, as they are highly unpredictable and often produce weak or unstable plants.
- Clones (Cuttings): A cutting from a healthy "mother" plant. This is a genetic duplicate. Pros: 100% guarantee of plant traits. Cons: Risk of introducing pests (like spider mites) or diseases if you don't trust the source.
2. Avoiding Bro-Science Breeders (The Red Flags)
Buying seeds from a friend of a friend or an unproven source is the fastest way to get a headache. A "breeder" must do years of work to stabilize a strain.
- Lack of Lab Reports: A legitimate breeder should be able to provide basic stability and testing data, especially for common issues like hermaphroditism (hermies, which self-pollinate and ruin your buds with seeds).
- Hermie Risk: The biggest sign of bad genetics is a plant that "herms" (grows male pollen sacs) under small amounts of stress. A good breeder will have bred this trait out. Unstable F2s or untested bag seeds are highly prone to herming.
- Poor Reputation/No History:** Before buying, spend 15 minutes checking community grow forums (like Reddit's r/microgrowery). If you see multiple, verified complaints about a breeder's strain herming or failing to grow, walk away.
3. Selection for Ohio's Climate
When selecting a strain, look for traits that combat our specific Ohio environmental threats:
- Mold Resistance: Look for genetics labeled as Sativa-dominant or Haze-dominant. These strains naturally grow "airier" (less dense) buds, making it harder for mold and bud rot (Botrytis) to take hold in the humid Midwest climate.
- Fast Finishers: For outdoor grows, look for strains that finish flowering in late September or early October. This is critical to avoid the cold, heavy rains and hard frosts that often hit Ohio in late October.
What Really Matters: Cannabinoids & Terpenes
Cannabinoids (The "Effect")
These are the main active chemicals in the plant. The two you need to know are:
- THC: This is the one that produces the psychoactive "high." A strain listed at 25% THC is very strong.
- CBD: This one is non-psychoactive (it doesn't get you "high"). It's known for its calming, anti-anxiety, and anti-inflammatory properties.
- Balanced Strains: Many modern strains have both THC and CBD (like a 1:1 ratio), which many people love for a balanced, less-intense effect.
Terpenes (The "Smell" and "Flavor")
Terpenes are the essential oils in cannabis (and also in things like lemons, pine trees, and lavender). They are what make a plant smell like gas, fruit, or pine. We are now learning that terpenes also guide the high. This is called the "entourage effect."
A strain with 20% THC and a "Limonene" terpene (lemony smell) might feel uplifting, while a strain with 20% THC and a "Myrcene" terpene (musky smell) might feel sleepy. This is why "smell" is often the best way to pick a strain you'll like!
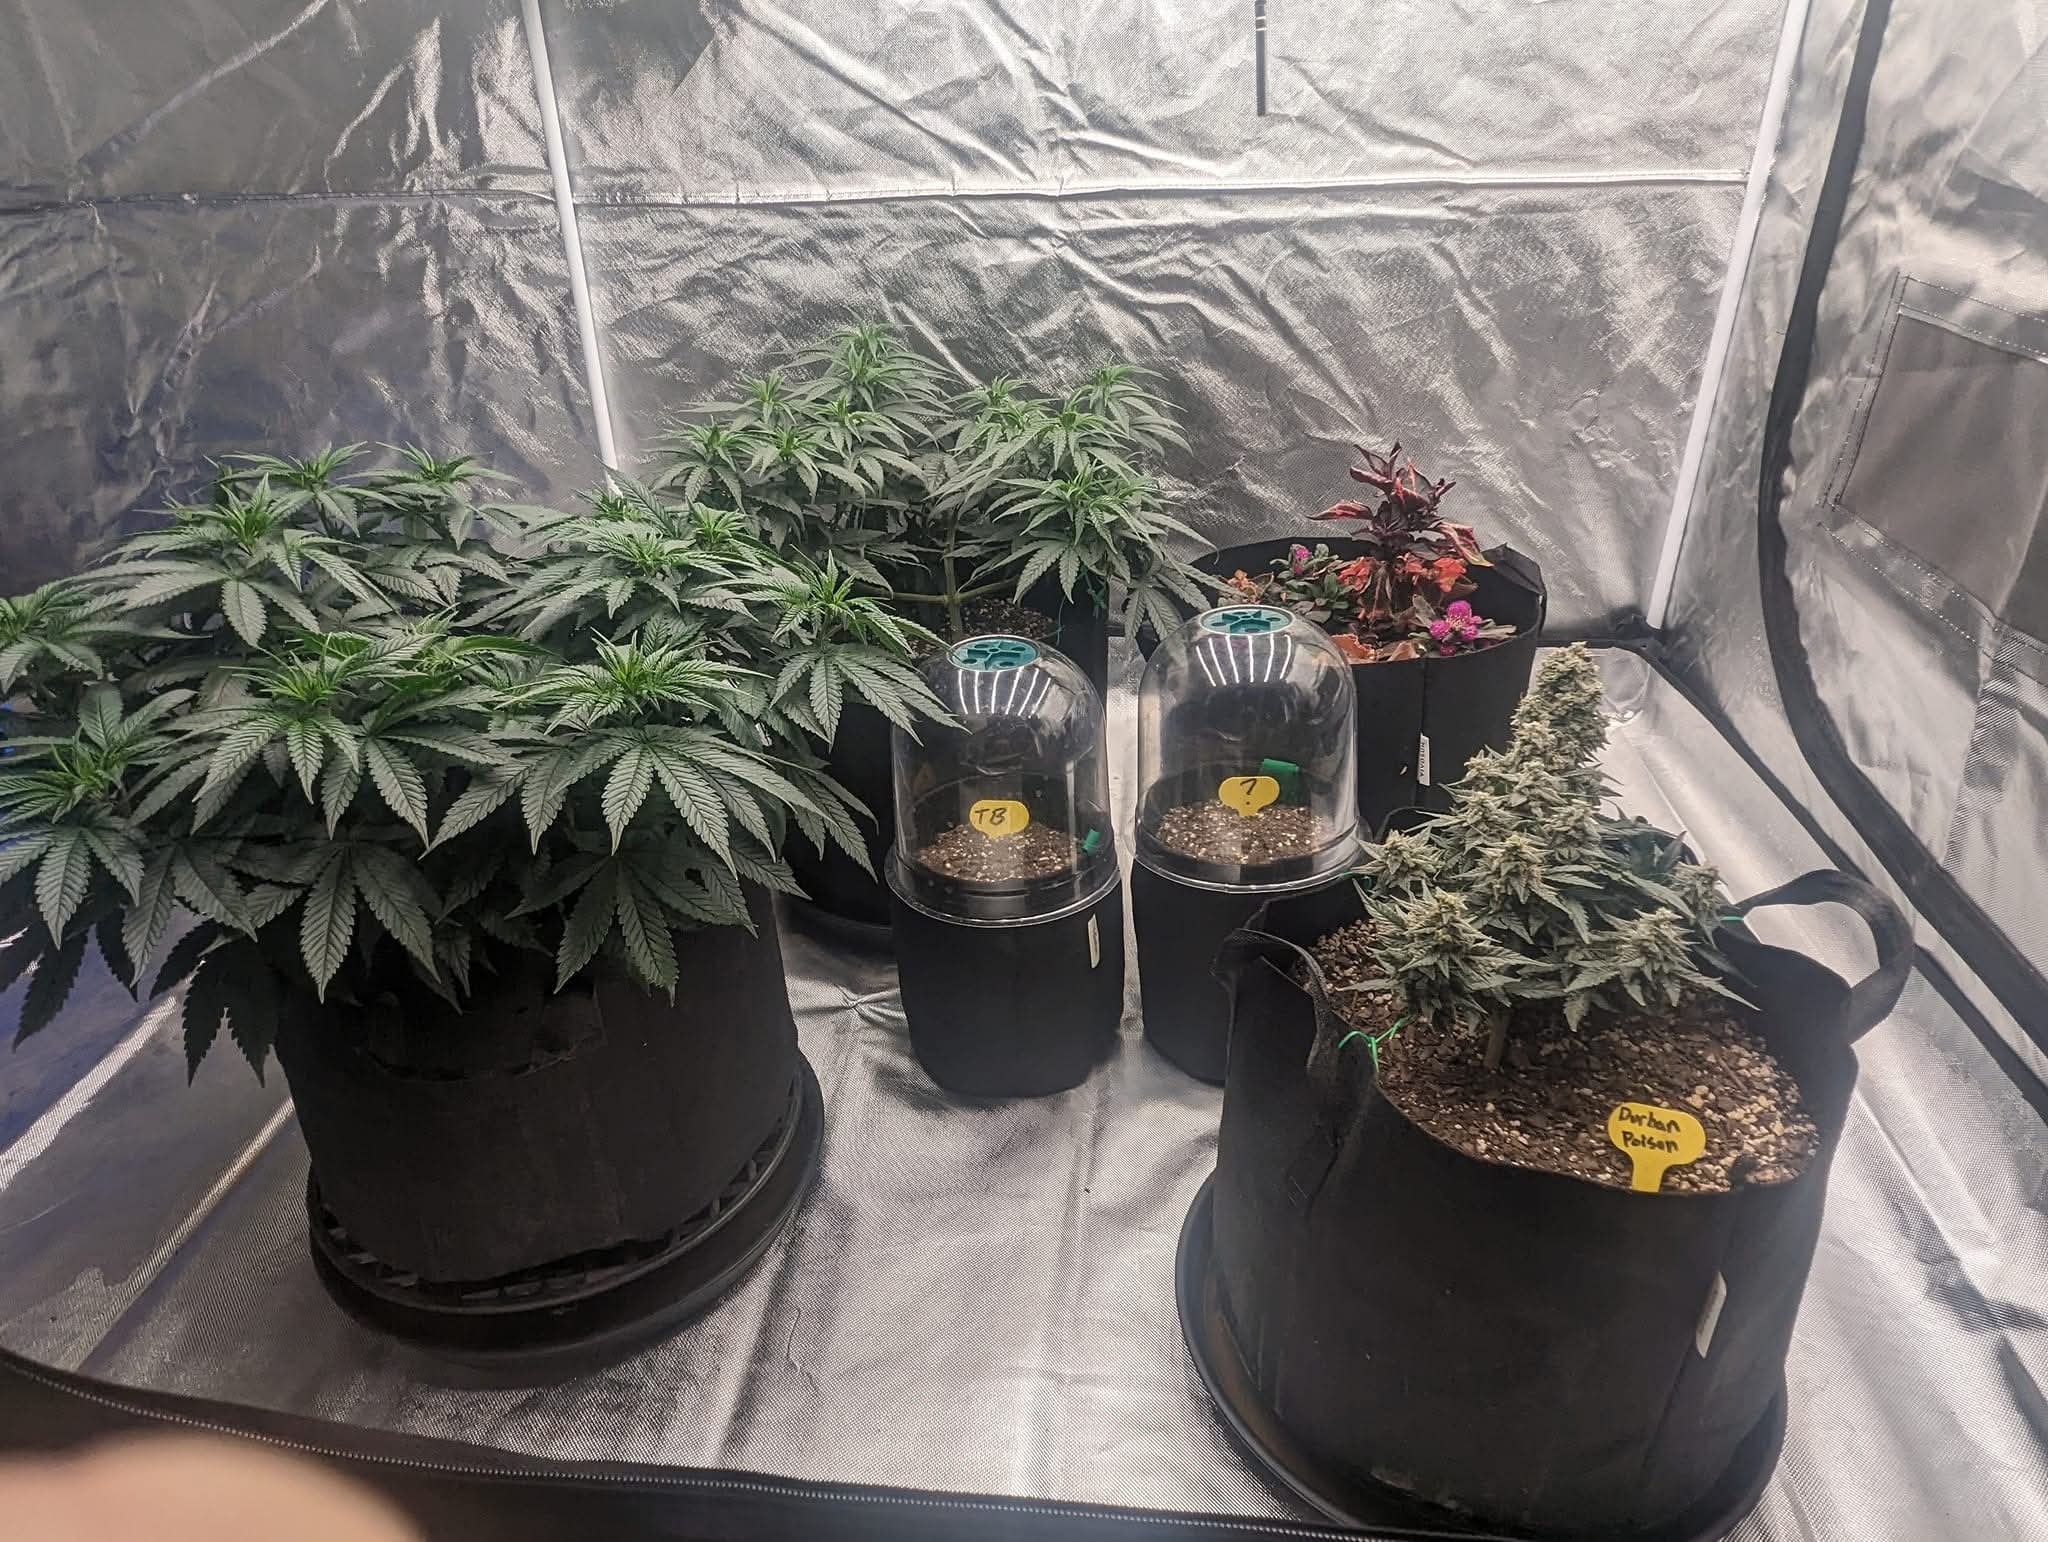
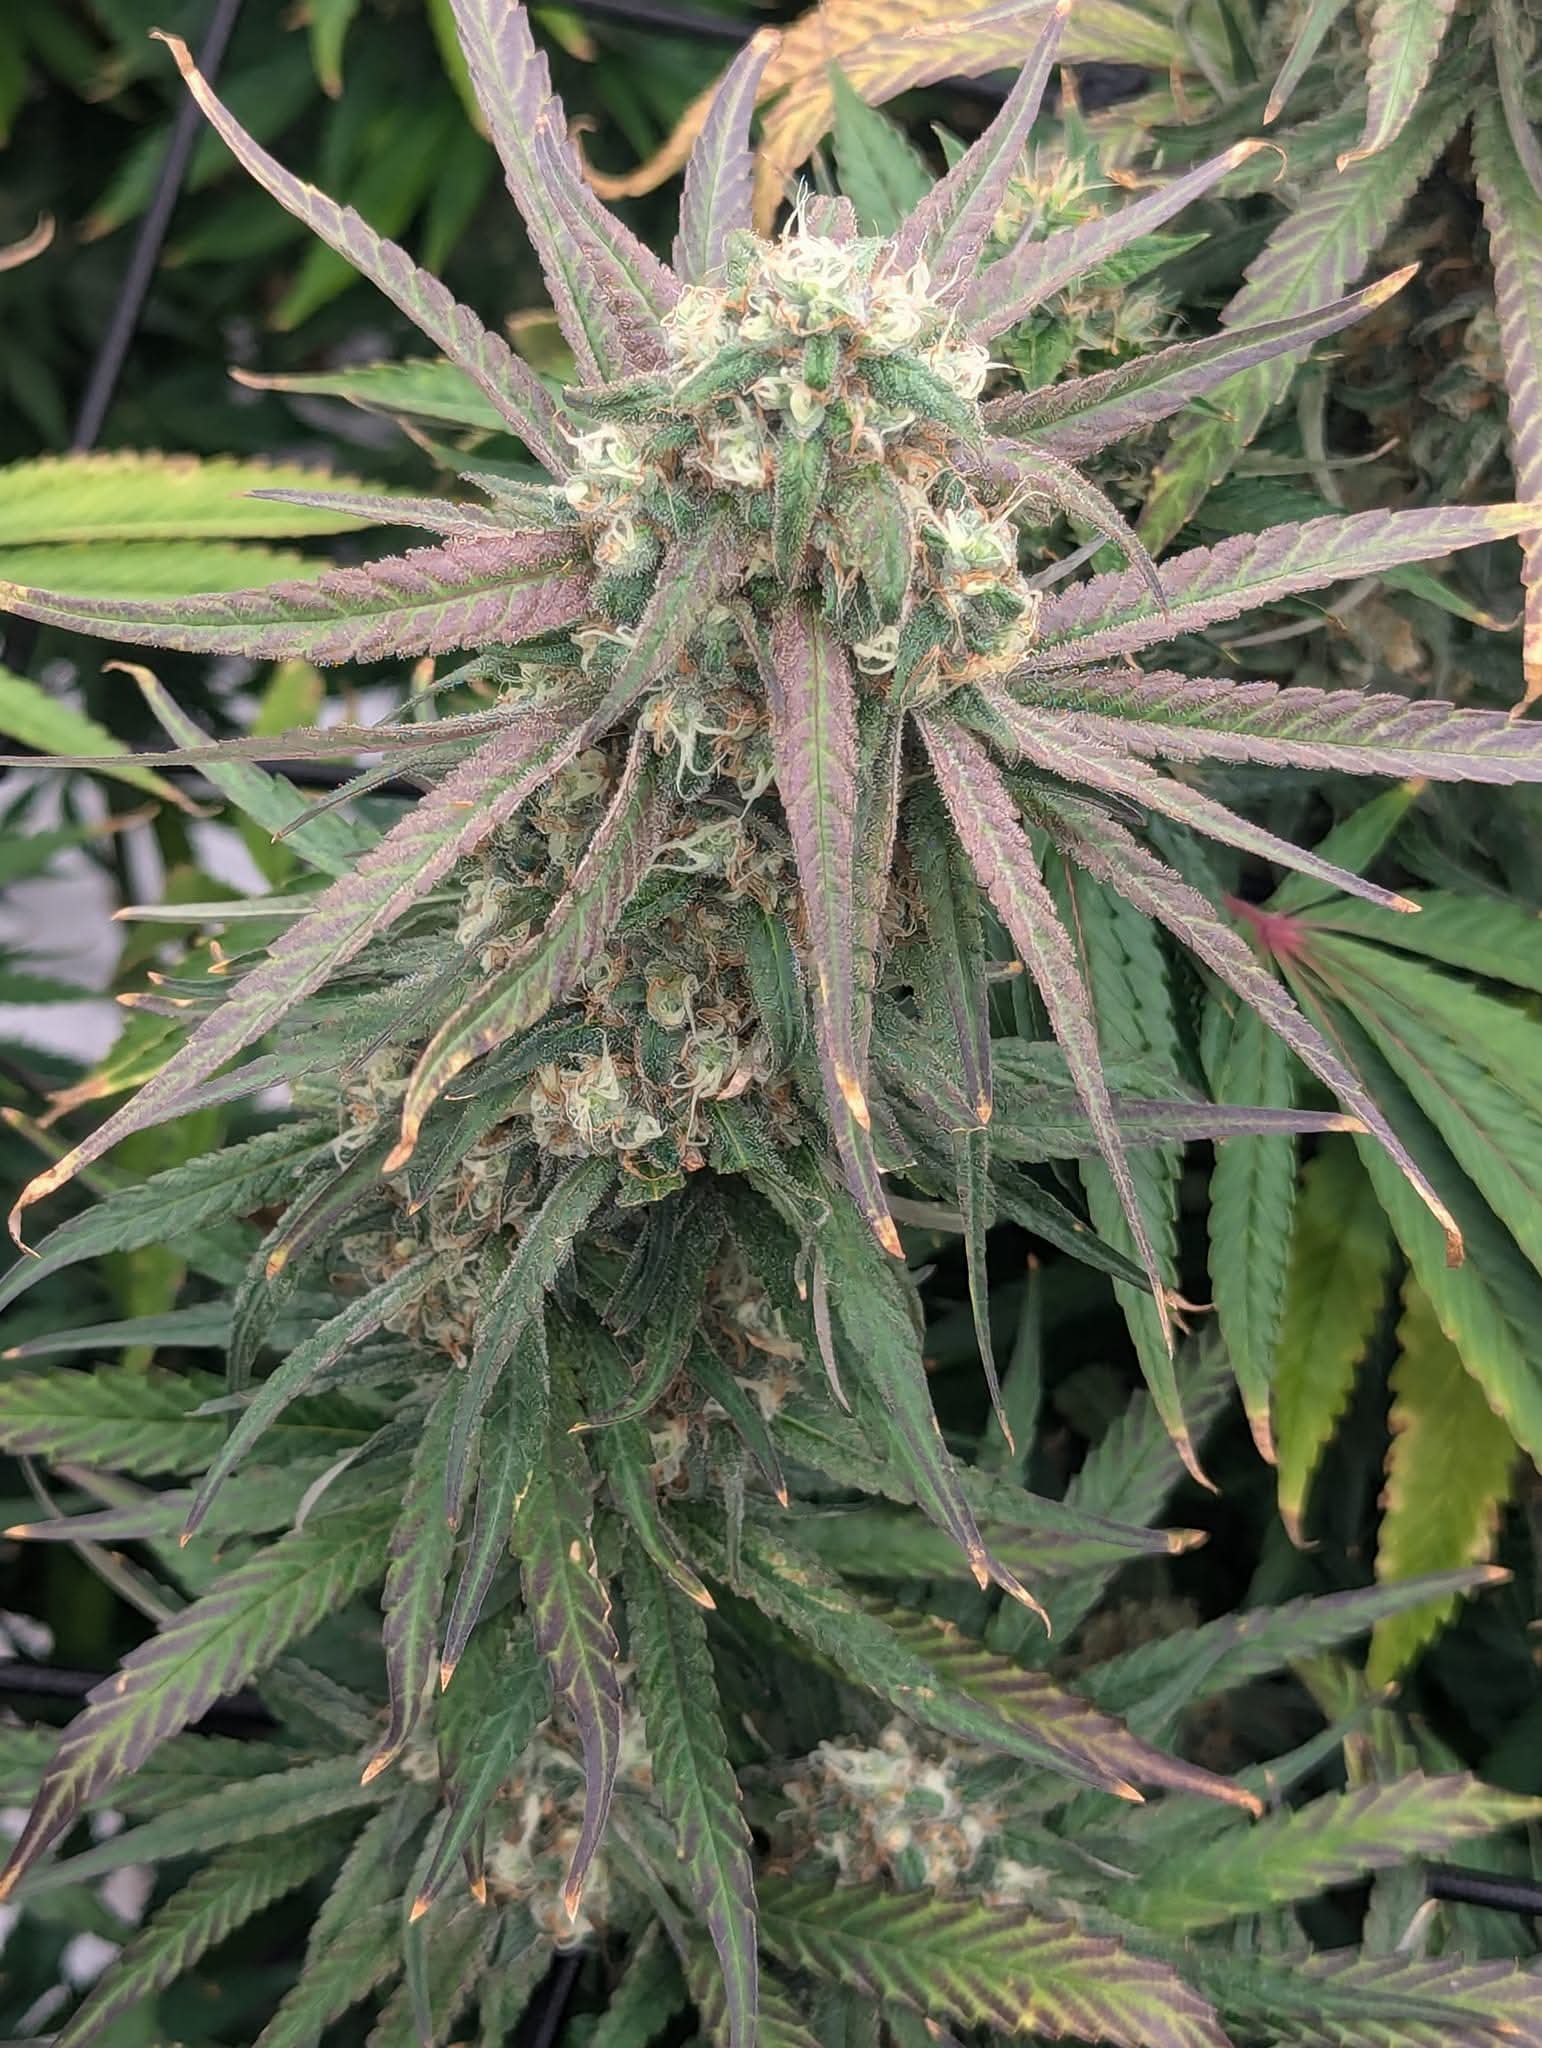
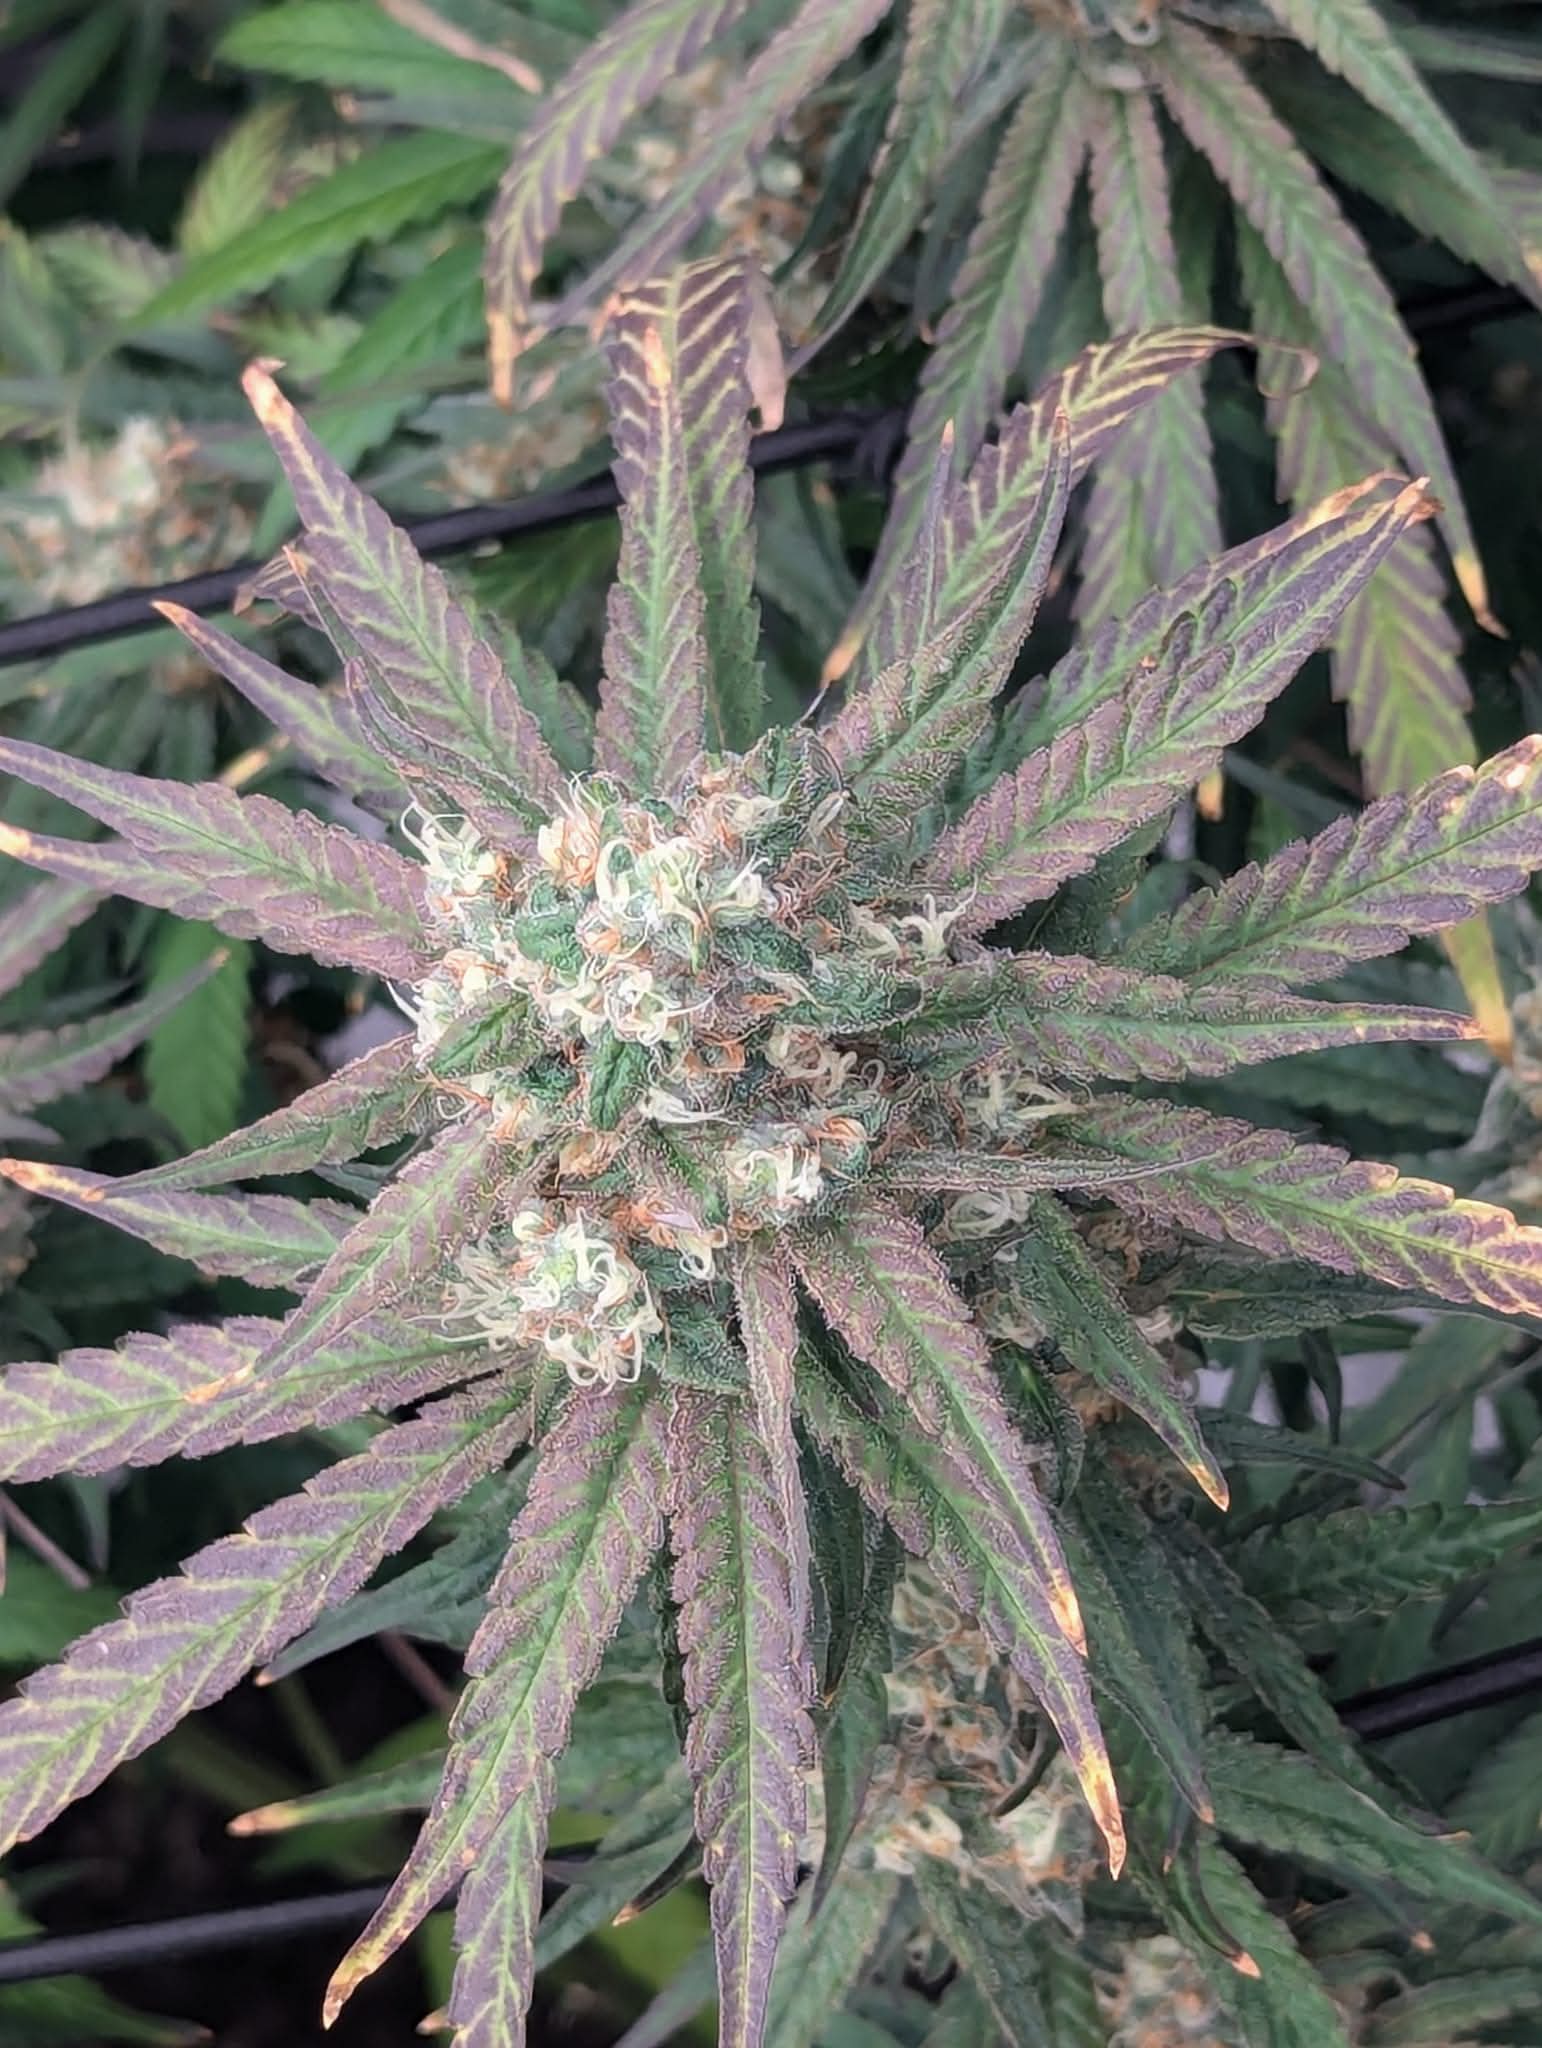
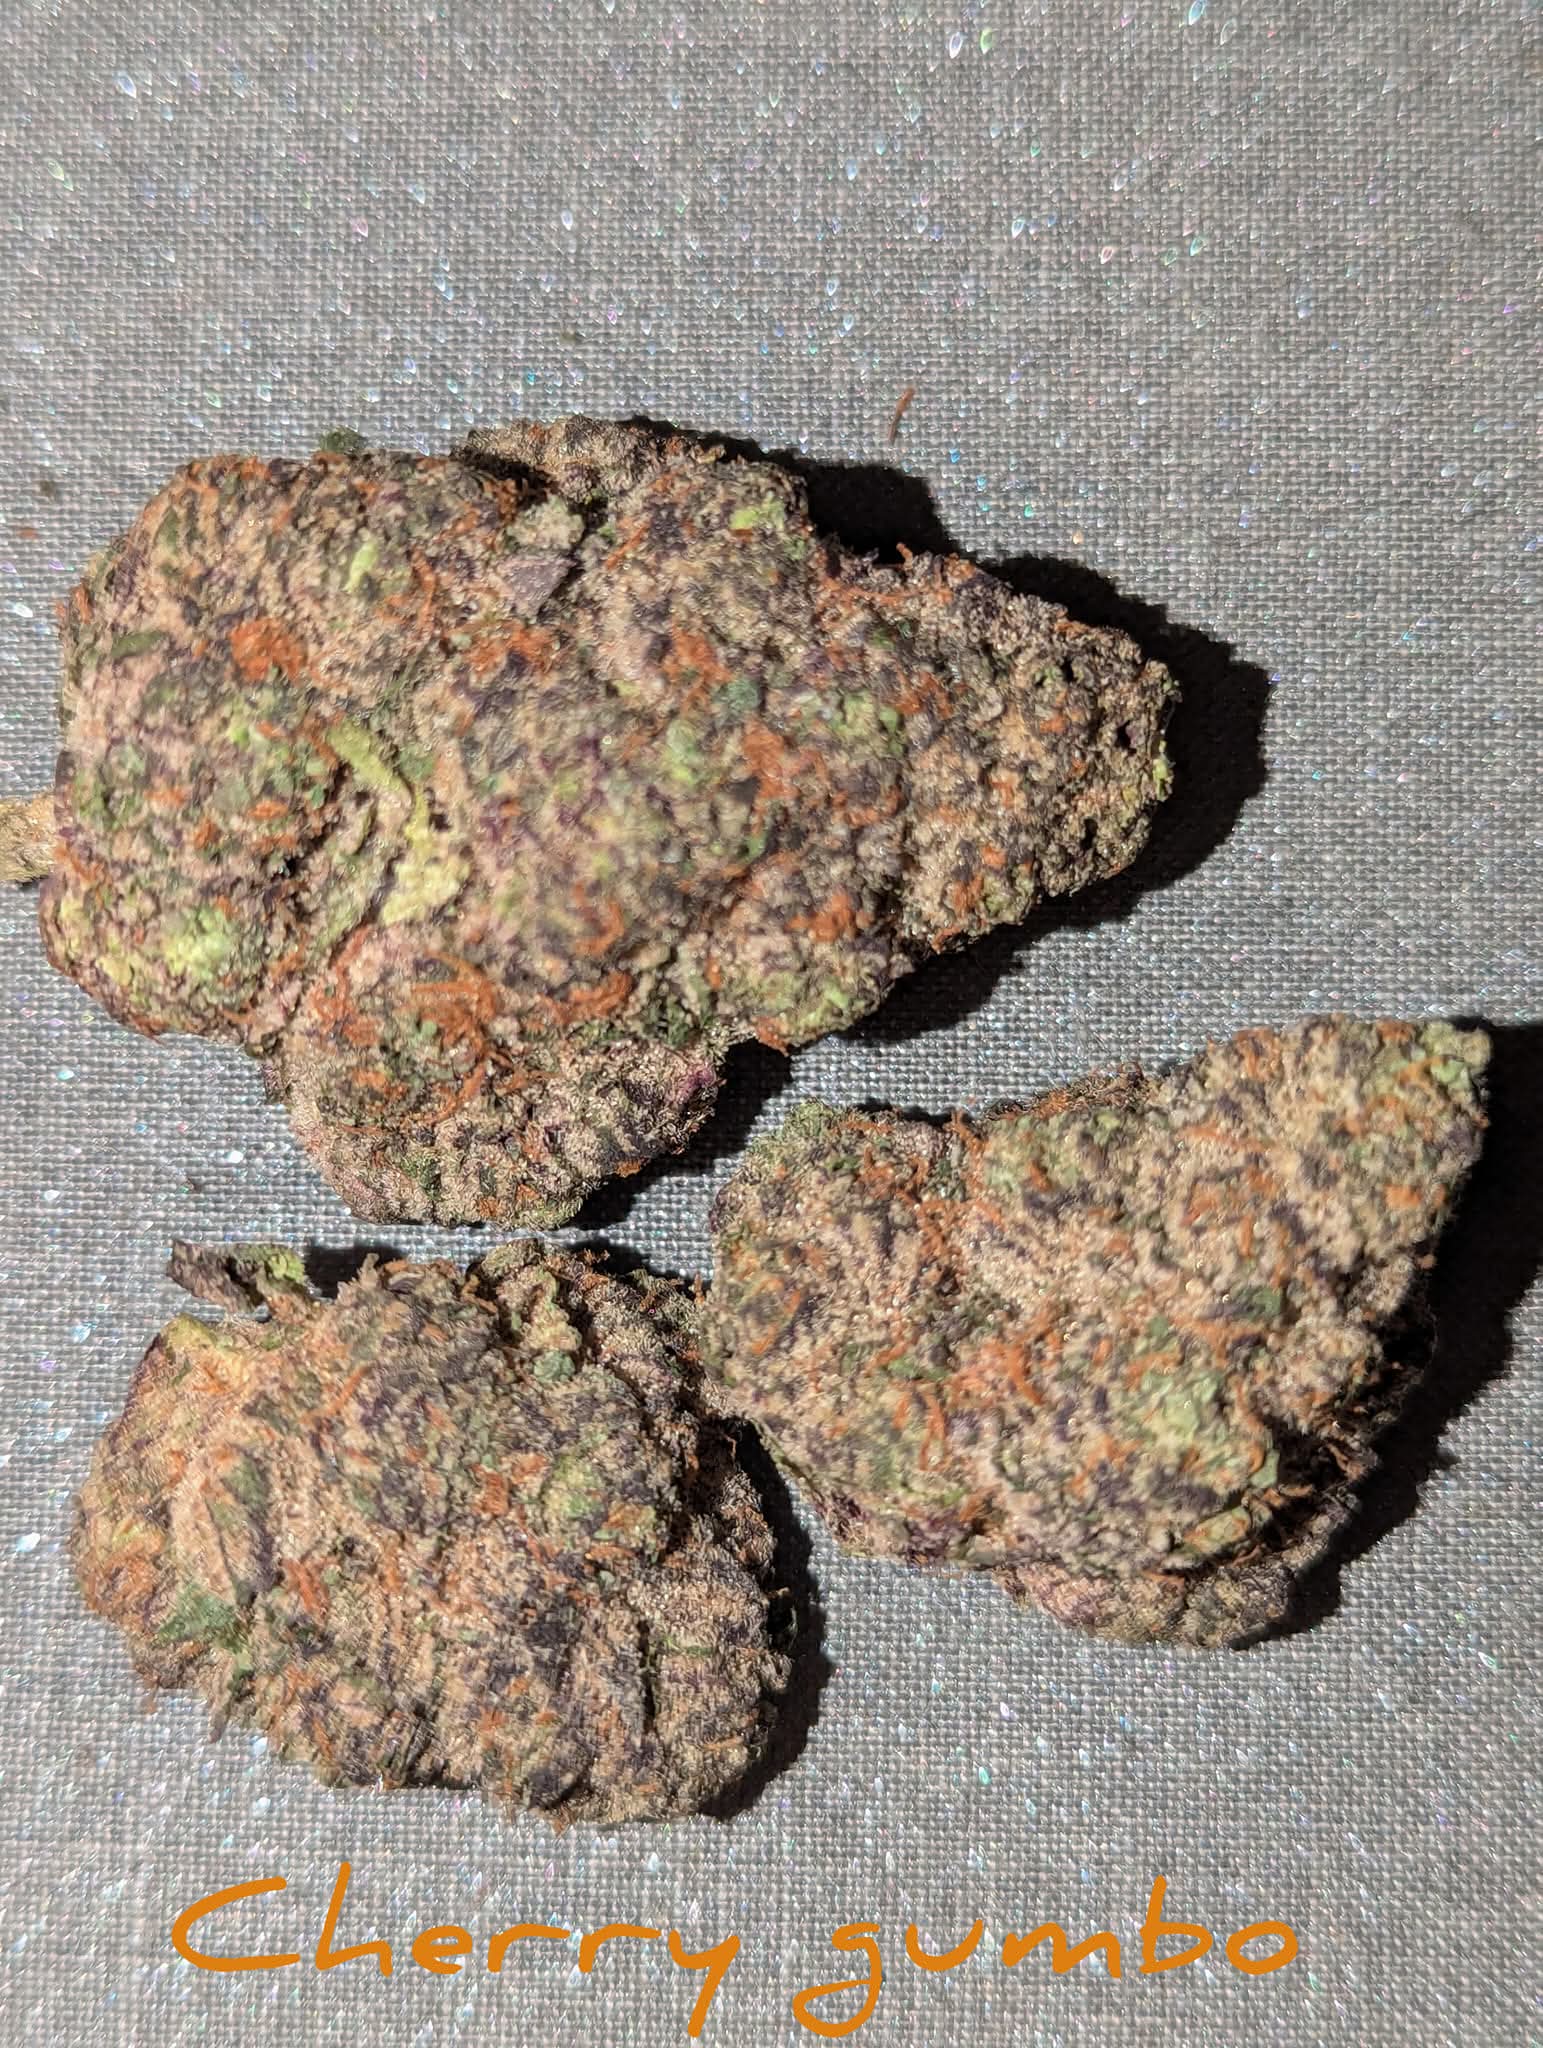
Genetics Showcase
A look at the science and beauty behind cannabis genetics.
⚙️ Automation: Making Your Life Easier
You don't need a fancy computer to grow weed. But a few simple pieces of automation can take 90% of the daily work off your plate and make your plants *much* happier by keeping their environment stable. Automation scales from simple $10 tools to full-blown hydroponic systems.
Level 1: The Non-Negotiable Tool
The Simple Outlet Timer
This is the single most important piece of automation, and it costs $10. You must have one for your grow light.
- Why: Your light schedule (like 18/6 for veg or 12/12 for flower) needs to be *exact*. Forgetting to turn your light on or off can stress your plants, and in flower, it can even cause them to stop budding or grow seeds (herm).
- 💡What to buy: A simple digital outlet timer from any hardware store. Plug your light into it, set the "ON" and "OFF" times, and you're done.
Level 2: Integrated Environmental Control Systems (Smart Controllers)
This is the best quality-of-life upgrade a new grower can make. Instead of buying individual timers for fans, humidifiers, and lights, these integrated systems act as one central "brain" for your tent. They use a single sensor to monitor the environment and automatically adjust all plugged-in devices (fans, lights, humidifiers, dehumidifiers) to maintain your target settings.
A. Leading Smart Grow Systems (The "Who's Who")
The biggest benefit of these systems is that they work as an ecosystem. Their fans, lights, and other accessories are designed to plug directly into the controller, giving you the best, quietest, and most efficient performance right out of the box.
- AC Infinity (AI+ System): Known for their Cloudline series of inline fans and controllers. Their top-tier controllers allow for complex programming based on VPD (Vapor Pressure Deficit), not just simple temperature and humidity.
- Vivosun (Smart Grow System): Vivosun's controllers integrate seamlessly with their lights, fans, and humidifiers. They provide an excellent, user-friendly interface for setting your environmental targets and ensuring your equipment works in harmony.
- Other Brands: Look for any brand offering a dedicated, all-in-one controller that links fans, lights, and humidity accessories. When making your first purchase, sticking with a complete kit from one of the above brands is the easiest way to guarantee compatibility and a smooth setup.

B. The Core Function: Automated Humidity Control (Humidifiers & Dehumidifiers)
The primary job of a smart controller is to minimize wild swings in humidity. You set the target range, and the controller manages your accessories automatically, a practice called Active Environmental Management.
- Active Humidification (Seedling/Veg):
- Target RH: 60% - 75% RH.
- How the Controller Helps: In the early stages, the controller automatically turns your humidifier ON when the humidity drops too low, preventing seedlings from drying out and promoting root development.
- Active Dehumidification (Flowering):
- Target RH: 40% - 55% RH.
- How the Controller Helps: In the crucial flowering phase, the controller automatically activates your dehumidifier when the air gets too moist. This is essential in Ohio to prevent the formation of bud rot (Botrytis), which thrives in high humidity.
C. Environmental Controllers (The Budget/Manual Brains)
If you prefer to piece together equipment from different brands, simple dedicated controllers (like Inkbird) can still be used. They monitor a single factor (temp or humidity) and manage a single device (fan or dehumidifier) to keep it in a set range. They are cheaper but less integrated than the dedicated systems listed above.
Level 3: Automated Watering (Off-the-Shelf)
This is the next step up from hand-watering. These systems automate the watering process, giving you incredible freedom and stability. They are perfect for soil and coco growers.
1. Self-Watering "Wick" Bases
- How they work: These are simple, non-electric trays that you place your fabric pots on (e.g., AC Infinity Self-Watering Bases). You fill the base's reservoir with water/nutrients. A fabric "wick" in the base draws water up into the bottom of your pot using capillary action.
- Pros: Extremely simple, no electricity, no moving parts. The plant "bottom-waters" itself, drinking only what it needs, when it needs it. This prevents overwatering and lets you leave for a 3-5 day weekend.
- Cons: The reservoir is small and needs refilling every few days. The wicks can sometimes get clogged with salts or organic nutrients.
2. AutoPot (Gravity-Fed) Systems
- How they work: This is a brilliant system from AutoPot-USA. It connects multiple pots to a large central reservoir (a big tank) using gravity—no pumps or electricity needed.
- The "AQUAvalve": The magic is in the blue valve in each pot's tray. It's a
smart float valve.
- It opens and lets about 1 inch of water/nutrient solution into the tray.
- It then *closes* and stays closed. It will not reopen.
- The plant drinks all the water in the tray. Once the tray is completely dry, the valve is triggered to "rock" open, refilling the tray.
- Why it's amazing: This system automatically creates a perfect wet-dry cycle, which is exactly what roots love. It's the only system that "bottom-waters" and then lets the plant dry out before watering again.
- Pros: You can leave your plants for 1-2 weeks! It's infinitely expandable. No electricity, no timers.
- Cons: More complex setup than wicks. The AQUAvalve can be sensitive to organic nutrients (which clog it), so it's best to use mineral-based (salt) nutrients.
Level 4: Automated Watering (DIY Drip)
This is a DIY approach if you don't want to buy an AutoPot system.
- How it works: You get a large water reservoir (like a big plastic tote), a small water pump, some tubing, and a simple outlet timer.
- Drip System: You run the tubing to your plants with "drip emitters." You set the outlet timer to turn the pump on for 5 minutes, 3 times a day.
- The Result: Your plants get a small, consistent amount of water. This is the basic idea behind "High-Frequency Fertigation" or HFF, and is very popular for coco coir.
- Cons: You have to dial in the timer. If it's too often, you'll overwater. Not often enough, and you'll underwater. It doesn't "listen" to the plant like an AutoPot does.
Level 5: Introduction to Hydroponics (Soil-Free)
This is the "pro level." Hydroponics means growing without soil. The roots are suspended in air or an inert medium (like clay pebbles) and get their nutrients directly from a water solution. Your pH and nutrient pens (TDS/EC) are not optional here—they are mandatory daily tools.
1. DWC (Deep Water Culture) - "Bubbler Buckets"
- How it works: This is the simplest form of hydro. The plant lives in a "net pot" (small basket) in the lid of a 5-gallon bucket. The roots hang down into the bucket, which is filled with nutrient solution. An air stone (from a fish tank pump) bubbles air into the water 24/7 to provide oxygen.
- Pros: Explosive growth. Very cheap and easy to build yourself.
- Cons: The water in the bucket can get hot. You have to check the pH and EC of *each bucket* every day, which is a lot of work.
2. RDWC (Recirculating DWC)
- How it works: This is the "gold standard" for home-grow hydro. It's a DWC system where all the buckets are connected by large pipes. A water pump circulates the *entire* volume of water through all the buckets and back to a main "control" reservoir.
- Pros: Amazingly stable. You only have to check the pH and EC in the *one* control reservoir. The circulating water stays cooler and more oxygenated. This setup grows the biggest monsters.
- Cons: Expensive. Complex to build. Many potential leak points if you don't build it right.
3. Ebb & Flow (Flood & Drain)
- How it works: Plants sit in a large tray filled with an inert medium (like clay pebbles or Rockwool blocks). A timer is set to a pump that *floods* the tray with nutrient solution for 15 minutes. Then, it drains back out to the reservoir. This repeats 3-5 times a day.
- Pros: The "drain" part is amazing for the roots. They get a huge rush of oxygen every time the tray empties, leading to very healthy, robust root systems.
- Cons: Requires a special "flood table." Can be noisy. If the pump or timer fails, your plants can dry out very quickly.
4. NFT (Nutrient Film Technique)
- How it works: You've seen this used for lettuce. Plants sit in long, sloped channels (like gutters). A tiny, continuous *film* of nutrient solution trickles down the bottom, running over the tips of the roots.
- Pros: Uses very little water. Roots get massive oxygen exposure.
- Cons: Not great for large plants, as the big roots can clog the channel. If the pump fails, your plants are dead in minutes because there is no medium to hold water.
Level 6: DIY Tech Automation (Pi & Arduino)
This is where you combine all of the above. You use a mini-computer like a Raspberry Pi or an Arduino to control *everything*. You connect sensors for temperature, humidity, pH, and EC. You write code to turn on fans, pumps, and lights based on the sensor data. This is super fun if you're a tech nerd, but it is 100% not necessary to grow amazing cannabis. A $10 timer and a $50 Inkbird controller will get you 99% of the way there.
- Pros: Complete control from 1 central device. The true definition of automation.
- Cons: You will need some computer as well as "maker"(PI & Arduino) knowledge to set this up. If it fails your whole system is down.
Automation in Action
See how integrated systems, from smart controllers to automated watering, can create a perfectly stable environment for your plants to thrive.
🎨 The Visualization Lab
We are building the most interactive, immersive cultivation experience on the web. It's not quite ready for you to operate yet, but here is a sneak peek at the tools coming soon to Grohio.
COMING SOON
Phase 2: The Interactive Evolution
⛺ 3D Grow Tent
A fully operable virtual tent. Drag and drop your lights, adjust your inline fans, and watch how your VPD and light footprint changes in real-time before you buy.
⚖️ The Mixologist
Test your feeding skills. Use the digital measuring cup and scale to attempt to measure out the perfect nutrient ratios or outdoor preventative sprays.
🗺️ The Cultivator Heatmap
Pin your location. Let's get a visual idea of where the community is growing across the country and connect local cultivators.
🦠 The Plant Doctor
Stop guessing what's wrong. Upload a photo of a sick leaf, and watch our visual scanner map the damage to instantly identify pests, mold, or nutrient lockouts.
🧬 The Terpene Profiler
Play mad scientist. Blend digital terpenes together to visualize the exact flavor profile, smell, and entourage effect before you buy your next pack of seeds.
🕸️ The Canopy Builder
Master the Screen of Green. Practice your Low-Stress Training by bending and weaving digital branches through a 3D trellis net. Maximize your light footprint without snapping a stem.
🔥 Our Gear: The 3 Amigos' Setup
People always ask us what we actually use. We've tried alot in the 1st 2 years of growing indoor and outdoor. After testing, tweaking, and (let's be honest) failing, we've landed on a core setup that is simple, ridiculously effective, and automated enough that we can still have a life.
This is the gear we recommend because it's the gear we trust. This isn't a sponsored post; this is what's running in our tents right now. We believe in investing in a system that works, so you can focus on the fun part: growing amazing plants.
Our Philosophy on Gear: Buy it nice or buy it twice. A good light or a reliable watering system is an investment. The cheap stuff will cost you more in the long run through lost harvests, frustration, and eventual replacement. We'll show you the "buy it for life" gear that makes growing a joy, not a chore.
1. The Brain: Vivosun Smart Grow System
This is the single biggest upgrade we've made to our grows, period. The Vivosun Smart Grow System, powered by their GrowHub Controller, turns your entire tent into a single, connected ecosystem. This is the heart of "set it and forget it" growing.
The magic is this: all your core equipment (your light, your inline fan, your humidifier, your circulation fans) plugs into one smart controller. You plug *that* controller into the wall. You set your ideal temperature and humidity on the Vivosun app... and you're done. The system handles everything else.
- It's a Fully Connected Ecosystem: This isn't just a smart plug. The controller talks to every piece of Vivosun gear. The AeroLight (their LED) and AeroZesh (their inline fan) are designed to work with it. The app gives you one simple dashboard for your entire tent.
- Control From Anywhere: This is the key. You can be at work, on vacation, or just on the couch. You can open the app on your phone and see your tent's exact temperature, humidity, and VPD in real-time. You can change your light schedule, turn up the fan, or check your settings from anywhere in the world.
- Automated Recipes: The app lets you create "grow recipes." You can program the
entire grow from seed to harvest. For example:
- Seedling Phase: Set RH to 70%, Temp to 78°F, Light at 30%.
- Flower Phase: Automatically drop RH to 45%, crank the light to 100%, and run the fan higher.
- Why We Love It: It stops "environmental drift." Your tent stays in the perfect VPD range 24/7. When the lights turn off and humidity spikes, the controller instantly tells the inline fan to ramp up. When the humidifier runs empty, you get an alert. It's the ultimate peace of mind and the single best tool for preventing mold and stress.
While we've built our ecosystem around Vivosun, other top-tier companies like AC Infinity and Spider Farmer offer fantastic, high-quality smart controllers and integrated systems as well. And for the tent itself, you can't go wrong with industry-leading brands like Gorilla Grow Tent for their unmatched durability.
2. The Watering: AutoPot Self-Watering System
If the Vivosun system is the "brain," the AutoPot system from AutoPot-USA is the "circulatory system." This is the most genius, simple, and effective automated watering system we have ever used. It's so simple, it's brilliant. And it requires zero electricity.
How This Genius System Works
Forget pumps, timers, and drip emitters. The AutoPot is a gravity-fed system that gives your plants *exactly* what they want, when they want it, using a magical little device called the AQUAvalve.
- The Setup: You have a big reservoir (a tank) filled with your nutrient water. A simple 1/4" tube runs from this tank to a tray where your pot sits.
- The AQUAvalve: This little float valve sits in the tray. When you first turn it on, it lets about an inch of nutrient water into the tray from the reservoir.
- The Magic: Once it hits that 1-inch level, the AQUAvalve shuts completely. It will not, under any circumstances, let more water in.
- The Plant Drinks: Your plant, sitting in coco or soil, slowly drinks up all the water in the tray. This is "bottom-feeding."
- The "Dry" Cycle: The plant keeps drinking until the tray is bone dry. This is the critical part! The AQUAvalve remains closed, letting the roots get exposed to oxygen. This is the "dry" part of the wet-dry cycle that roots crave.
- The Refill: Only when the tray is completely empty and dry does the float mechanism drop, triggering the AQUAvalve to open and refill the tray with another 1-inch of water.
This system is genius because it's the only automated system that perfectly mimics the perfect hand-watering "wet-dry" cycle. It's impossible to over-water or under-water. The plants are in 100% control. We fill our reservoir once every 7-10 days and the plants take care of themselves.
AutoPot is our go-to, but other great companies make excellent self-watering systems too. Brands like AC Infinity, Vivosun, Spider Farmer, Octopot, and Grow Ace all offer popular watering systems or self-watering bases that accomplish a similar goal of automating your watering.
🧪 3. Our Indoor Nutrient Stack
A. The Secret Weapon: Heavy 16 (Base Nutes)
This is it. This is the "secret" we've landed on after trying multiple brands. We run the full Heavy 16 lineup for our base nutrients (Veg A/B and Bloom A/B). Why? Because it's a professional-grade, multi-element formula that is insanely clean and pH stable.We also run there fire and prime per the feeding chart
When you're running an automated system like AutoPots, the *last* thing you want is a nutrient line that clogs your 1/4" tubes or swings in pH while it sits in the reservoir. Heavy 16 doesn't do that. It's designed for high-performance fertigation. You mix it, you pH it once, and it stays at that pH. It costs more upfront, but it eliminates 99% of the nutrient-related headaches we used to have. The results speak for themselves.
B. The Rocket Fuel: Recharge by Real Growers
This is our other non-negotiable. Recharge isn't a nutrient; it's a super-pack of beneficial bacteria, fungi (mycorrhizae), and molasses. We use this once a week. Think of it like this: the Heavy 16 is the expensive steak dinner, and the Recharge is the digestive enzyme that lets the plant actually eat it.
It builds a massive, healthy, fuzzy root system that can absorb nutrients with insane efficiency. It makes your whole soil system "come alive." When we started using Recharge, our plant vigor and nutrient uptake exploded. We will not grow without it.
C. Outdoor & Natural Nutrients
For our outdoor grows or for anyone wanting a more "all-natural" path, we go a different route. We cut a plug out and replace it with good topsoil and feed it all natural fertilizers. Our go-to stack here is:
- Humboldt's Secret: Their Grow & Bloom base nutes are fantastic and very clean. We also use their Sweet & Sticky in flower to boost sugar (Brix) levels, which feeds the microbes and leads to better flavor.
- Unsulphured Blackstrap Molasses: The old-school secret. A tablespoon per gallon of water feeds the microbes in your soil a carb-heavy meal, and they love it. Cheap and effective.
- Recharge and nitrogen: Recharge once a week is unmatched. Great microbial product that PLANTS LOVE! We also supplement nitrogen outdoor when necessary using TPS Nutrients again.
- Deserves a mention: Meigs Fertilizer: A great Ohio-local, all-natural granular fertilizer. A great alternative to the Humboldt's Secret 2 part system.
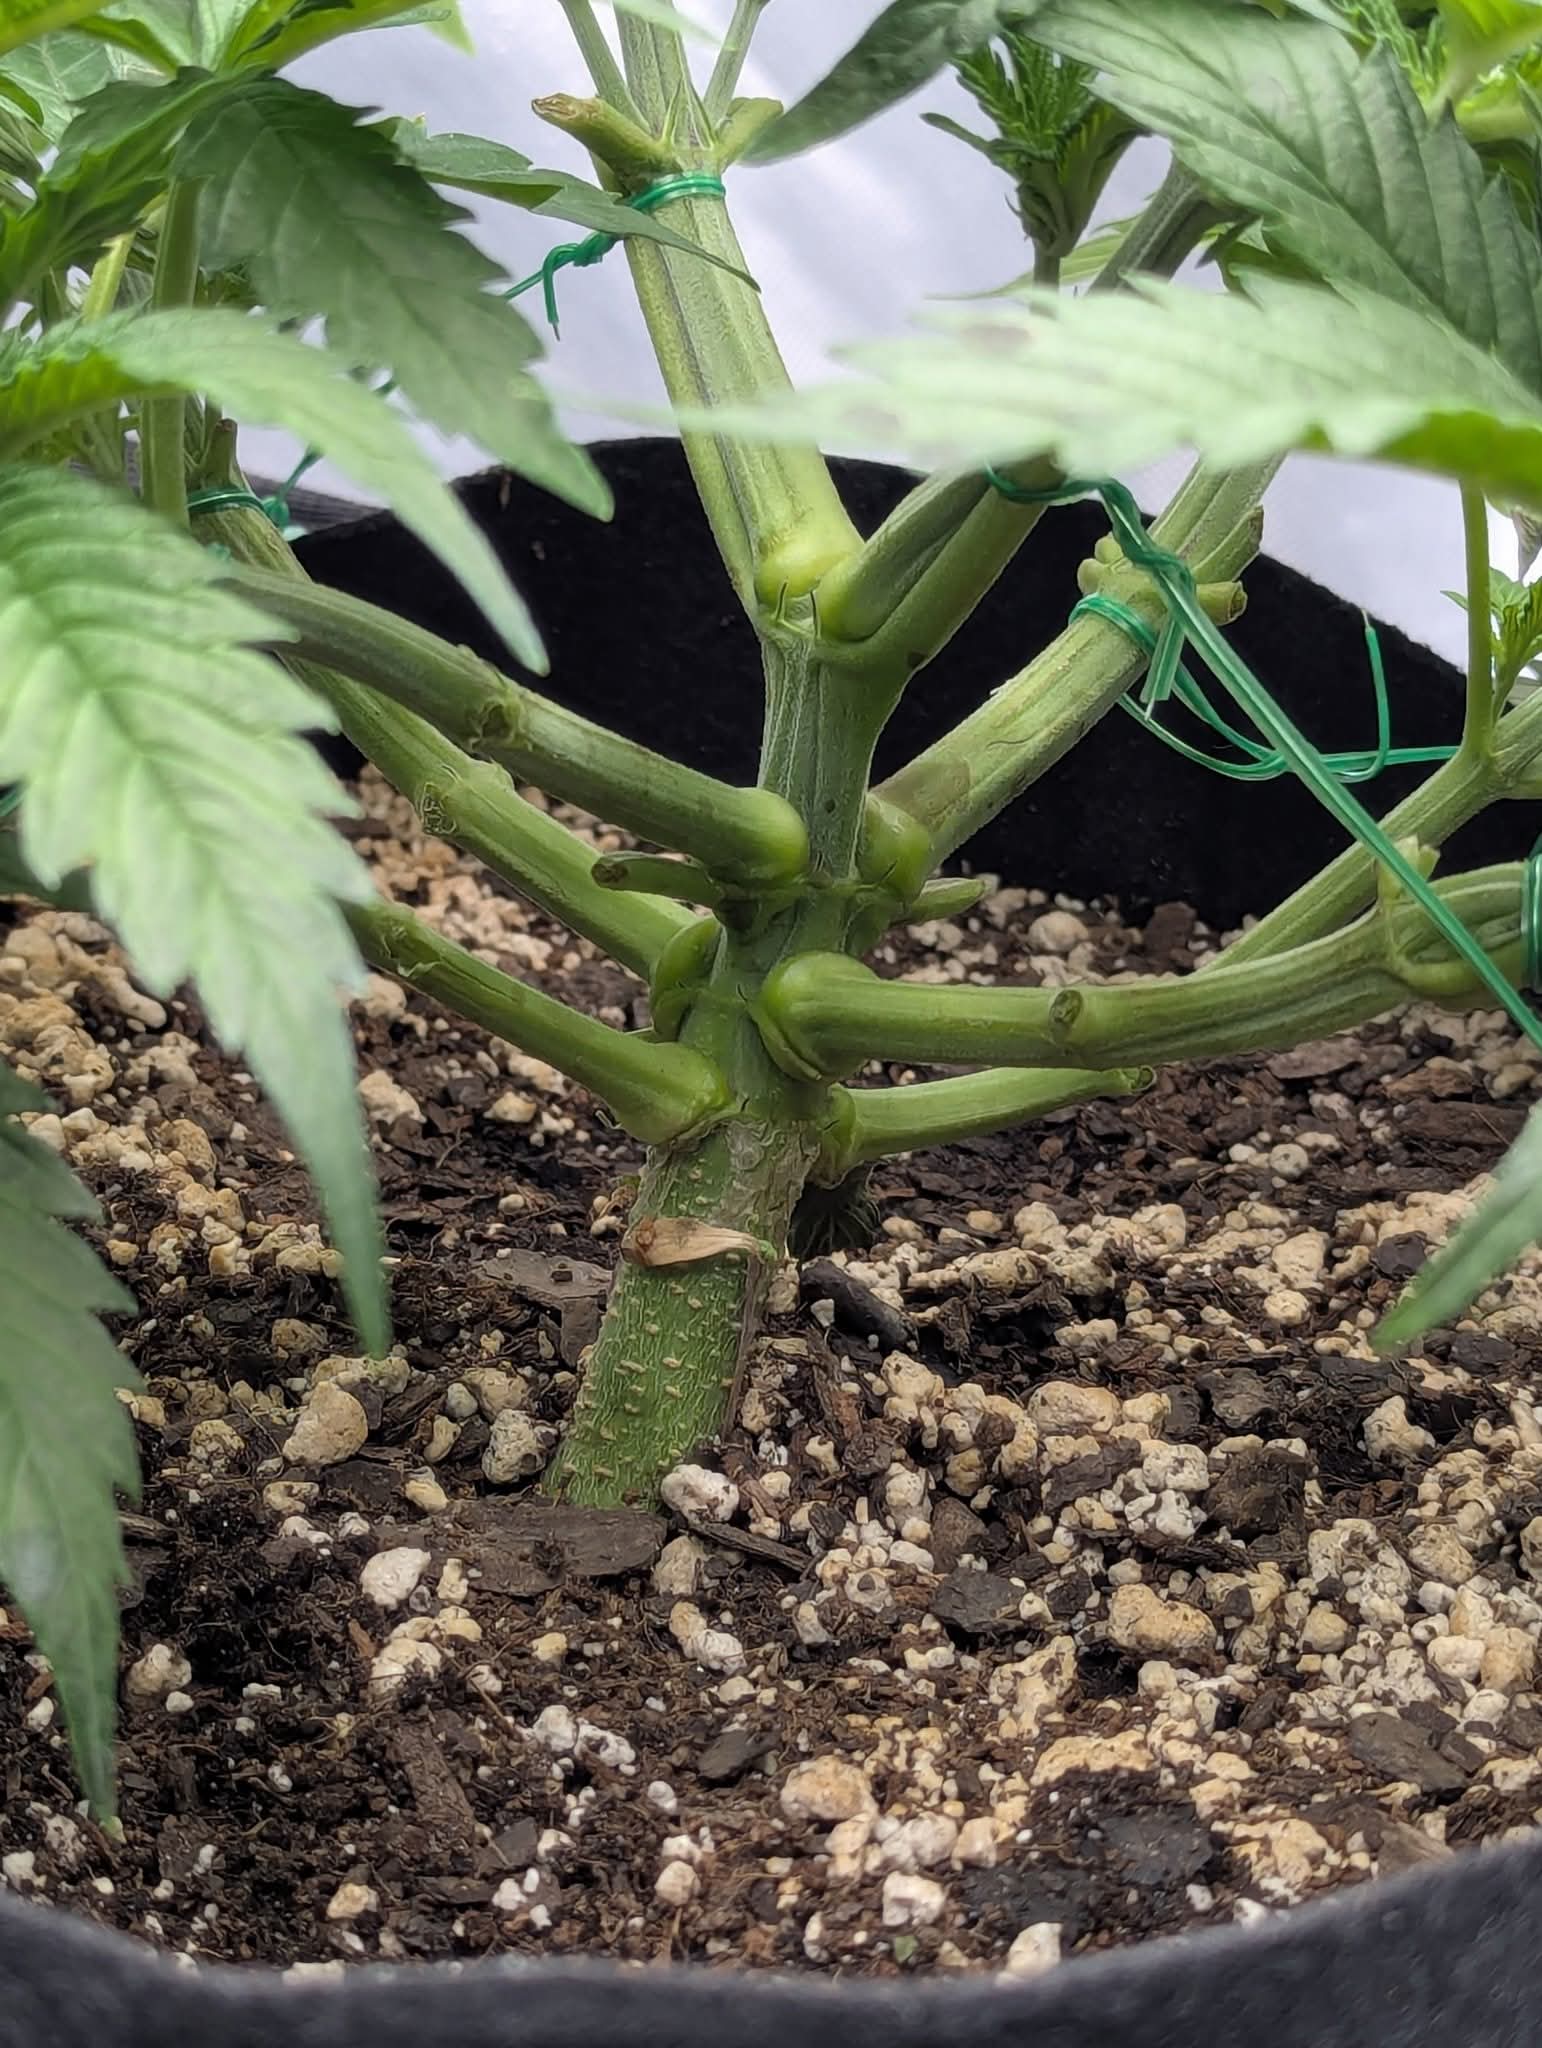
4. Our Training Techniques: LST & Scrogging
Great gear is half the battle; the other half is managing your plants. We don't just let our plants grow wild. We actively train them to maximize our tent space and light efficiency. Our goal is to create a flat, even "canopy" of buds, where every single flower site gets direct, high-intensity light. This is how you get huge yields of dense, top-shelf buds instead of just one big top bud and a bunch of small, airy "larf" buds down below.
Our entire automated system (Vivosun + AutoPots) is designed to support these two core techniques:
A. Low-Stress Training (LST)
What it is: LST is a simple, gentle technique we use on every plant, starting in the early vegetative stage. Instead of letting the plant grow straight up like a Christmas tree, we gently bend the main stalk over so it's horizontal (parallel to the soil). We use soft plant ties to hold it down.
Why we do it: This bending breaks the plant's "apical dominance" (its instinct to send all energy to the very top bud). When the main stalk is bent over, the plant gets confused and starts treating all the lower side branches as new "main" stalks. These side branches, which would normally be small, explode with vertical growth, racing each other to become the new top. By continuing to tie down new growth, we create a wide, flat, bushy plant where dozens of branches reach the same height, all ready to become big, dense colas.
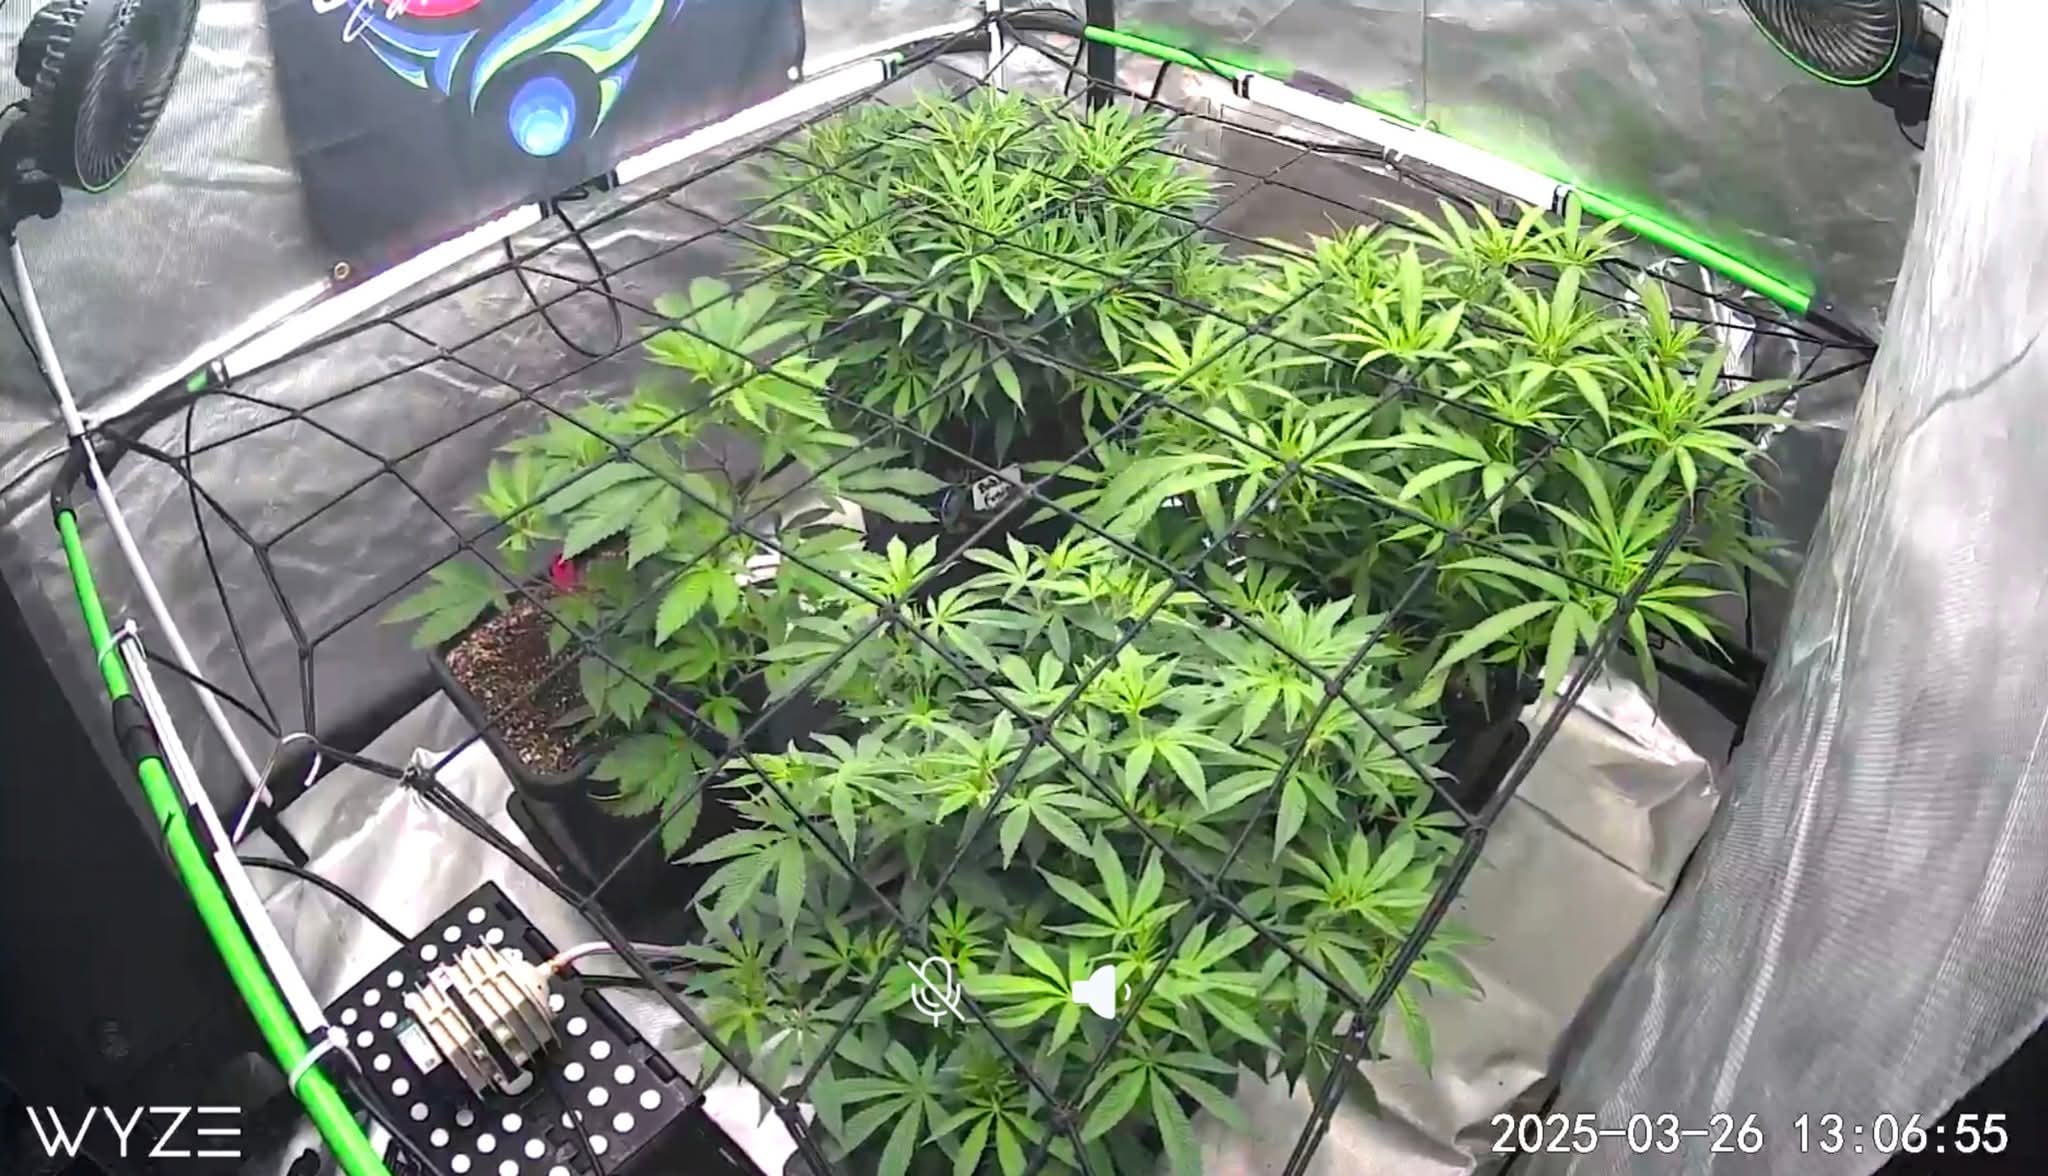
B. Screen of Green (Scrogging)
What it is: Scrogging is our "finishing" move that builds on LST. About a week or two before we "flip" the lights to 12/12 for flowering, we install a "Scrog net"—a trellis net with 3-4 inch squares—horizontally across the tent, about 8-12 inches above our pots.
Why we do it: As the plants "stretch" (grow rapidly) in the first 2-3 weeks of flower, we "weave" the growing branches through the net squares. We tuck any branch that grows *up* back *under* the net and into the next empty square. This does two critical things:
- It perfects the canopy: It forces every single branch to stay at the exact same height, creating a literal "screen of green." No bud site is shaded by another. This ensures every ounce of light from our LEDs is hitting a bud site directly, maximizing photosynthesis and yield.
- It provides support: Later in flower, as the buds get heavy and dense, they would normally fall over and snap. The Scrog net acts as a heavy-duty support system, holding the weight of all those massive colas so the plant can focus on swelling up, not supporting itself.
By combining LST (to build the bush) with a Scrog net (to create the perfect, even canopy), we ensure our automated gear is running at 100% efficiency, turning light and nutrients into the maximum possible yield.
5. Our Pest Control Arsenal (Indoor & Outdoor)
You can't grow in Ohio without a pest and mold strategy. Indoors, it's about prevention. Outdoors, it's a full-on war. We rely on a few key products to keep our plants clean.
- Lost Coast Plant Therapy: This is our all-in-one "clean-up" spray. It's organic and safe to use in veg and early flower. It works on contact to smother soft-bodied pests like spider mites and aphids, and it also handles powdery mildew. We use it as a preventative spray indoors and as a first-line-of-defense outdoors.
- Neem Oil: A classic for a reason. We use this primarily as a preventative soil drench and as a spray on our outdoor plants during the vegetative stage. It's a powerful anti-feedant and insect growth regulator. (We avoid spraying it indoors or on any buds as it can affect the final taste).
- BT (Bacillus thuringiensis): This is our #1 weapon against caterpillars (budworms) outdoors. BT is an organic, naturally occurring bacteria that only affects caterpillars and is completely harmless to humans and beneficial insects. We've spray it preventatively on our outdoor plants starting in August to stop budworms from ever getting a foothold.
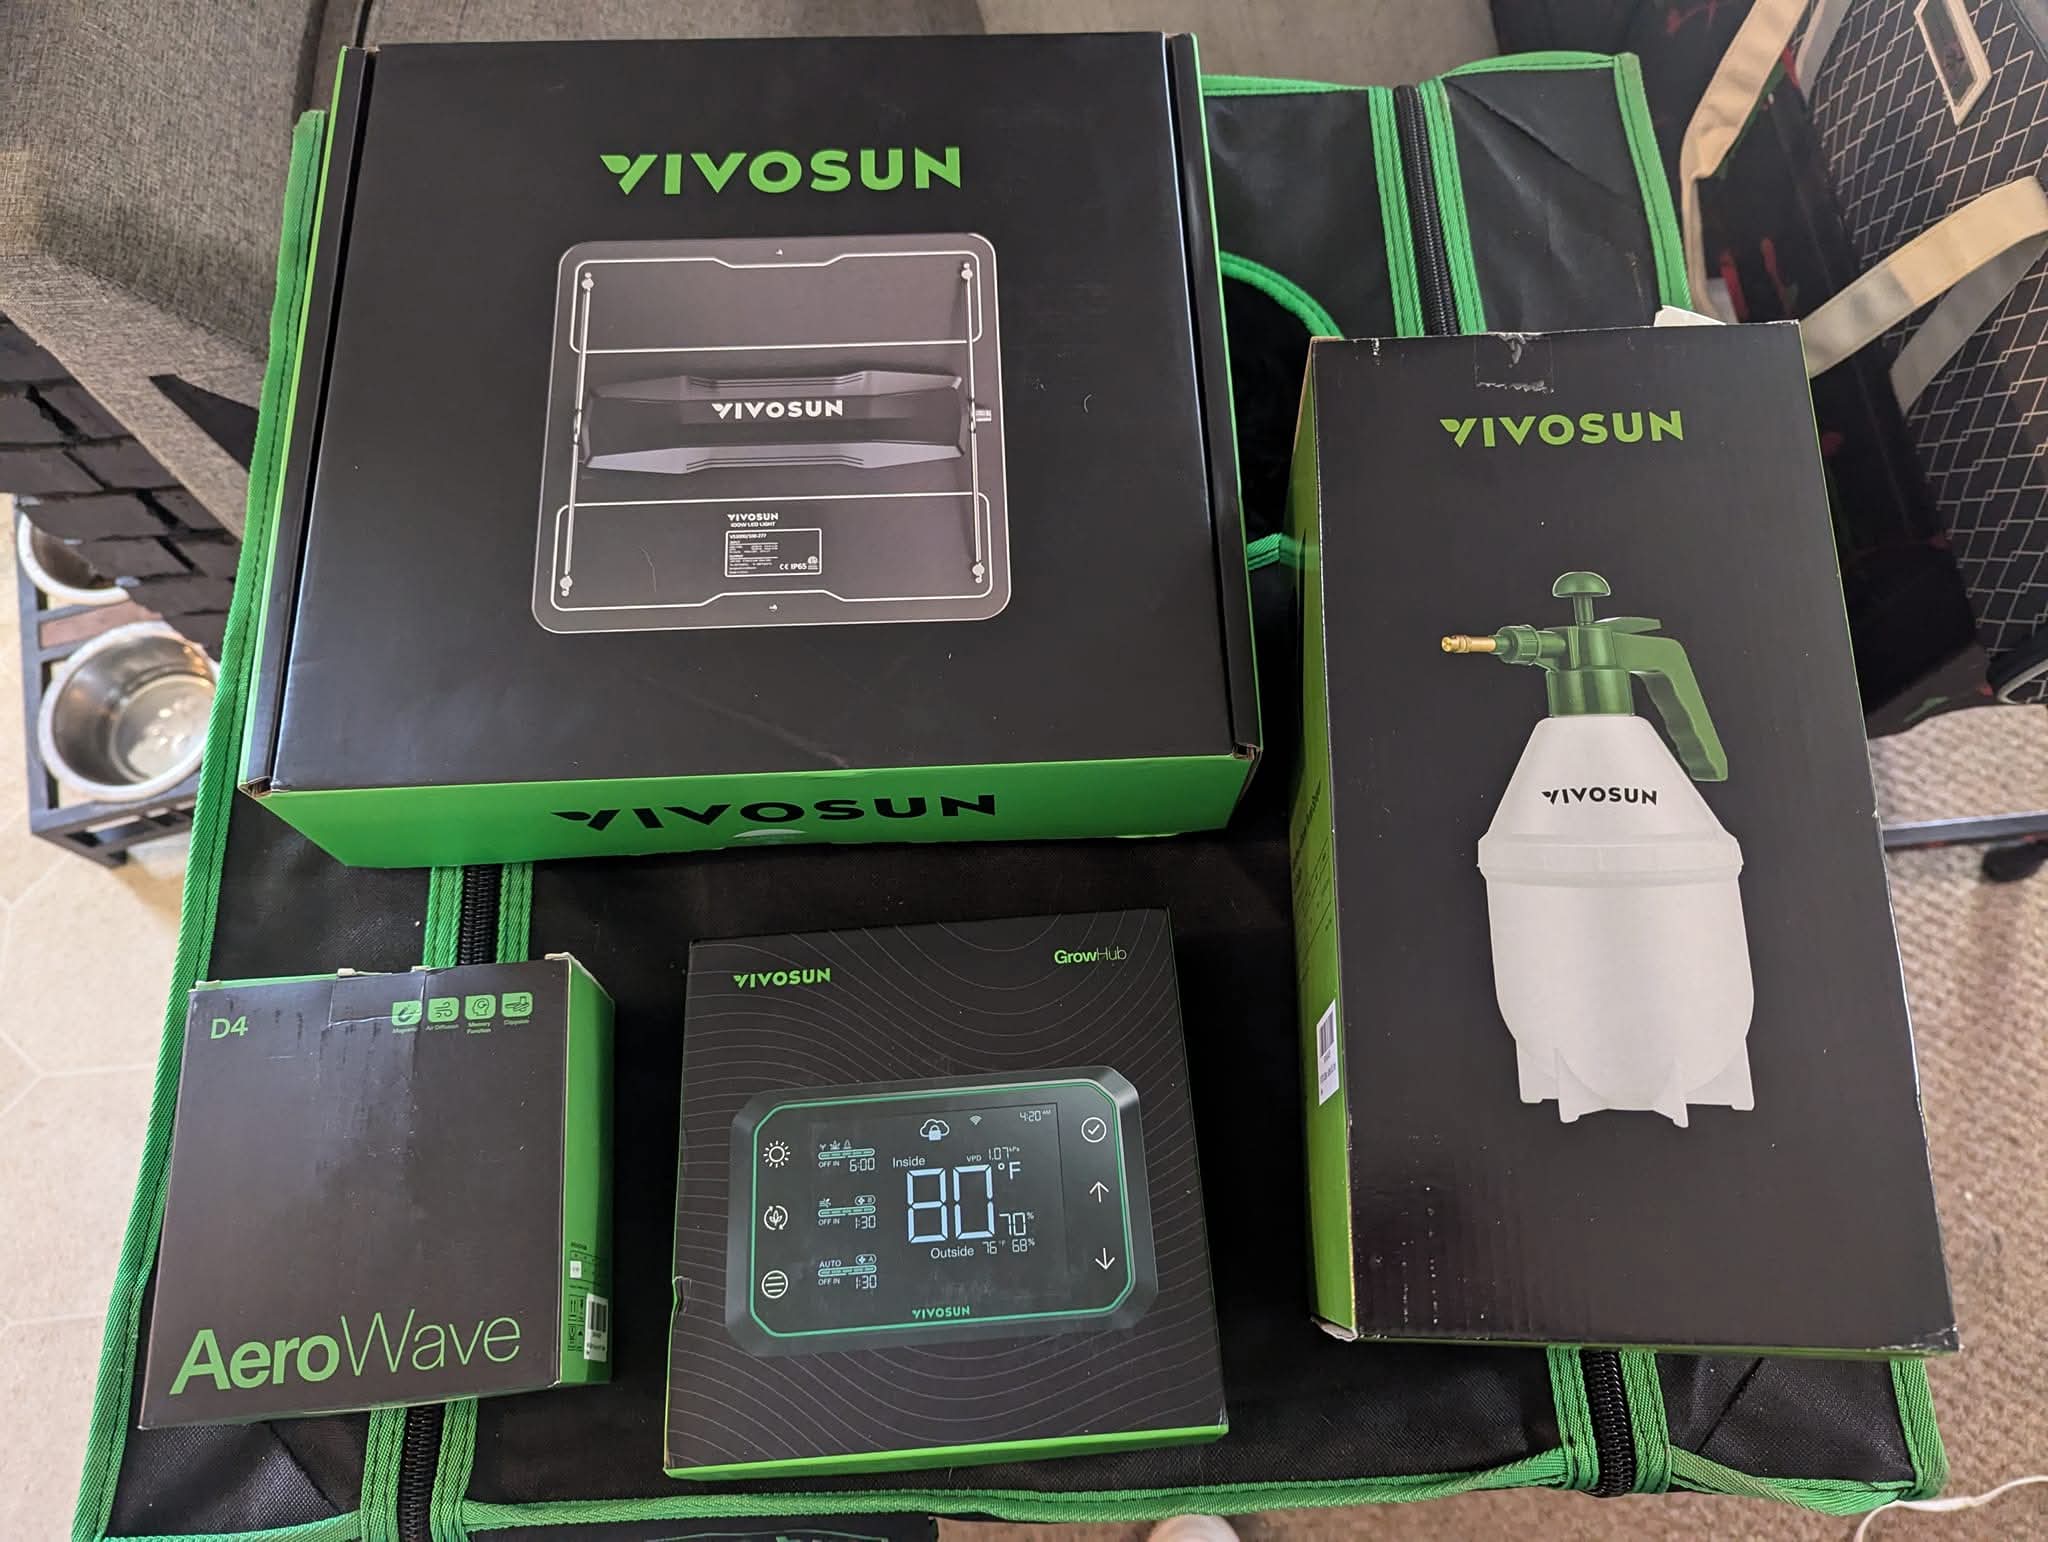
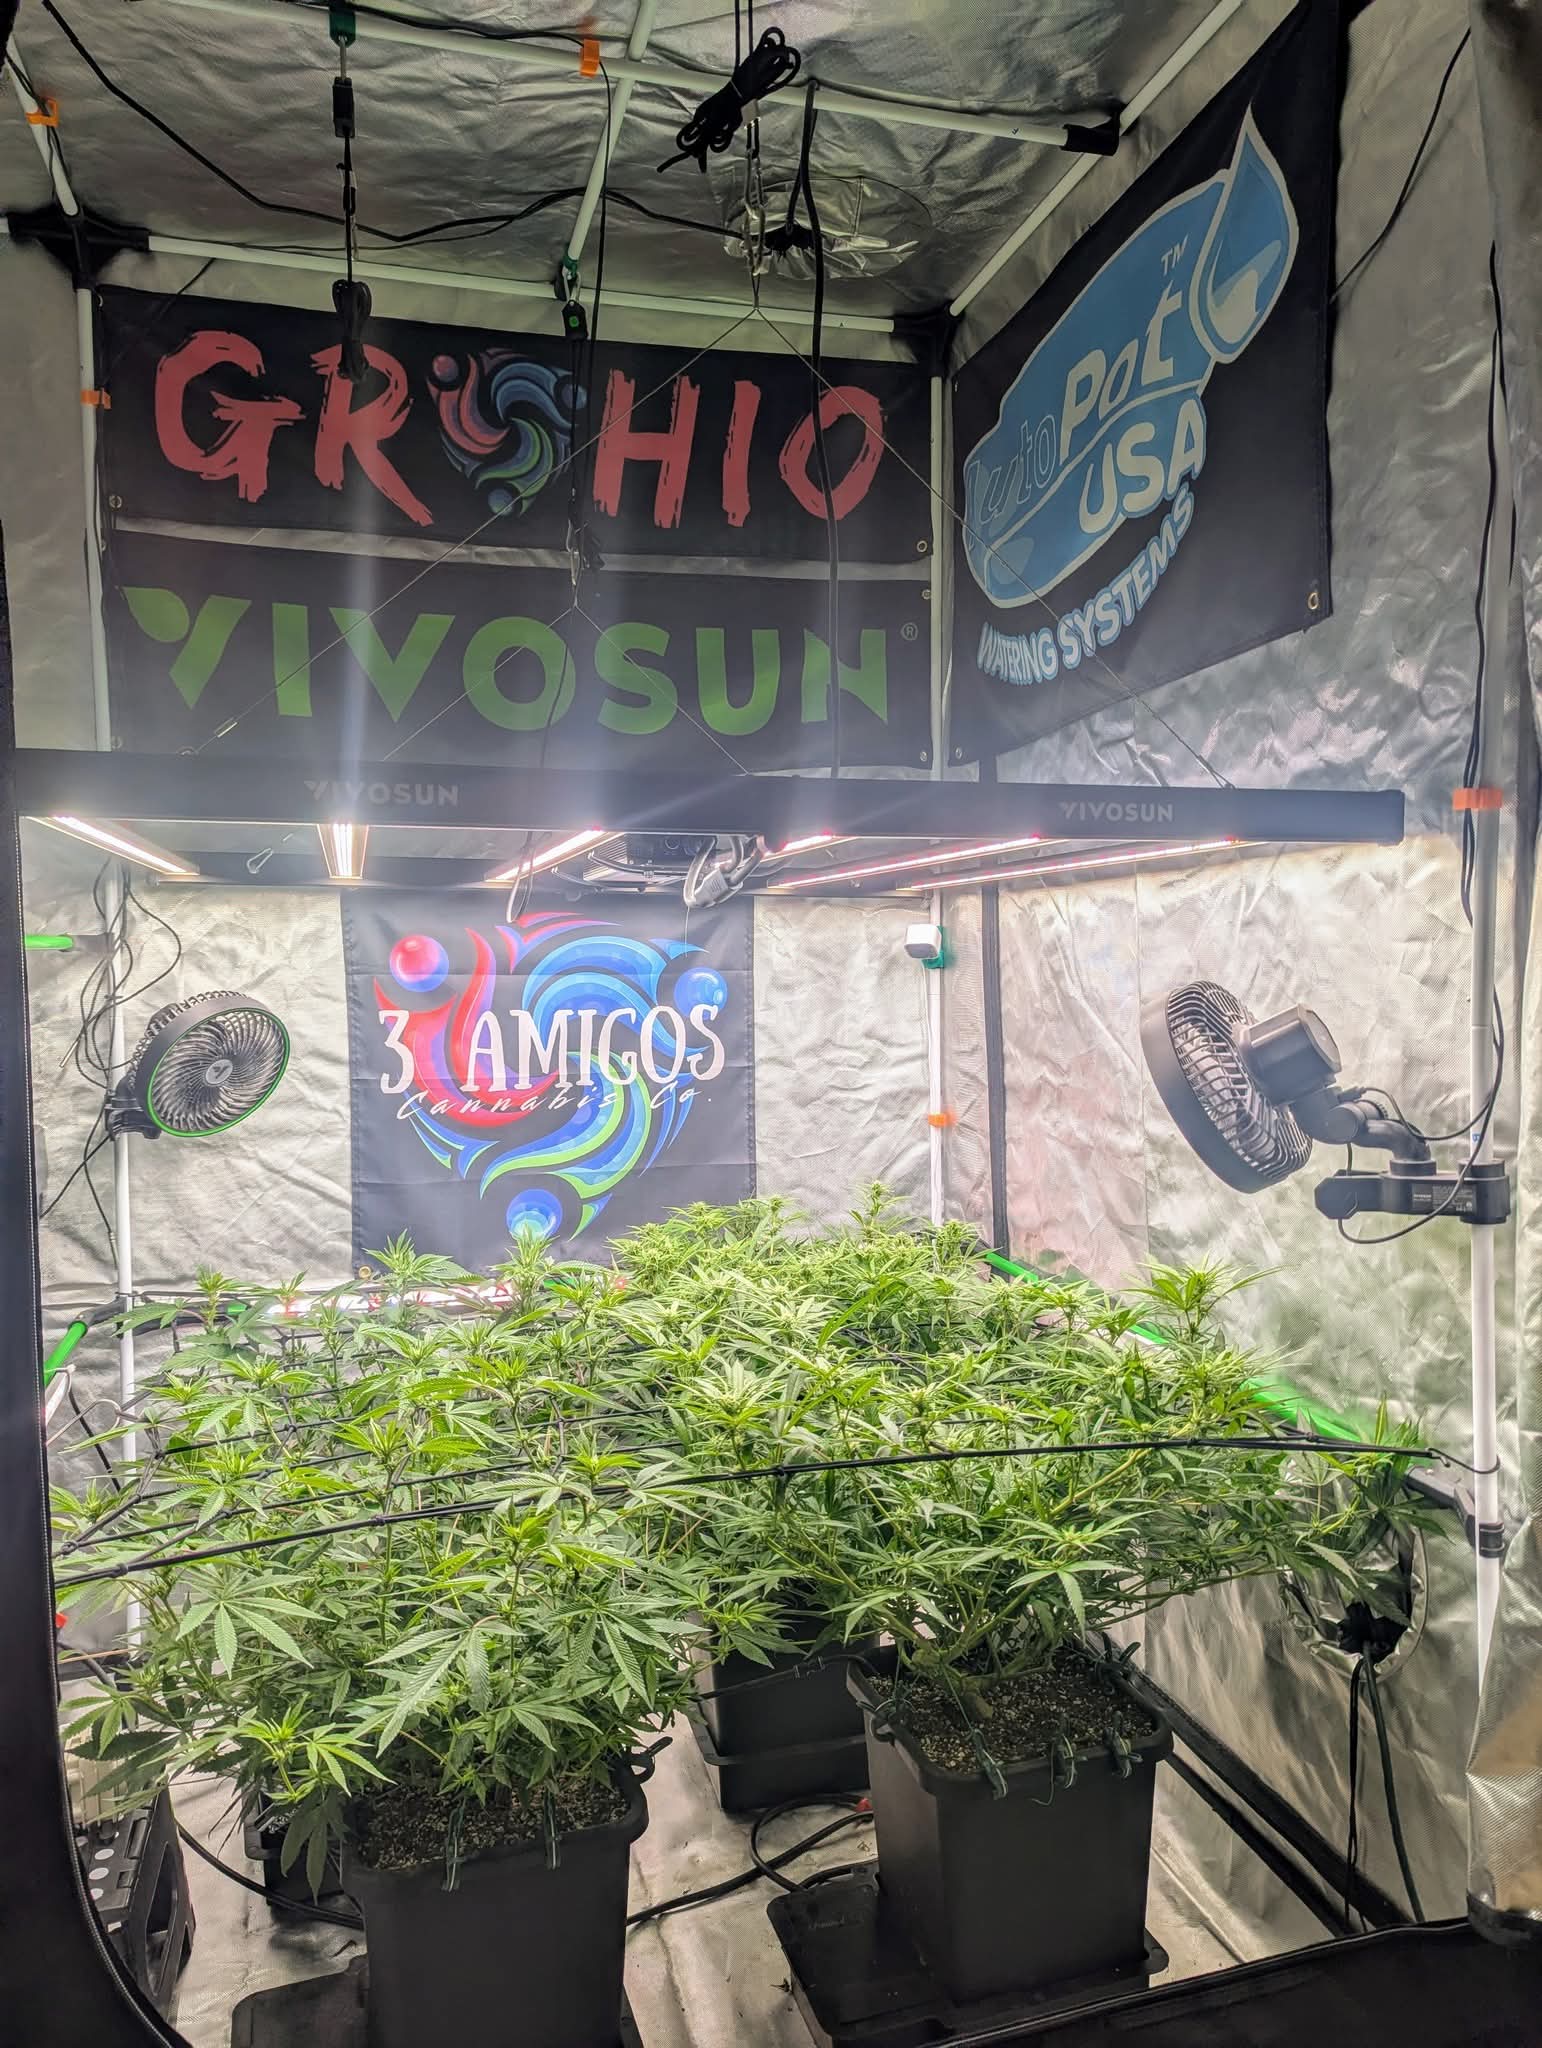
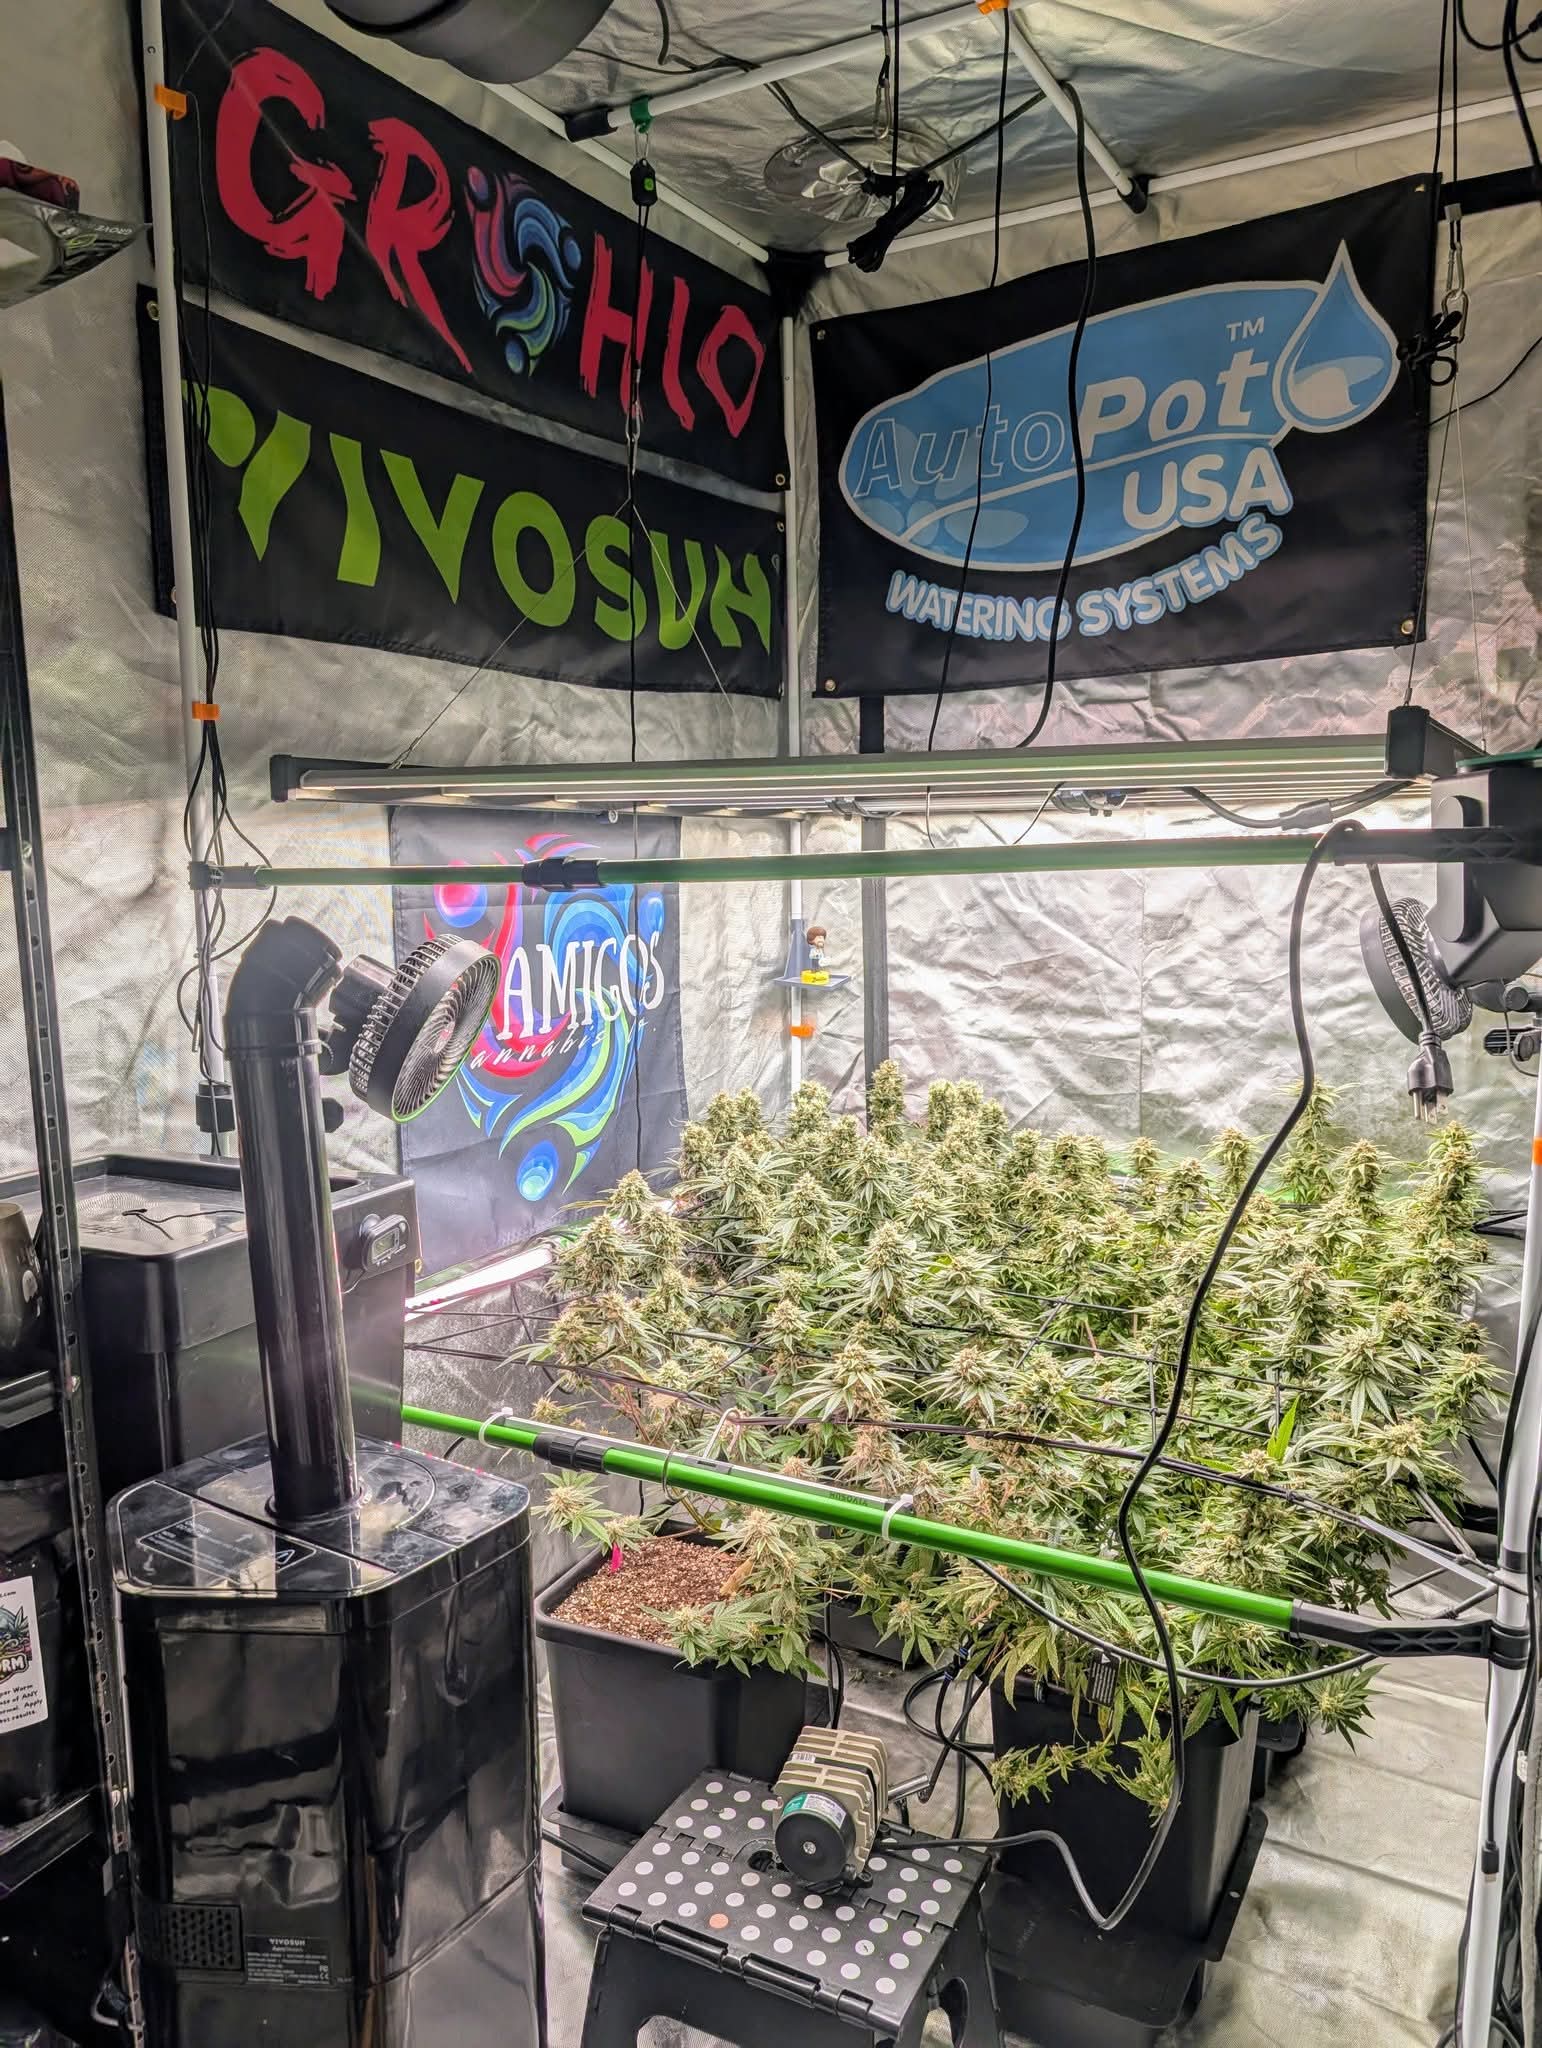
Our Gear in Action
Here's a look at our complete Vivosun and AutoPot setup running in the tent.
🐛 Problem Hub: What's Wrong With My Plant?
Don't panic! Every grower runs into problems. The key is to catch them early. This hub will help you diagnose the most common issues you'll face.
Chapter 1: The Defense Mindset (Avoiding Bro Science)
When you see a problem, the first reaction is panic. The second is usually searching online, where you'll find hundreds of anecdotal, low-efficacy remedies (the "bro science"). Do not spray milk, vinegar, or garlic water on your plants! Use proven, tested products to protect your investment.
Always follow this order:
- Diagnose:** Use the tables below and a microscope (or loupe) to know exactly what the problem is.
- Stabilize:** Fix the immediate environment (e.g., lower the heat, fix the pH, stop overwatering).
- Treat:** Use a reliable, broad-spectrum product.
Product Spotlight: Lost Coast Plant Therapy
If you want one single product that handles Spider Mites, Powdery Mildew, and Fungi (the "Big 3"), look at Lost Coast Plant Therapy. While it's costly, it's a powerful, non-toxic, all-in-one product that works in all stages of growth (veg and flower) without leaving a harmful residue. It is designed to replace having three different bottles for three different problems.
Chapter 2: Common "Bad Bugs" (Pests)
THE GOLDEN RULE: CHECK YOUR pH FIRST! 90% of the time, a new
grower's "nutrient problem" is actually a pH problem. Cannabis plants can only
"eat" their food if the water's pH is in the right range. If the pH is wrong, the nutrients are
locked out, and the plant starves—even if the food is in the soil!
Target pH Range:
- Soil: 6.0 - 6.8
- Coco/Hydro: 5.5 - 6.5
Always pH your water after adding nutrients. Get a decent digital pH pen; it's the
best diagnostic tool you can own.
| Pest | What It Looks Like | Damage You'll See | How to Fix It (Simple) | Chemical/Effective Defense |
|---|---|---|---|---|
| Spider Mites | Tiny, tiny (like a spec of dust) red or black dots on the underside of leaves. You'll see fine, spider-like webbing on the buds and leaves. | Tiny white or yellow "speckles" all over the leaves. The plant looks dusty, dry🐞 and sick.. They multiply *fast* in hot, dry rooms. | Raise humidity. Wipe leaves with a damp cloth. Spray undersides thoroughly. | Lost Coast Plant Therapy or Pyrethrins (only in early veg). Introduce beneficial mites (Predatory Mites). |
| Fungus Gnats | Small, black flies that look like tiny mosquitoes or fruit flies. They crawl on your soil and fly around your tent. | The adults are just annoying. The larvae (which live in the top inch of wet soil) eat your plant's tiny roots, stunting its growth. | Let your soil *dry out* completely between waterings. Place yellow sticky traps on the soil to catch the adults. | Apply Mosquito Bits (BTI - Bacillus thuringiensis israelensis) to the water. This kills the larvae safely. |
| Aphids | Small, pear-shaped bugs (green, black, or yellow). They cluster on the stems and undersides of new leaves. | New growth looks twisted or stunted. They leave behind a sticky, clear "honeydew" (poop) that can attract ants or grow sooty mold. | A strong spray of water can knock them off. Wipe them off by hand. | Organic Insecticidal Soap (potassium salts of fatty acids). Introduce Ladybugs. |
| Caterpillars (Budworms) | (Outdoor only) Small green or brown caterpillars. | You'll see small black dots (poop) on your buds. They burrow inside the bud, eat it from the inside, and cause it to rot and die. | Inspect buds daily and pick them off by hand. | Spray preventatively with BT (Bacillus thuringiensis), an organic, caterpillar-safe bacteria. |
Chapter 3: Common Nutrient & Water Issues
| Symptom | What It Looks Like | What It Probably Means |
|---|---|---|
| Overwatering | Leaves are dark green, droopy, and feel "heavy" or "fat" with water. The whole plant looks sad and limp. Pot is always heavy. | You are watering too often! The roots are drowning and can't get oxygen. Let the pot dry out! Wait until it's light to lift. BE CAREFUL OVER WATERING AND UNDER WATERING SYMPTOMS CAN LOOK SIMILAR |
| Underwatering | Leaves are droopy, thin, and feel "papery" and dry. The whole plant looks lifeless. Pot is light as a feather. | You waited too long! Give it a good, deep watering, and it will (usually) perk back up in a few hours. BE CAREFUL OVER WATERING AND UNDER WATERING SYMPTOMS CAN LOOK SIMILAR! |
| Nutrient Burn | The very *tips* of the leaves turn yellow, then brown and crispy. It often starts on the newest, upper leaves. | You're feeding it too much! Your "food" is too strong. Fix: Flush the soil with plain, pH'd water, then give it a weaker nutrient dose next time. |
| Nitrogen Deficiency | The oldest, lowest leaves on the plant start to turn pale green, then yellow, then fall off. The problem moves up the plant. | Your plant is hungry for "Veg" food (N). This is common in early flower. Give it a dose of veg nutrients to green it back up. (If pH is OK!) |
| Cal-Mag Deficiency | Rusty brown spots or irregular yellow blotches appearing on new and middle leaves. Common when using filtered/RO water or in coco. | Your plant is hungry for Calcium and Magnesium. This is a very common micro-nutrient issue. Add a "Cal-Mag" supplement to your water. (If pH is OK!) |
🔎The Finish Line: Harvest, Dry & Cure
Congratulations! You've made it through 4+ months of anxiety, watering, and checking for bugs. Now comes the hardest part: Patience.
You have spent months growing "mass," but the next 30 days determine your "quality." A rushed dry/cure turns top-shelf genetics into hay-smelling, harsh smoke. A perfect dry/cure turns average weed into "Fire." Do not fumble on the 1-yard line.
The "Low and Slow" Philosophy: Your goal is to dry the plant as *slowly as possible* without it getting moldy (usually 10-14 days). This preserves the **terpenes** (flavor) and allows the breakdown of **chlorophyll** (the green "grassy" taste). If you dry it in 3 days, it's ruined forever.
Chapter 1: "The Chop" - Knowing When It's Ready
Harvesting is a "window," not a specific day. Do not trust the "flowering time" on the seed packet—that is just marketing. You must look at the plant.
The Pistils (Hairs) Lie
Don't harvest just because the white hairs turn orange/brown. That can happen from heat, rain, or touch. While mostly orange hairs *suggest* maturity, they are not the true indicator.
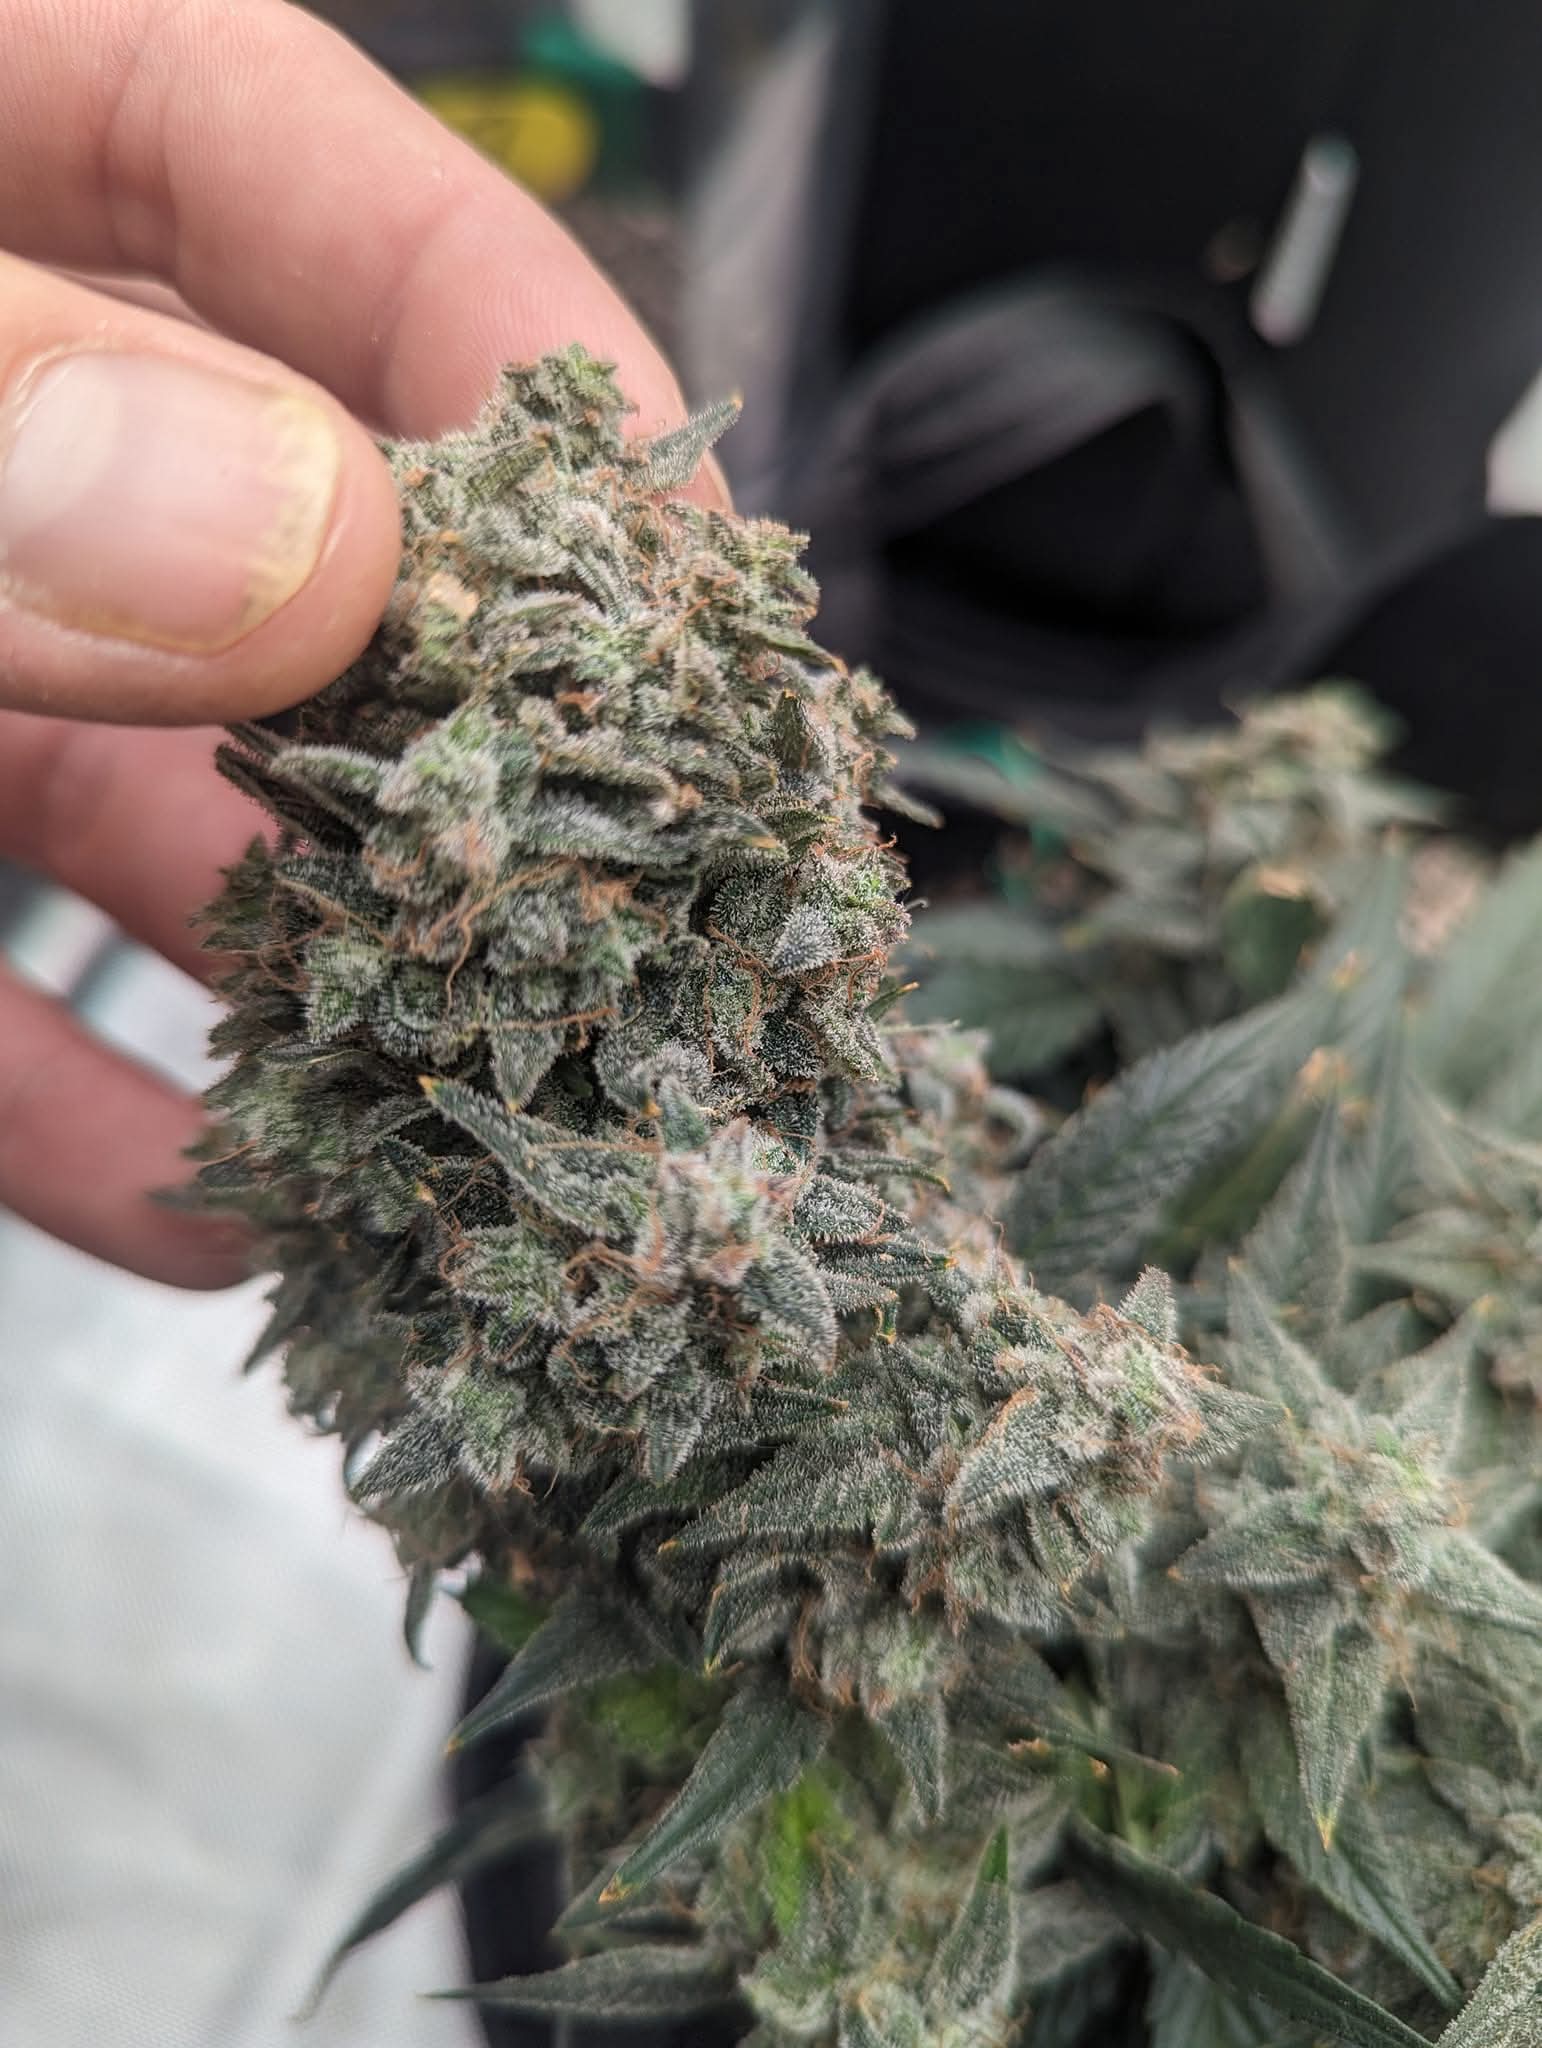
Trichomes: The Only Truth
You need a 30x-60x Jeweler's Loupe or a USB microscope. Look at the crystals (trichomes) on the buds (not the sugar leaves, which mature faster).
- Clear Trichomes: [Glassy, like ice] NOT READY. The plant is still building potency. Harvesting now gives you a weak, racy, anxiety-inducing high and low yields.
- Cloudy / Milky Trichomes: [Like plastic or milk] PEAK THC. This is the target window. The high is cerebral, energetic, and at maximum psychoactive strength. Aim for 90-100% cloudy.
- Amber Trichomes: [Golden/Brown] SEDATIVE. THC is degrading
into CBN. This provides the "couch-lock," narcotic, body-stone effect.
- Amigos Preference: We like to chop when we see 10-20% Amber. This gives a full-bodied high that hits hard but doesn't put you in a coma immediately.
Chapter 2: Pre-Harvest Prep (Bro-Science vs. Reality)
There are many myths about the final week. Here is our take:
- The Flush: Do you need to feed straight water for 2 weeks? Science says No. Blind taste tests show people can't tell the difference. However, we *do* recommend cutting your nutrients to 25% strength for the last week. Why waste expensive Heavy 16 on a plant that's about to die? Save your money.
- 48 Hours of Darkness: Some growers turn the lights off for 2 full days before chopping, claiming it boosts trichomes. Verdict: It's harmless. It might help a tiny bit, but mostly it just saves you two days of electricity. Feel free to try it.
- The Drought: Stop watering 1-2 days before the chop. A "thirsty" plant has less water inside, which helps jump-start the drying process.
Chapter 3: The "Slow Dry" Setup
This is the most critical step in the entire 4-month process. You need to prepare your drying area *before* you cut the plant.
The "60/60" Rule
The Holy Grail of drying is maintaining this environment:
- Temperature: 60°F (15°C). Heat evaporates terpenes. Keep it cool!
- Humidity: 60% RH. This is the sweet spot.
- Above 65%: High risk of mold/rot. Use a dehumidifier.
- Below 50%: Dries too fast ("Hay smell"). Use a humidifier if needed, but keep it clean!
- Darkness: Light destroys THC rapidly once the plant is cut. Your dry room must be pitch black.
- Airflow: You need air circulation (fans moving air around the room) but never direct wind on the buds. Point fans at the wall. If the buds are dancing, they are drying too fast.
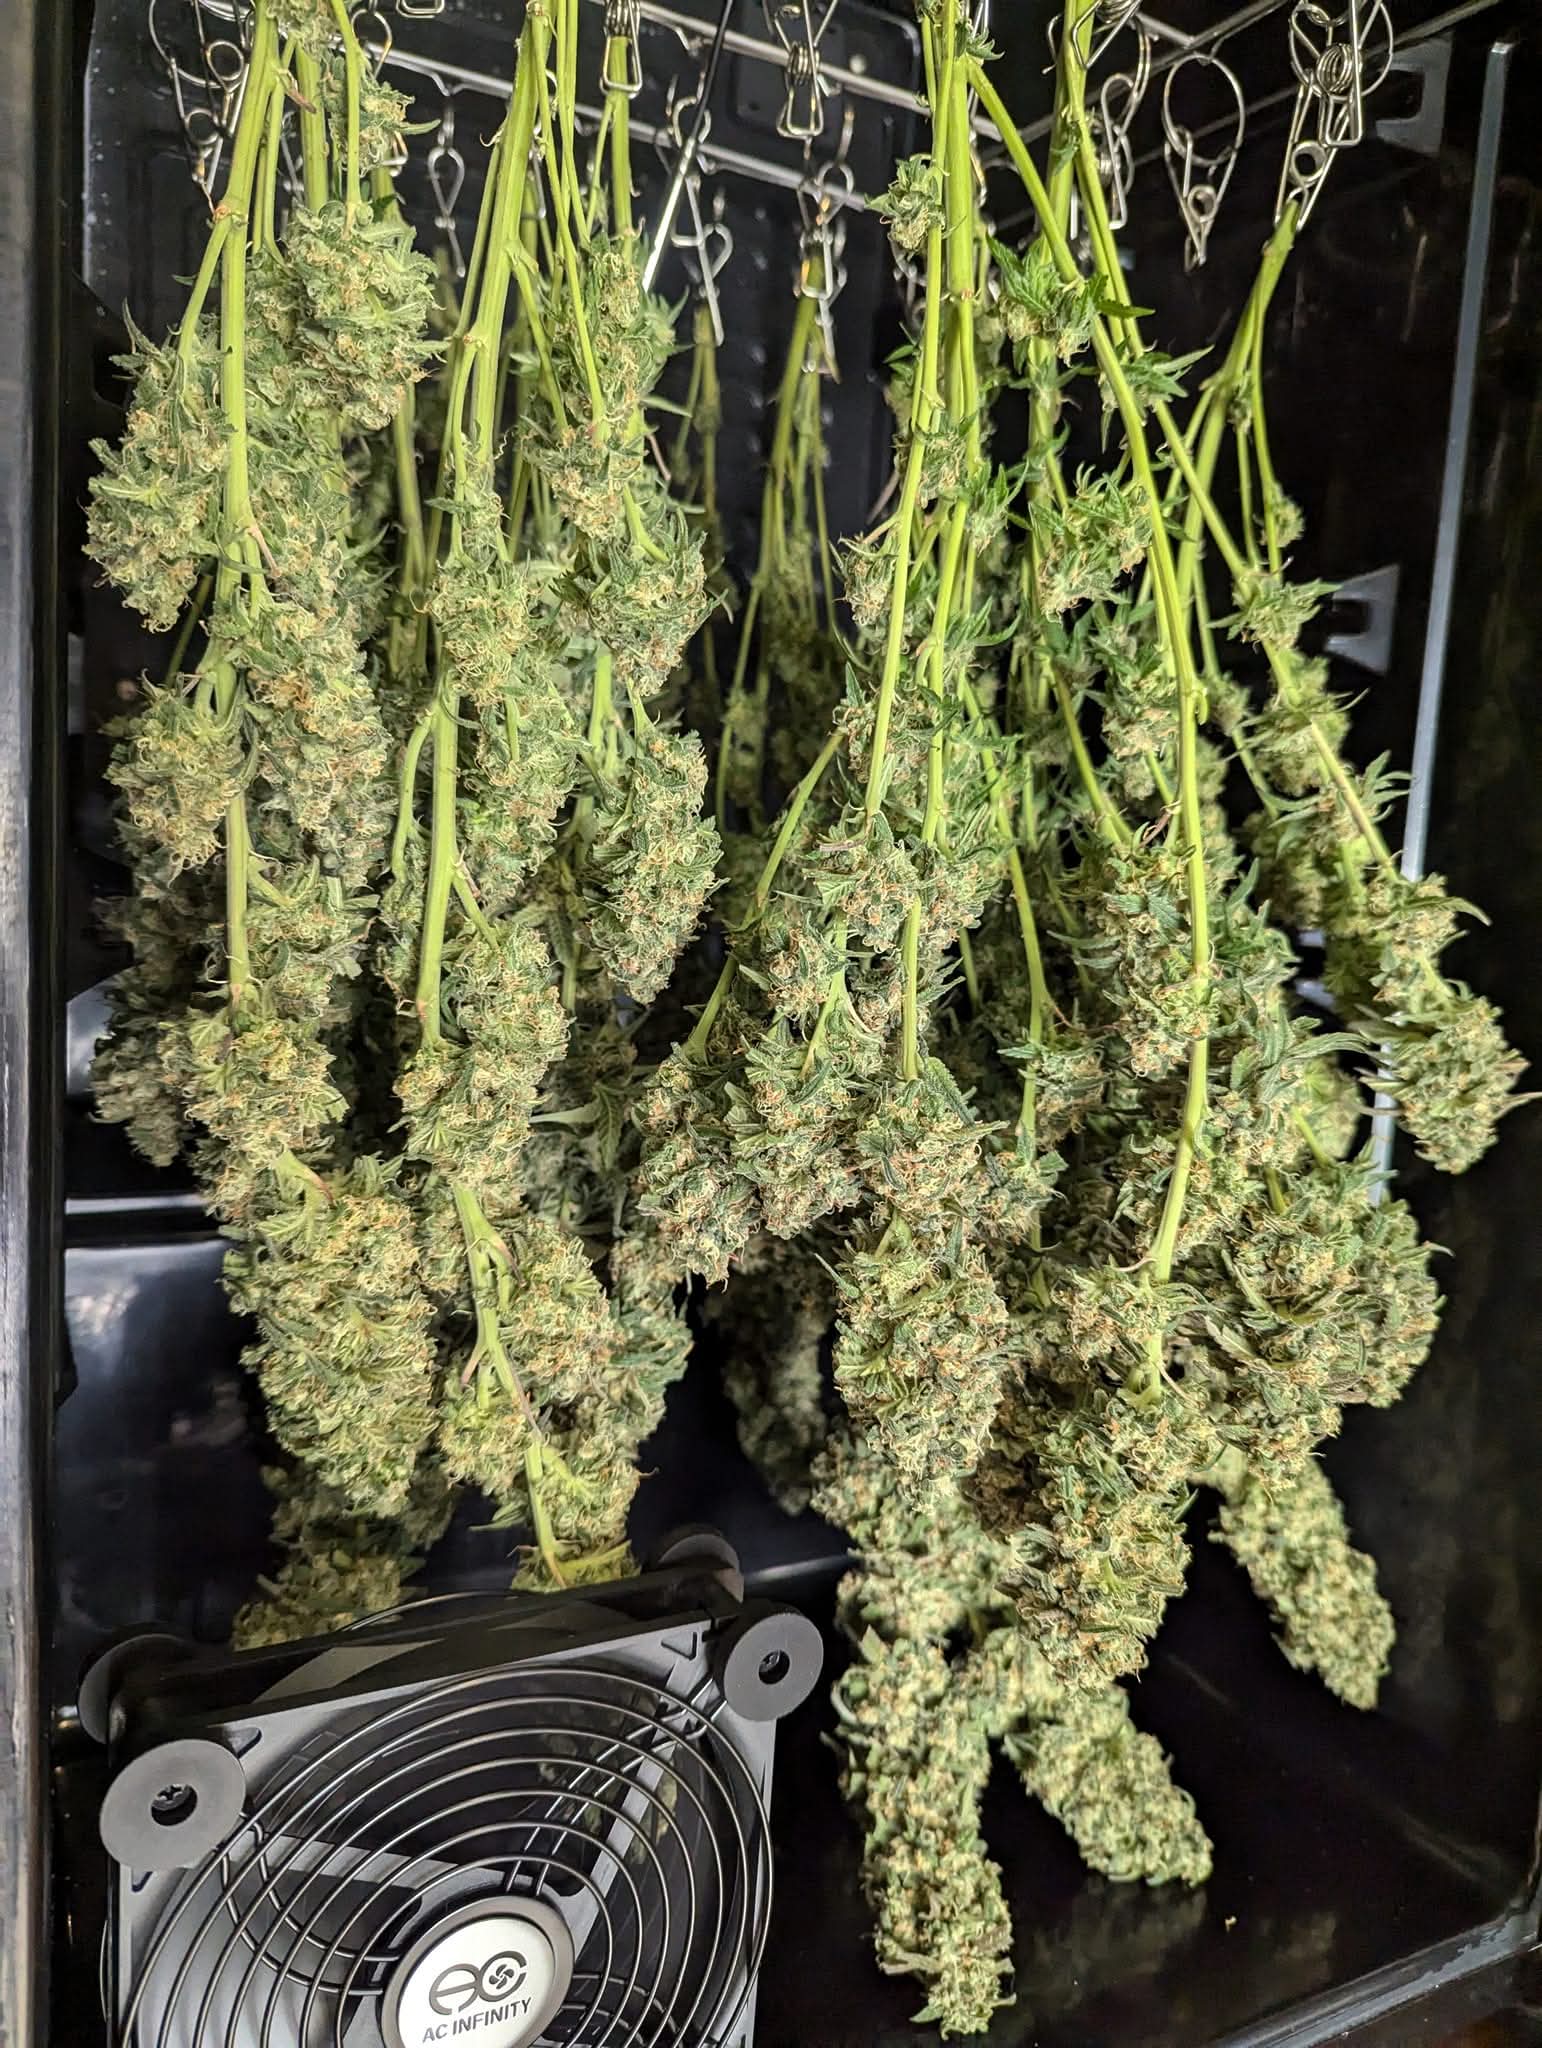
Whole Plant Hang vs. Branching
- Whole Plant Hang (Recommended): Cut the plant at the base and hang it upside down intact. The stems hold moisture and feed it to the buds slowly. This extends the dry time, which improves quality.
- Branching: If you have monster outdoor trees or high humidity issues (65%+), cut the individual branches off to hang. This allows for more airflow and faster drying to prevent mold.
Chapter 4: Surviving "Trim Jail"
✂️Tools You Actually Need
- Chikamasa Scissors: Do not use cheap office scissors. Buy "Chikamasa" or similar spring-loaded micro-snips. Your hands will thank you.
- Trim Bin: A specialized tray with a screen in the bottom. As you trim, crystals fall off. The screen catches the kief (hash) so you can smoke it later. It pays for itself in one harvest.
- Isopropyl Alcohol (91%+): Your scissors will get covered in "finger hash" glue every 20 minutes. Keep a cup of alcohol nearby to dip and wipe them.
- Entertainment: Put on a long movie or podcast. You're going to be here a while.
Wet Trim vs. Dry Trim (The Verdict)
We 100% recommend Dry Trimming (trimming after the drying process). Wet trimming (trimming right when you chop) makes the plant dry too fast and smell like lawn clippings. Only wet trim if you have massive humidity issues and are terrified of mold.
Chapter 5: The Cure (Turning Hay into Gold)
Curing redistributes moisture from the center of the bud to the outside, and allows bacteria to eat the remaining chlorophyll. This makes the smoke smooth and flavorful.
Method A: Glass Mason Jars (The Classic)
- Fill jars 75% full. Don't stuff them!
- Put a mini-hygrometer in every jar. This is mandatory. You need to know the humidity inside.
- The Burp Schedule:
- Week 1: Open jars 2x a day for 15 mins. (Smell that? That's chlorophyll gas escaping).
- Week 2: Open jars 1x a day.
- Week 3+: Open every few days.
- The Danger Zone: If the jar reads 70%+ humidity, take the buds out immediately! They are too wet and will mold. Lay them on cardboard for an hour to dry, then re-jar.
- The Target: You want the jar to sit stable at 58% - 62%.
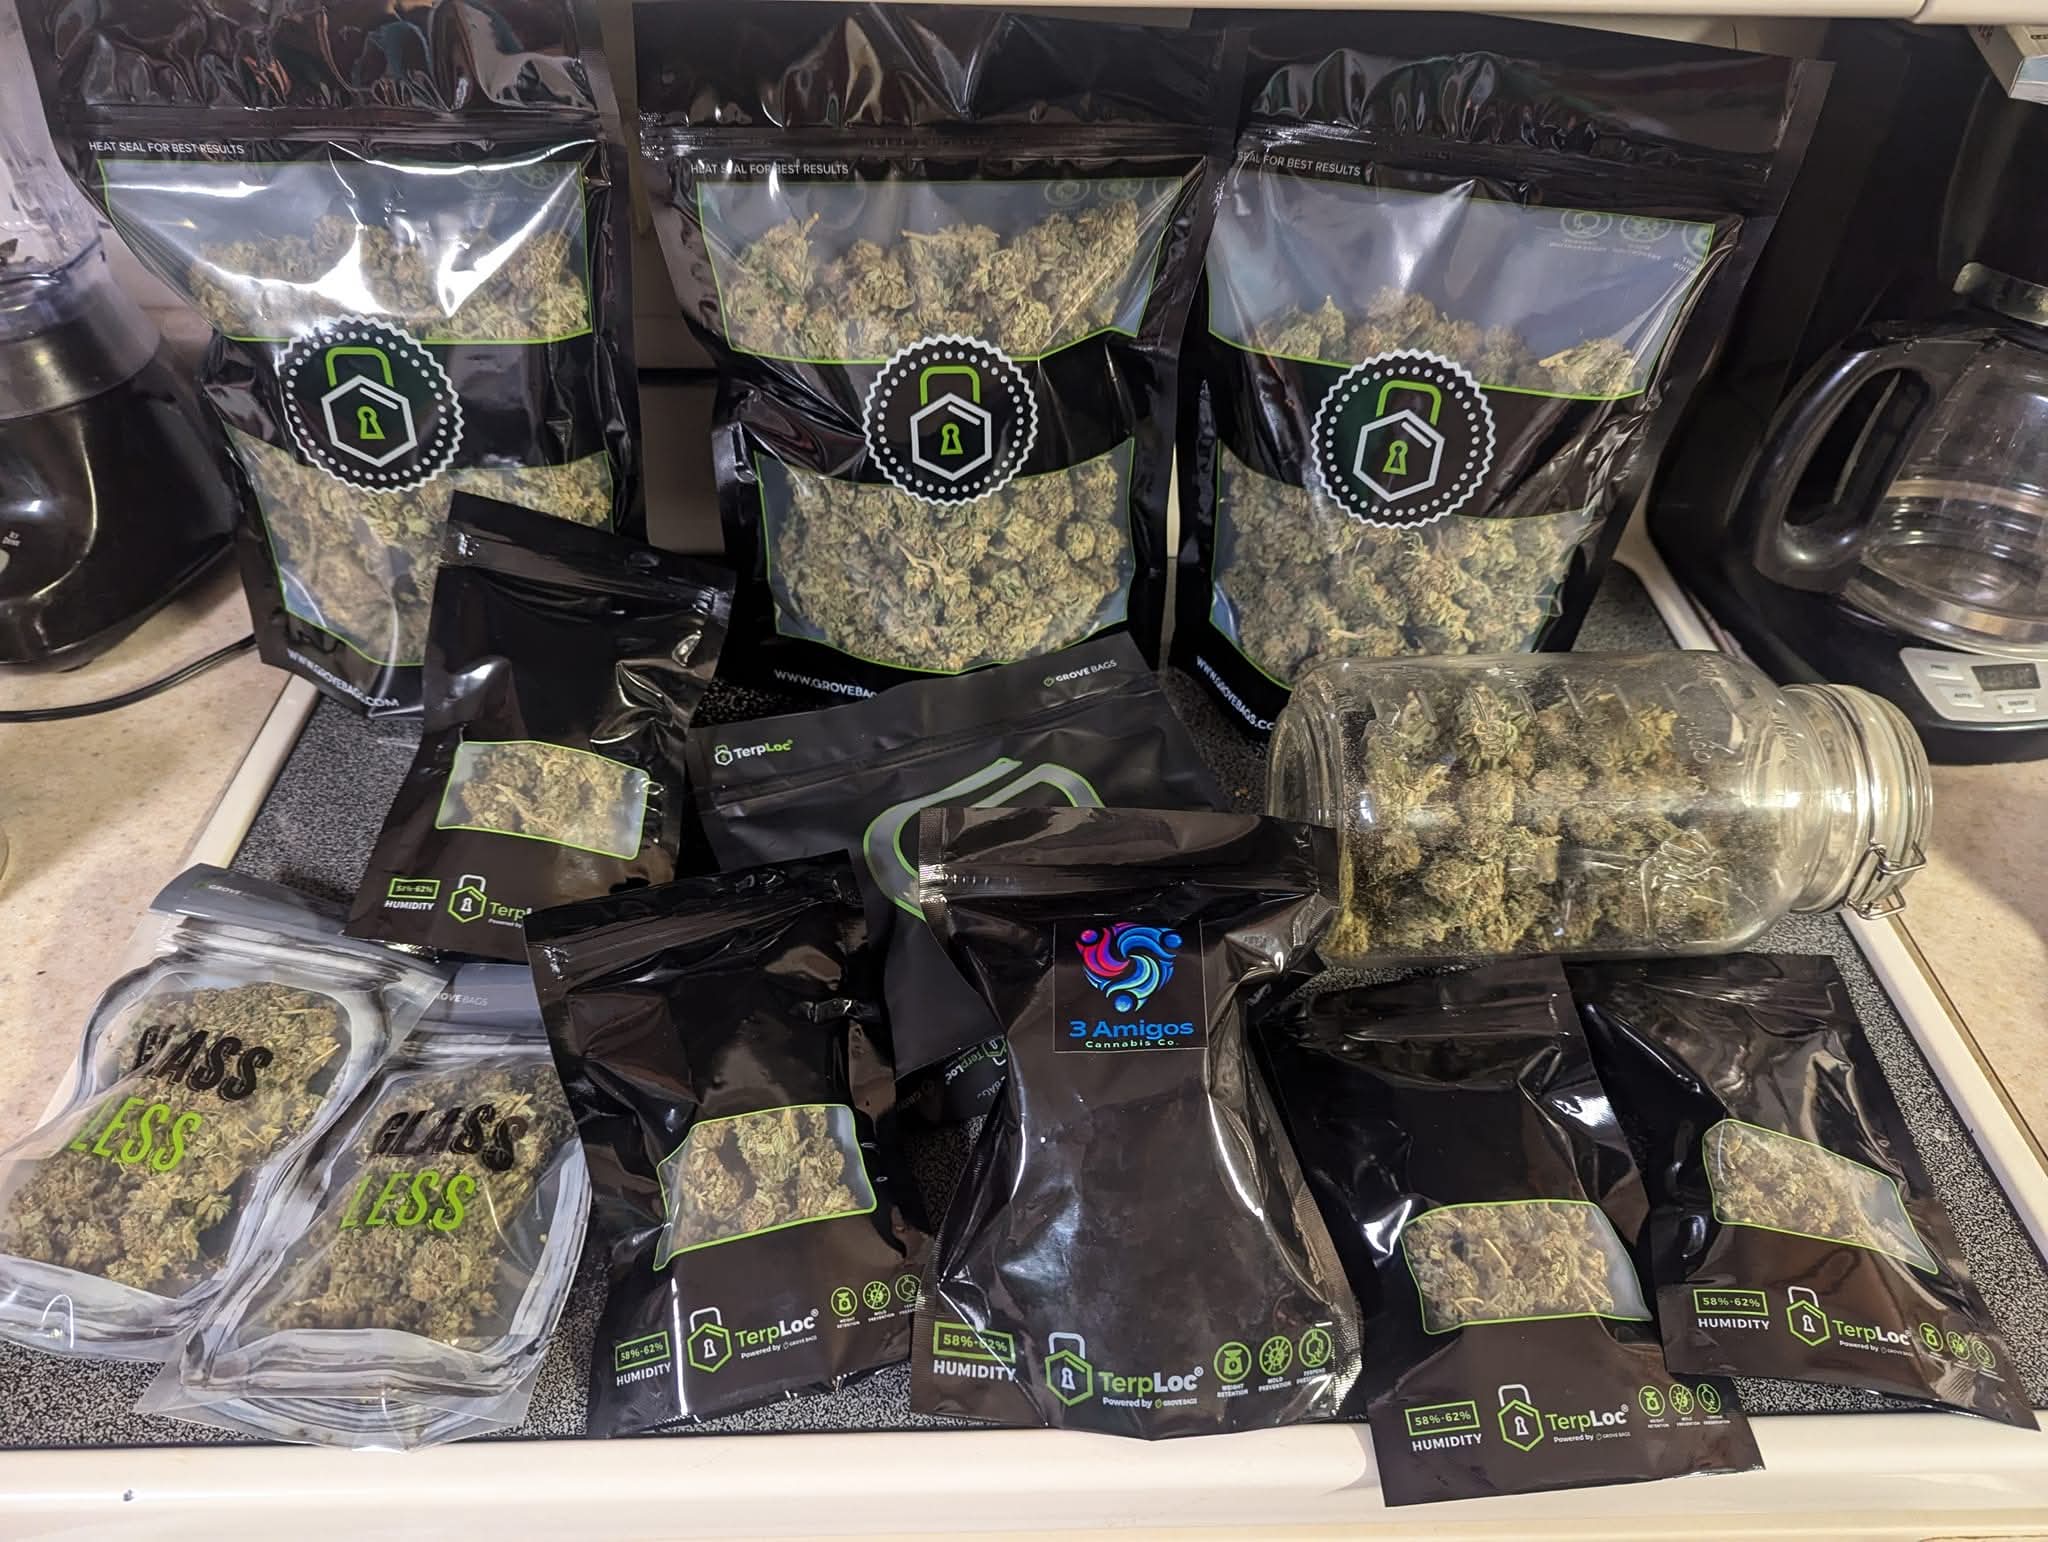
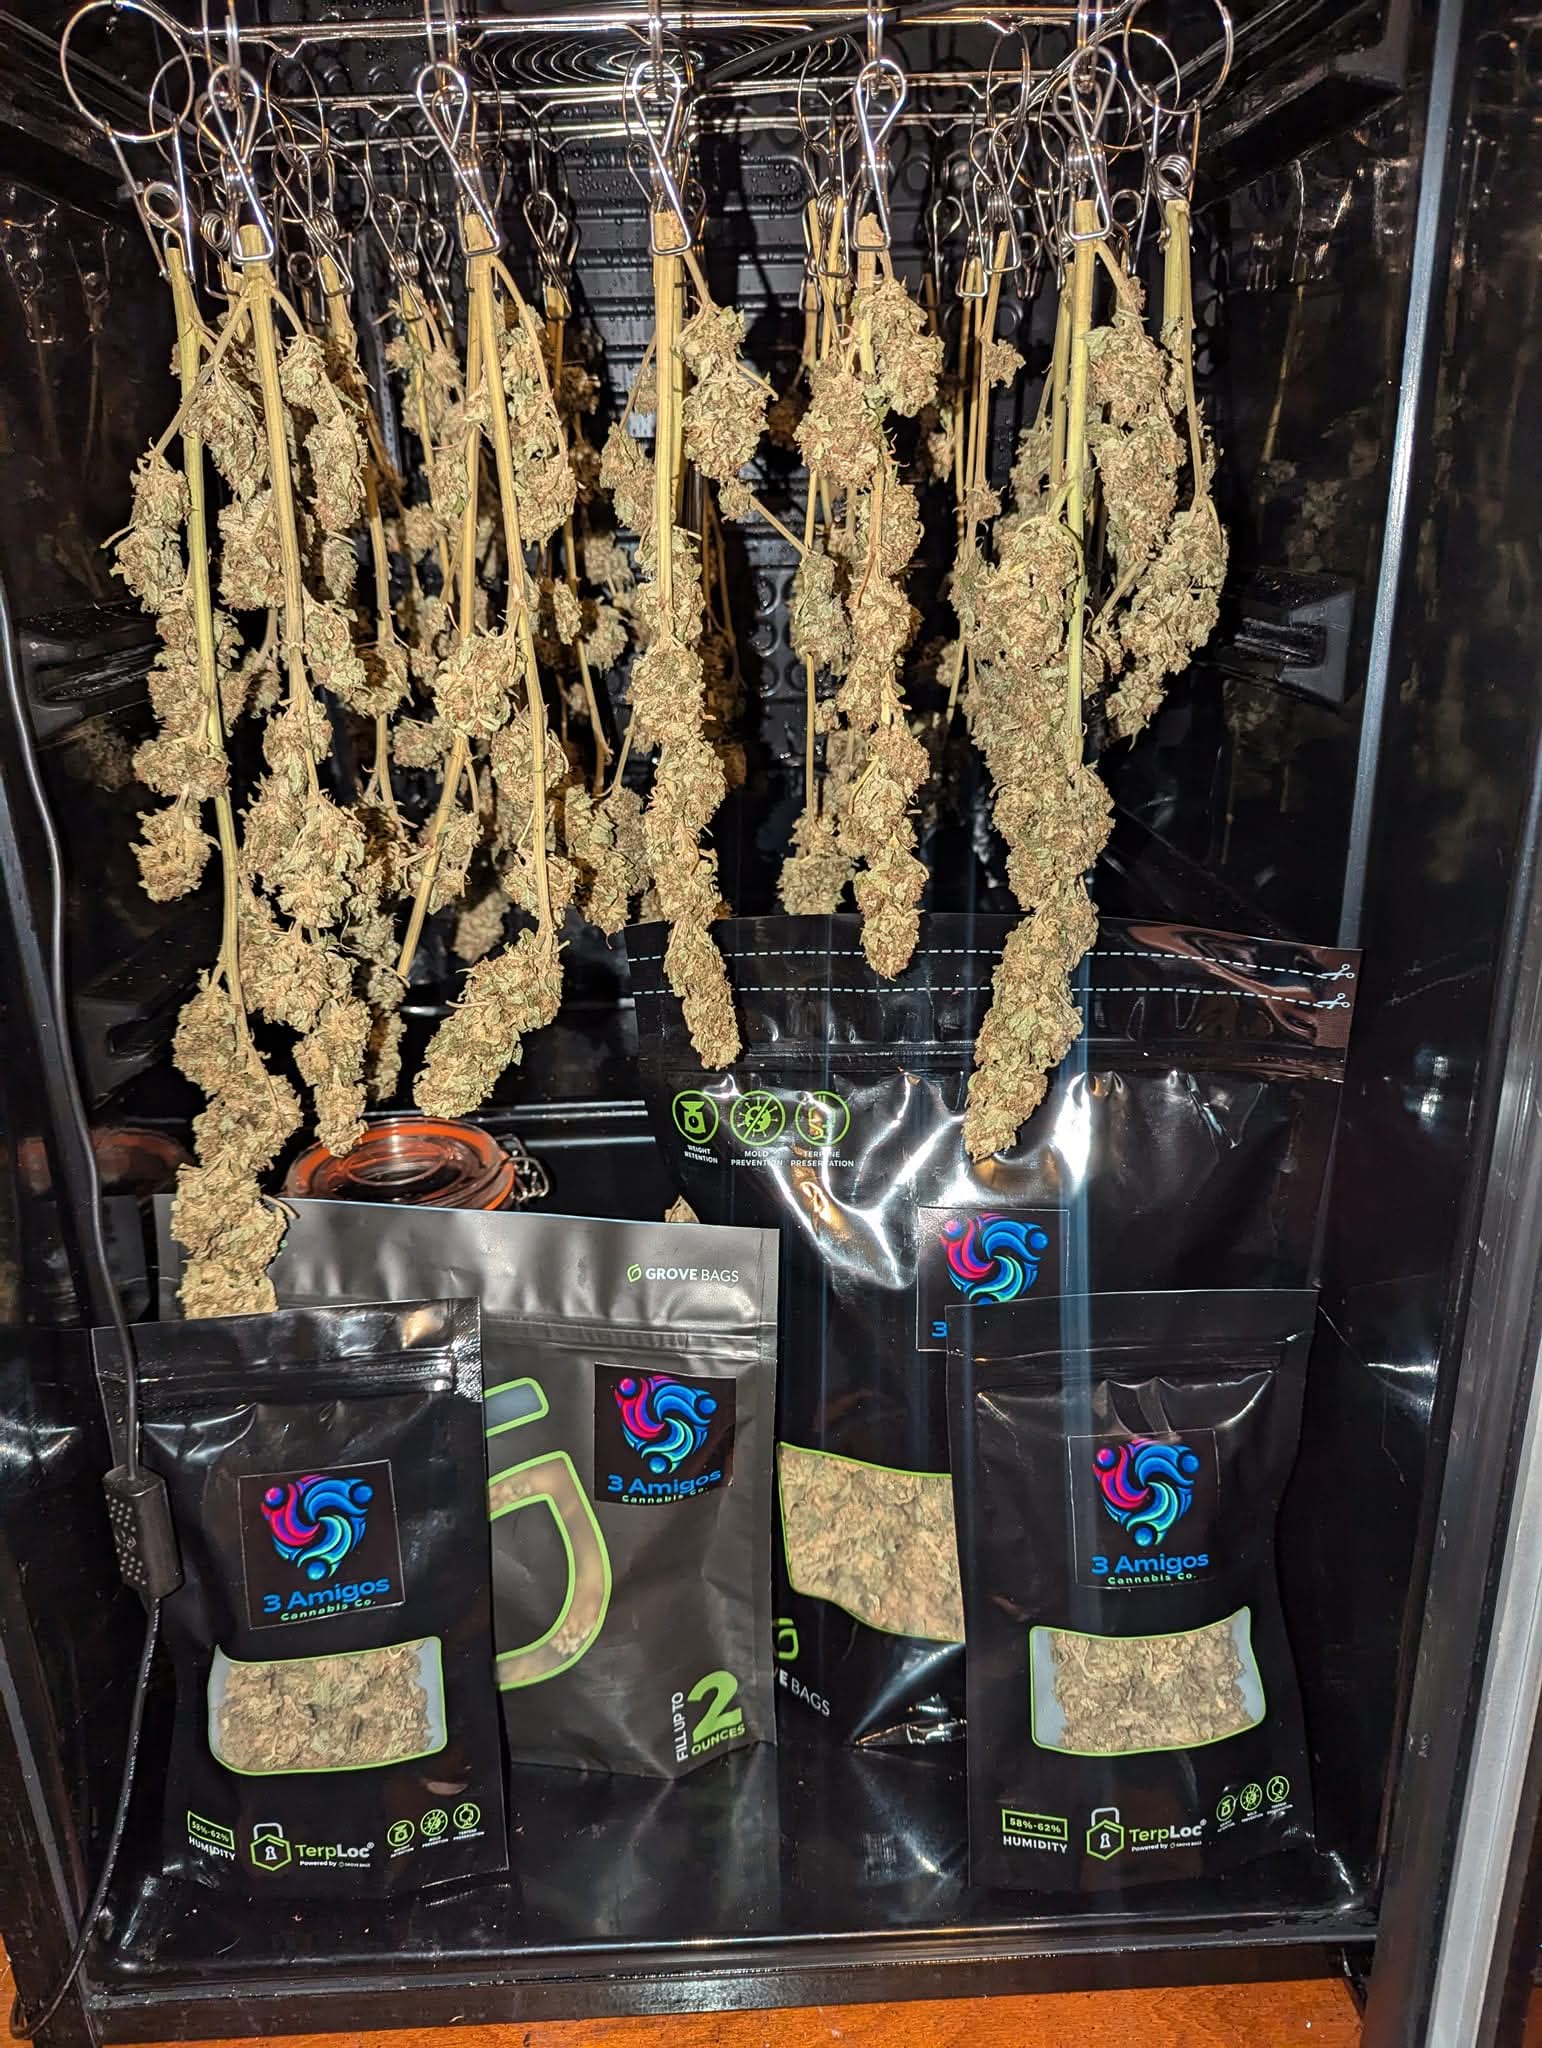
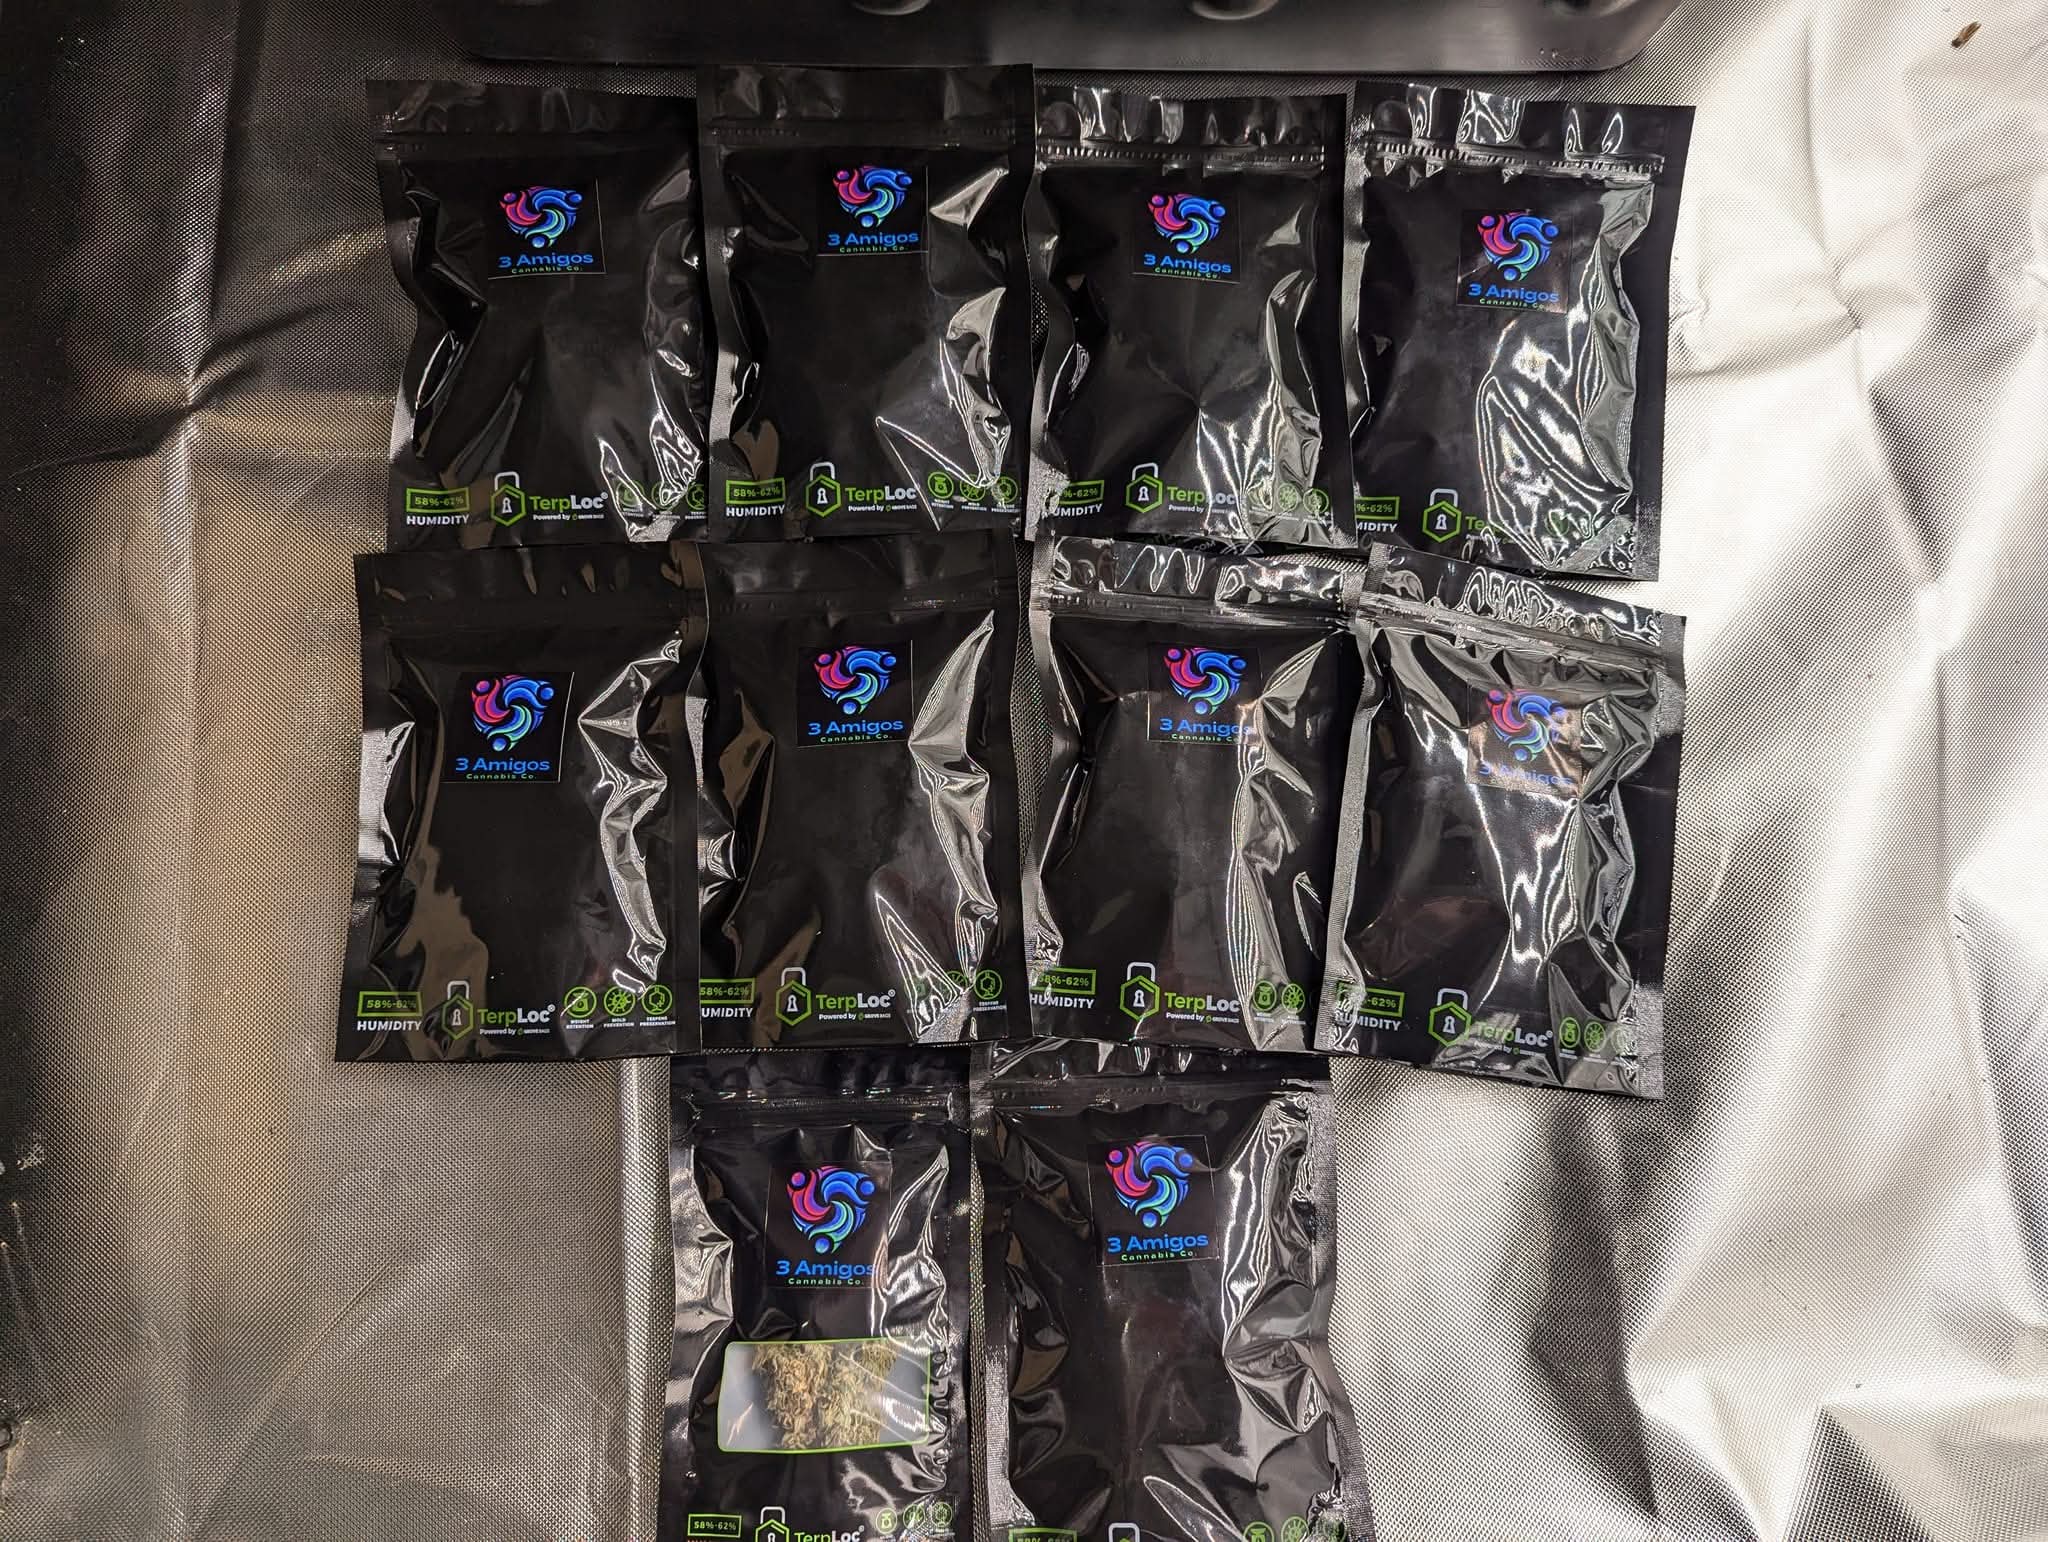
Method B: Grove Bags (The Cheat Code)
We love these for new growers. Grove Bags have special "TerpLoc" technology.
- How to use: Dry your weed properly. Put it in the bag. Heat seal the bag (with a hair straightener or iron). Done.
- No burping. No hygrometers. The bag naturally maintains 58-62% humidity and lets gas out while keeping oxygen out. It's magic.
Chapter 6: Long-Term Storage
So you grew a pound and you can't smoke it all at once. How do you keep it fresh?
- Light is the Enemy: UV light degrades THC into CBN (the sleepy stuff). Always store jars in a dark cabinet or drawer.
- Heat is the Enemy: Keep it cool (60-68°F).
- Humidity Packs (Boveda / Integra): Once your cure is finished (after 4 weeks), toss a 62% Boveda pack into the jar. This will keep the buds "spongy" and fresh for 6-12 months. (Note: Don't use these during the initial dry/cure if you can avoid it, some claim they steal a tiny bit of terpene smell, but they are great for long-term storage).
- Freezing? Only freeze your weed if you plan to make Bubble Hash (Live Rosin) later. Do not freeze buds you want to smoke as flower; the trichomes become brittle and break off.
The Final Product
Its a sad but neccesary step in the process.
🛠️ Interactive Grow Tools
Don't guess, know. These simple tools help you measure the most important parts of your grow. We've included calculators here to take the guesswork out of the three most confusing measurements. **Note:** All values are saved to your profile!
Your Must-Have Measurement Tools:
1. A pH Pen:** To measure the pH of your water (see Problem Hub).
2. A TDS/EC Pen:** To measure how "strong" your nutrient water is.
3. A Thermo-Hygrometer:** A simple $10 device that shows the Temperature
(Temp) and Relative Humidity (RH) in your tent.
VPD Calculator (Vapor Pressure Deficit)
This sounds super-scientific, but it's simple. It's just a measurement of how "thirsty" the air is. It combines temperature and humidity into one number that tells you if your plant can "sweat" (transpire) easily.
If the VPD is too low (air is too wet), your plant can't sweat and might get mold. If the VPD is too high (air is too dry), your plant sweats too fast and gets stressed. You're just looking for the "green zone."
Good Ranges: Seedlings (0.4-0.8), Veg (0.8-1.2), Flower (1.2-1.6).
DLI Calculator (Daily Light Integral)
This measures the total amount of light your plant gets all day. PPFD (which you see on light reviews) is how *intense* the light is at one moment. DLI is that intensity added up over all the hours the light is on.
Think of it like water: PPFD is how fast the water is flowing. DLI is the total gallons in the bucket at the end of the day. This is the number that really determines your yield.
Good Ranges: Seedlings (12-18), Veg (20-40), Flower (40-60).
Nutrient Strength Converter (EC to PPM)
This tool helps you measure how "strong" your nutrient water is. Your TDS/EC pen gives you a number, but different companies use different scales. It's confusing!
An EC of 1.5 is the same as 750 PPM (on the 500 scale) and 1050 PPM (on the 700 scale). This calculator just does that simple math for you, so you can follow feeding charts correctly.
Tip: Most American nutrient bottles use the 500 scale.
Lab & Tools Showcase
A fun take on advanced tools and lab equipment that power modern cultivation, from genetic testing to terpene analysis.
💲 Grow Cost & Savings Calculator
Is growing your own cannabis really cheaper? Let's run the numbers. This calculator helps you figure out your total investment, your "cost per gram" to produce, and your total savings compared to buying from a dispensary. **Note:** All values are saved to your profile!
Note on "Profit": Since selling home-grown cannabis is strictly illegal in Ohio, there is no "profit." The real value is in knowing exactly what's in your product and calculating the money you *save*. This calculator helps you find your "cost-to-produce" and your "total savings."
Step 1: One-Time Setup Costs
Enter what you paid for your reusable gear.
Step 2: Recurring Costs (Per Grow)
Enter your costs for one full grow cycle.
Step 3: Electricity Cost (Per Grow)
Assumes 18/6 in Veg (~4 weeks) and 12/12 in Flower (~12 weeks).
Step 4: Your Harvest & Savings
Your Estimated Cost Breakdown
Your Estimated Savings
❓ Frequently Asked Questions (FAQ)
Here are some of the most common questions we hear from new and intermediate growers, categorized by topic. Don't be afraid to ask—we all started here!
Watering & Soil Fundamentals
"How often should I water my plant?"
This is the #1 question, and the answer is: "When the pot needs it, not on a calendar schedule."
The biggest mistake new growers make is watering a little bit every day. This keeps the soil soggy, drowns the roots, and invites pests like fungus gnats. Cannabis plants love a "wet-dry" cycle.
- Water Thoroughly: Water your plant until the soil is fully saturated and you see about 10%-20% of the water run out the bottom of the pot. This is called "runoff."
- Wait: Now, do not water it again until the pot is significantly lighter.
- The "Lift Test": This is the best way. After you water, pick up the pot. Feel how heavy it is. Now, wait 2, 3, or even 5 days. Keep picking it up. When it feels much lighter (like the water is almost all gone), it's time to water again.
In a big 5-gallon pot, a mature plant might only need water every 3-5 days. A seedling in a Solo cup might need a little every 2 days. Let the pot's weight be your guide, not the calendar.
"What does 'pH' mean, and why is it so critical?"
pH is a measure of how acidic or alkaline your water/nutrient mix is. It is the single most important factor, next to light, for plant health.
Think of pH as the key to the plant's mouth. If the key is wrong, the "mouth" (the roots) is locked, and the plant cannot eat the nutrients, even if the food is all around it. This is called nutrient lockout.
- Target for Soil: 6.0 to 6.8 pH
- Target for Hydro/Coco: 5.5 to 6.5 pH
You must check the pH of your water after you add any nutrients, as the nutrients can change the pH dramatically. A quality digital pH pen is non-negotiable for a successful grow.
Light & Environment
"Can I just grow a plant in my closet or on my windowsill?"
Windowsill: Almost certainly no unless you get lucky. A window in Ohio simply does not provide enough direct, intense sunlight for a cannabis plant to produce anything more than a few tiny, wispy buds. It will stretch, look sad, and be a waste of your time.
Closet: Yes, You can but you are basically just building a "grow tent" inside your closet. You will still need:
- A Grow Light: This is not optional. A simple light bulb won't work.
- A Fan (Ventilation): A closet is a small, sealed box. It will get hot and humid fast. You will need an exhaust fan (like the ones for a tent) to pull the hot air out, and another fan to move air around inside.
- Light Proofing: You have to make the closet perfectly dark for the 12/12 flower cycle. This means sealing all the cracks around the door.
Honestly, it's much easier and safer to just buy a 2x4 tent and put it in the closet. It's designed for exactly this!
"My seedling stretched and fell over! Is it dead?"
It's not dead! This is a classic beginner problem. It means your grow light is too far away or too dim. The seedling is "stretching" itself thin, trying to get closer to the light it needs to survive.
- The Fix: Gently prop the seedling up with a toothpick or a bent paperclip. Then, lower your grow light several inches. If your light has a dimmer, you can also turn the intensity up.
- The Pro-Tip: When you eventually transplant it from its starter cup to its final pot, you can bury most of that "stretched" stem. It will turn into roots and make the plant stronger!
Nutrients & Harvest
"What's the difference between 'Veg' and 'Bloom' nutrients?"
Think of it like food for a person. "Veg" is food for a "growing teenager," and "Bloom" is food for an "adult athlete."
- Veg Nutrients (High Nitrogen): Nitrogen (the "N" in N-P-K) is the main ingredient for building leaves, stems, and branches. During the vegetative stage (18/6 light), your plant is a teenager focused on getting big, so you feed it high-Nitrogen "veg" food.
- Bloom Nutrients (High P & K): Phosphorus (P) and Potassium (K) are the main ingredients for building flowers (buds). When you "flip" your lights to 12/12, your plant's job changes. It's now an athlete focused on producing heavy buds. You switch to "bloom" food, which has less N and more P and K.
You should almost always start with 1/4 or 1/2 strength of what the bottle recommends to avoid nutrient burn.
"What are those 'trichomes' and why do I need a loupe?"
The "trichomes" are the tiny, sticky, crystal "frost" that covers your buds. They look like microscopic mushrooms. This is where the plant makes almost all of its THC, CBD, and terpenes!
Harvesting is all about timing, and you can't guess the timing by looking at the "hairs" (pistils). The only way to know for sure is to look at the color of these trichomes with a 60x jeweler's loupe (a $10 magnifying glass).
- Clear Trichomes: Mean "Not Ready." The plant is still producing THC.
- Cloudy / Milky Trichomes: Mean "Peak Potency." This is when THC is at its highest. This is when most people harvest for a strong, energetic high.
- Amber / Brown Trichomes: Mean "Past Peak." The THC is now degrading into a different chemical (CBN), which is known for making you feel sleepy and sedated.
You want to harvest when all the trichomes are cloudy, and you see just the first few (maybe 5%-10%) turning amber.
"Do I need to 'flush' my plants before harvest?"
The old-school practice of "flushing" (giving plants plain water for the last 1-2 weeks) to remove nutrients is highly debated. Modern scientific consensus suggests flushing does not significantly improve taste or quality and can actually hurt your final yield by starving the plant right at the end.
- Our Recommendation: Instead of a harsh "flush," simply cut your nutrient dose to a very light feeding (1/4 strength) for the last 5-7 days and focus on getting a perfect slow dry and cure. A perfect cure is what makes the biggest difference in flavor!
🖼️ Amigos' Grow Gallery
Welcome to the Amigos' Grow Gallery! This is the heart of our community, a place to share your journey and see what fellow Ohioans are growing. We invite you to upload photos of your plants to track their progress, show off that beautiful harvest, or even ask for help diagnosing a problem. All your images are uploaded and saved to our secure server, allowing you to be part of the community showcase. Don't be shy, let's see those plants!
Your Uploads
Your image uploads to our secure serverFrom The Amigos
A collection of photos from our team to yours.


AutoPot-USA
A fun take on the AutoPot system.
📓 Amigos' Notebook (Community Forum)
Welcome to the community hub! This is a place to share your grow status, ask questions, and see what other growers are up to. Your User ID is your anonymous name. (This feed is live and updates in real-time!)
Create a New Entry
Community Feed
Loading posts from the community...